
'%3e%3cpath%20d='M8%200C12.4183%200%2016%203.58172%2016%208C16%2012.4183%2012.4183%2016%208%2016C3.58172%2016%200%2012.4183%200%208C0%203.58172%203.58172%200%208%200ZM11.6162%204.38379C11.2257%203.99337%2010.5927%203.99338%2010.2021%204.38379L8%206.58594L5.79785%204.38379C5.40732%203.99334%204.77429%203.99329%204.38379%204.38379C3.99331%204.77429%203.99335%205.40733%204.38379%205.79785L6.58594%208L4.38379%2010.2021C3.99348%2010.5927%203.99341%2011.2257%204.38379%2011.6162C4.77426%2012.0066%205.40734%2012.0065%205.79785%2011.6162L8%209.41406L10.2021%2011.6162C10.5927%2012.0066%2011.2257%2012.0067%2011.6162%2011.6162C12.0067%2011.2257%2012.0066%2010.5927%2011.6162%2010.2021L9.41406%208L11.6162%205.79785C12.0066%205.40735%2012.0066%204.77429%2011.6162%204.38379Z'%20fill='%23080E17'%20fill-opacity='0.46'/%3e%3c/g%3e%3cdefs%3e%3cclipPath%20id='clip0_3761_713'%3e%3crect%20width='16'%20height='16'%20fill='white'/%3e%3c/clipPath%3e%3c/defs%3e%3c/svg%3e)


'%3e%3cpath%20fill-rule='evenodd'%20clip-rule='evenodd'%20d='M21.4999%2010.9993C21.4999%205.20009%2016.7986%200.498901%2010.9993%200.498901C5.19994%200.498901%200.498657%205.20009%200.498657%2010.9993C0.498657%2016.2404%204.33858%2020.5844%209.35855%2021.3722V14.0346H6.69238V10.9993H9.35855V8.68594C9.35855%206.05427%2010.9262%204.60062%2013.3248%204.60062C14.4736%204.60062%2015.6753%204.80571%2015.6753%204.80571V7.38979H14.3512C13.0468%207.38979%2012.64%208.19921%2012.64%209.0296V10.9993H15.5523L15.0867%2014.0346H12.64V21.3722C17.66%2020.5844%2021.4999%2016.2404%2021.4999%2010.9993Z'%20fill='%231568EA'/%3e%3c/g%3e%3c/svg%3e)


Running into a "Windows cannot access the specified device" message can instantly bring your work or gaming plans to a halt. Between permissions problems, antivirus blocks, or hidden system issues, it’s easy to get stuck without knowing what to fix first. Instead of letting it slow you down, this guide will walk you through practical solutions step-by-step. You’ll learn how to clear obstacles, adjust settings, and get everything running smoothly again so next time, you’ll know exactly what to do.
Adjust Permissions to Fix "Windows Cannot Access the Specified Device" Error
Windows manages file and program access through a permissions system, ensuring only authorized users can open certain items. Most of the time, this works seamlessly but sometimes, especially when launching programs like Valorant or trying to open files on a newly set-up Windows system, you might run into the "Windows cannot access the specified device" error. This usually points to missing or restricted permissions. If left unchecked, it can prevent you from opening critical files or running apps, interrupting your workflow. In this section, I’ll show you simple, beginner-friendly steps to adjust permissions and clear the way for smooth access.
Steps to Fix “Windows Cannot Access the Specified Device” Error
Fixing this Windows driver error doesn’t have to be complicated. With a few quick adjustments, you can regain access to your files and programs without any major hassle. Let’s go through the steps:
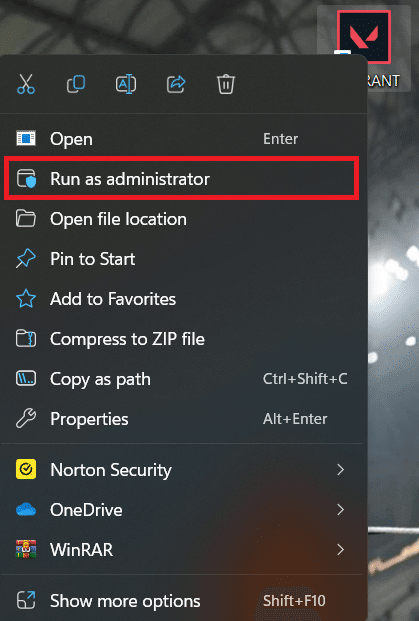
Step 1: Right-click on the program or file that's causing the error for example, Valorant and select Run as administrator. This elevates its access level and might solve the issue right away.
Step 2: Right-click the file again and select Properties. In the Properties window, navigate to the Security tab to view the file’s permissions and user access settings and click Edit.
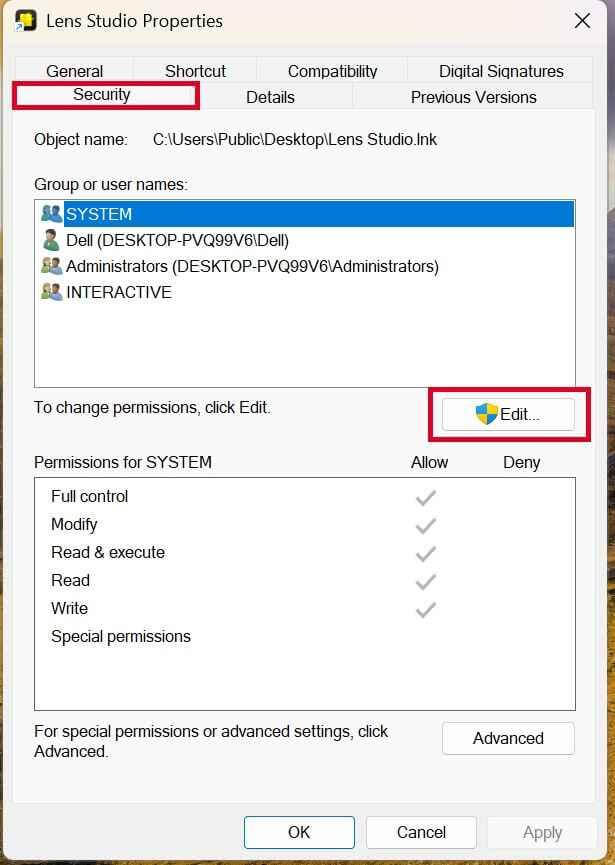
Step 3: Select your user account from the list, and check the box next to Full control. Once you’ve made the changes, click Apply and close the window.

Step 4: Try opening the file again. With full permissions now enabled, the error should no longer appear.
Tip: If you’re still facing issues, open Command Prompt as an administrator and type:
icacls "file_path" /reset
This resets the file’s permissions to default settings. Just replace "file_path" with the actual location of your file.
Manage Antivirus Settings to Fix "Windows Cannot Access the Specified Device" Error
Antivirus software plays a crucial role in protecting your system, but sometimes it can mistakenly block legitimate programs or files. This is a common reason behind the "Windows cannot access the specified device" error, particularly for users trying to launch games like Destiny 2 or Fortnite. When security tools flag safe applications as threats, it can prevent them from opening properly. In this section, I’ll guide you through adjusting your antivirus settings to add exceptions, ensuring that trusted programs run without unnecessary interference.
Steps to Fix Manage Antivirus Settings to Fix "Windows Cannot Access the Specified Device" Error:
If antivirus software is blocking your program or file, adjusting the settings can usually fix the problem. Here’s how you can add exceptions and get things running smoothly again:
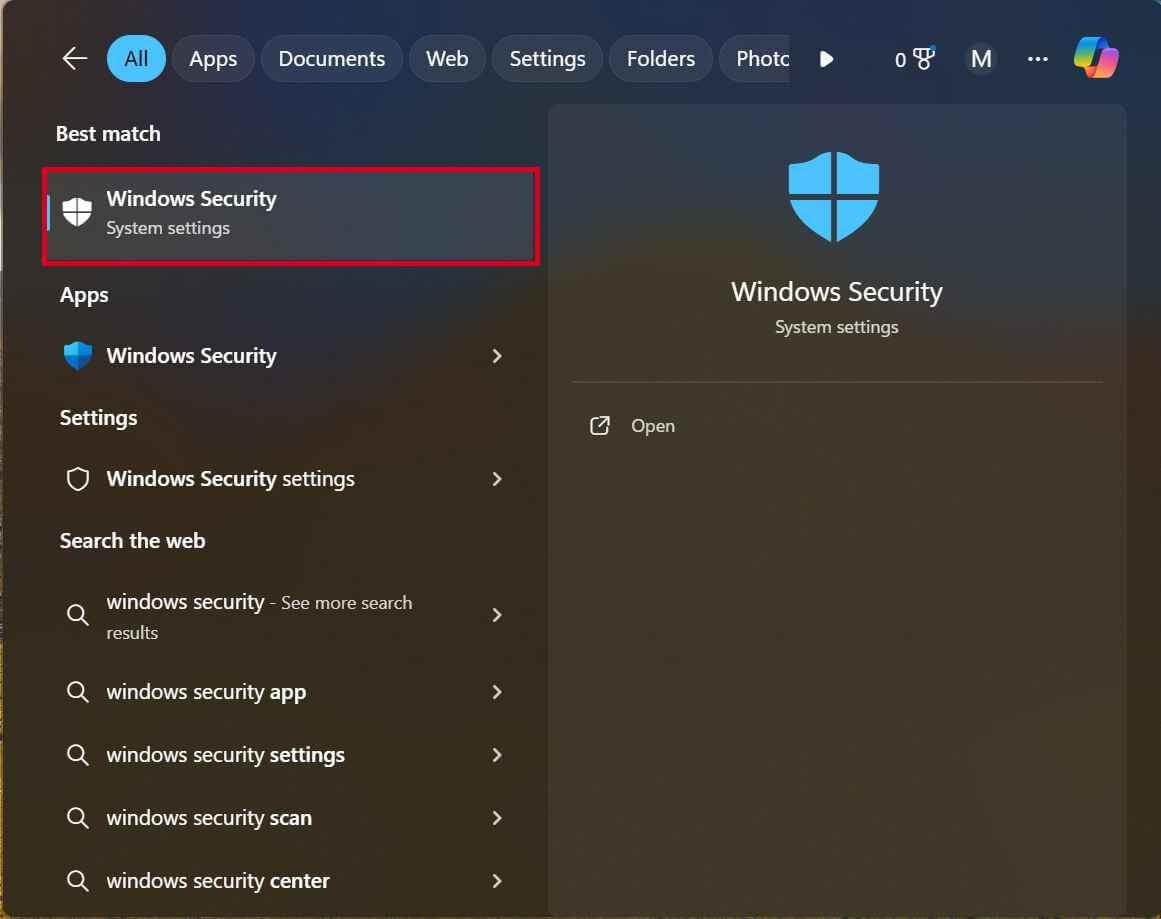
Step 1: Open the Start menu and search for Windows Security.
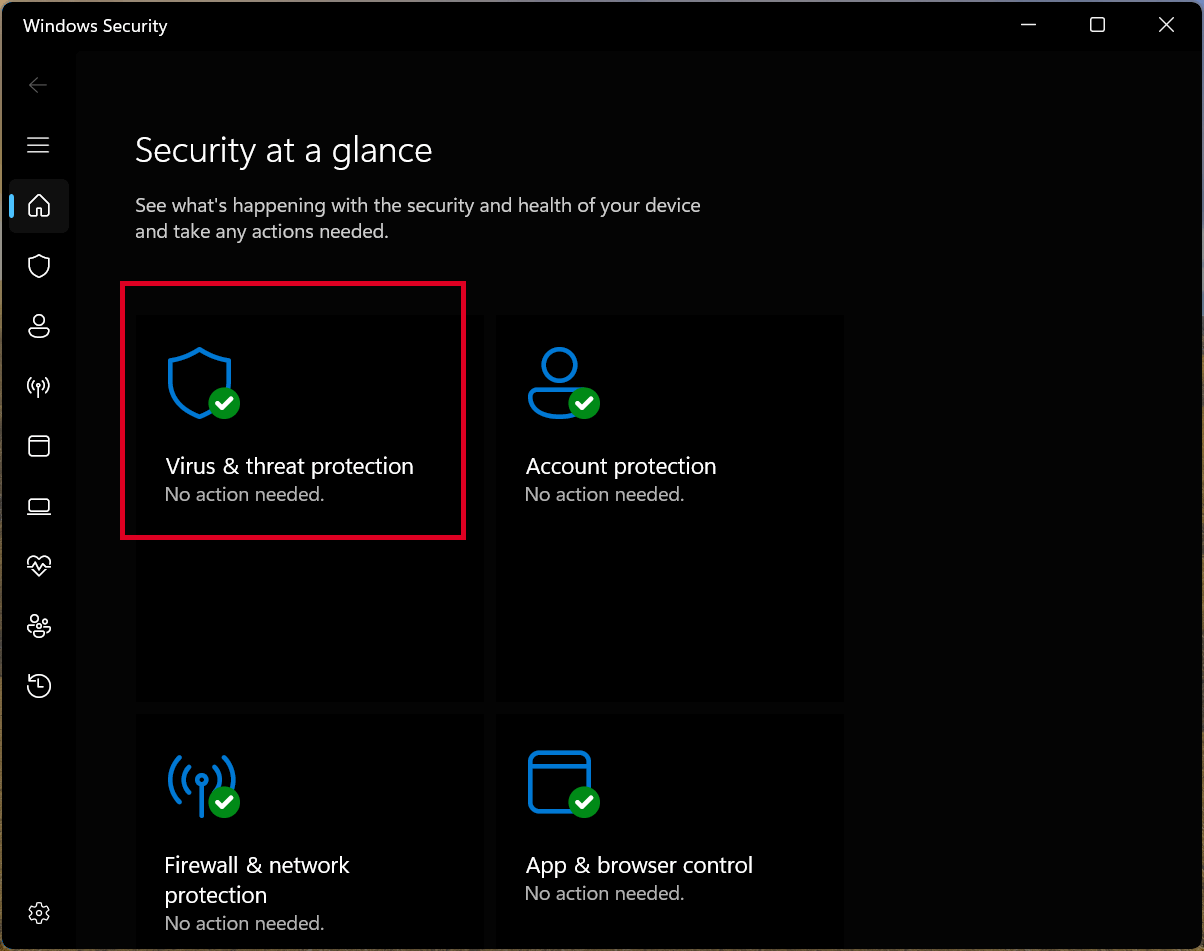
Step 2: Once you’ve opened it, click Virus & threat protection from the dashboard.
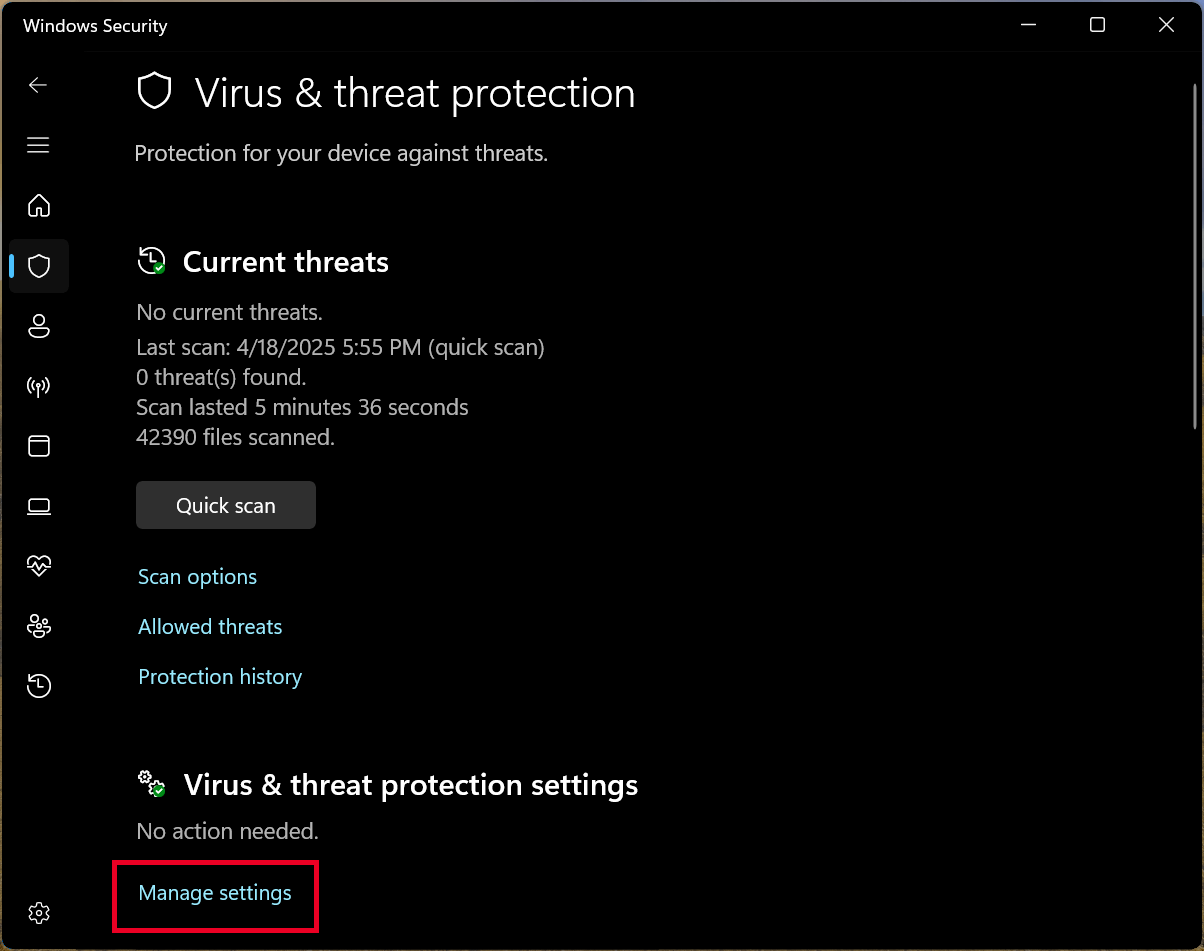
Step 3: Scroll down to Virus & threat protection settings and click Manage settings.
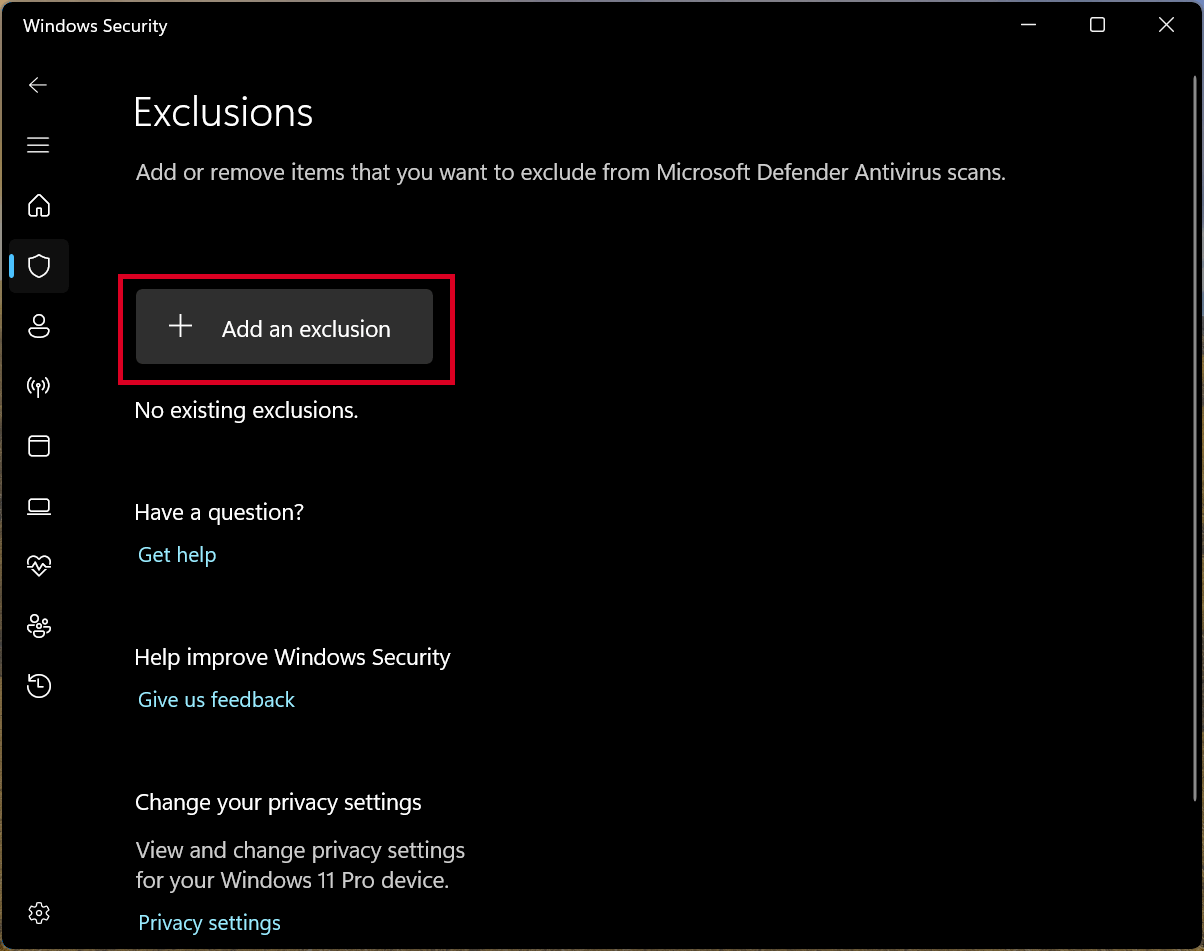
Step 4: Under the Exclusions section, choose Add an exclusion, and add the specific program file.
Step 5: After adding the exclusion, restart the program and see if it opens properly without the error.
Tip: Still having trouble? Open your antivirus app’s quarantine list. Sometimes the file might have been blocked or quarantined automatically. You can usually restore it safely if you trust the program.
Clear the Program’s Cache to Fix "Windows Cannot Access the Specified Device" Error
Programs like Epic Games Launcher and Steam rely on cache files to speed up launches and improve performance. However, after updates or changes, these cached files can sometimes become corrupted, leading to the "Windows cannot access the specified device" error. When this happens, games and apps might fail to open correctly, creating unnecessary roadblocks. In this section, I’ll walk you through clearing out the cache, a quick and simple fix that’s especially helpful for gamers and new PC users looking to get things back on track.
Steps to Clear the Program’s Cache to Fix "Windows Cannot Access the Specified Device" Error:
Clearing a program’s cache can often fix hidden issues that cause access errors. It only takes a few minutes, and you’ll be back to running your apps and games without trouble. Here’s how to do it:
Step 1: First, make sure the program is completely closed. Open Task Manager by pressing Ctrl + Shift + Esc, find the program in the list, and end the task if it’s still running.

Step 2: Now, navigate to the cache folder. For Epic Games Launcher, head to:
C:\Users\YourUsername\AppData\Local\EpicGamesLauncher\Saved
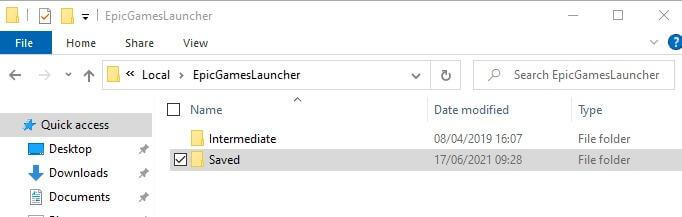
Step 3: Locate and delete the webcache folder. Some programs might have similarly named cache folders.
Step 4: Relaunch the program. It will automatically rebuild its cache, which often fixes the access issue.
Tip: The program might take a little longer to load the first time after clearing the cache and that’s completely normal. Once rebuilt, performance should stabilize.
Repair System Files to Fix "Windows Cannot Access the Specified Device" Error
Corrupted system files are another hidden cause behind the "Windows cannot access the specified device" error, often triggered by incomplete Windows updates or unexpected shutdowns. When key system components are damaged, it can block programs and files from opening properly. Fortunately, Windows includes built-in repair tools that make it easy to scan for and fix these issues. In this section, I’ll guide you through using SFC and DISM commands, simple steps even beginner users can follow to restore system stability.
Steps to Repair System Files to Fix "Windows Cannot Access the Specified Device" Error:
When system files get damaged, Windows gives you built-in tools to repair them quickly. Here’s how you can use simple commands to get everything back in order:
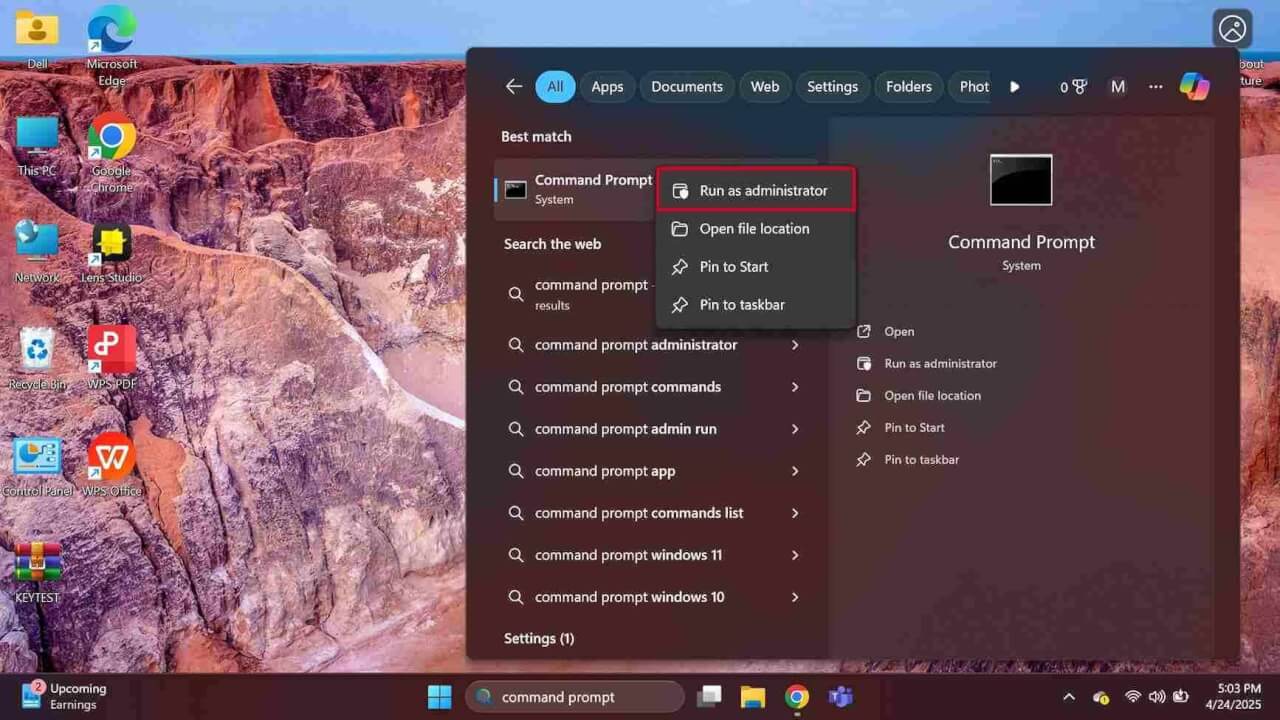
Step 1: Search for Command Prompt in the Start menu, right-click it, and choose Run as administrator to open it with elevated privileges.
Step 2: In the Command Prompt window, type:
sfc /scannow
Then hit Enter. Windows will scan your system for missing or corrupted files and automatically repair them.

Step 3: If the SFC scan reports that it found issues but couldn’t fix them all, run the next command:
DISM /Online /Cleanup-Image /RestoreHealth
Tip: Curious about what was fixed? Check the CBS.log file located at C:\Windows\Logs\CBS for a detailed report.
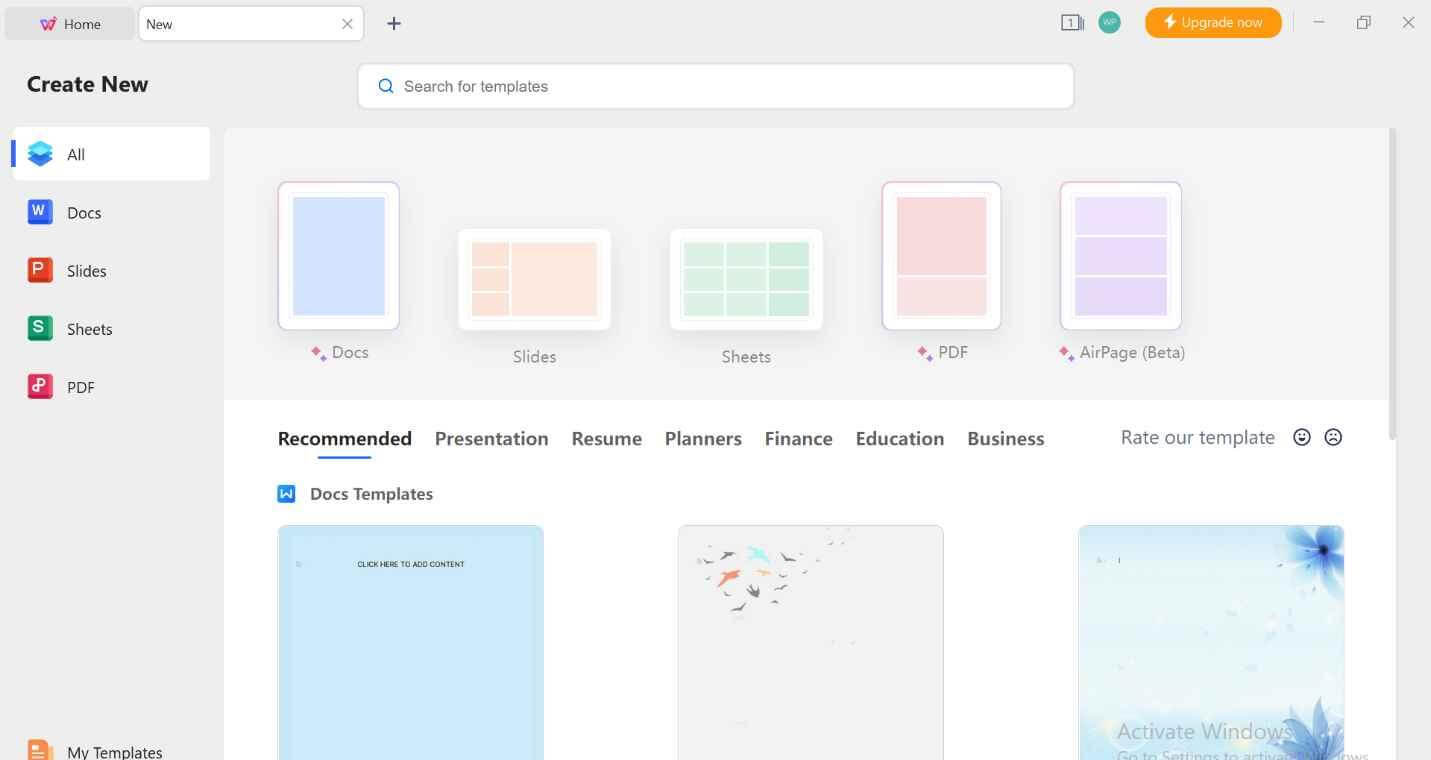
Once Fixed—Use WPS Office to Open & Work with Your Files Seamlessly
Now that your system is running smoothly again, setting up a simple tool for handling everyday files can make a big difference. One option I found helpful is WPS Office . It opens Word documents, spreadsheets, and PDFs without needing extra setup, and fits easily into a normal Windows workflow. Having something lightweight ready means you can get back to editing and organizing files right from File Explorer without any added hassle.
Here are a few features that really stood out:
All-in-One Word, Excel, and PowerPoint Support
WPS Office comes with Writer, Spreadsheets, and Presentation, its own versions of Word, Excel, and PowerPoint. I was able to open and edit .docx, .xlsx, and .pptx files without any formatting issues. Whether I was writing reports or working through data sheets, everything just worked the way I expected.
Built-in PDF Reader and Editor
Managing PDFs was just as easy. WPS includes a built-in tool that lets me open, annotate, and even merge PDF files, all without needing extra software. If you’re handling digital documents regularly, this feature alone is a big time-saver.
WPS AI: Smart Writing and Document Tools
One feature I didn’t expect to use as much as I did was WPS AI. It can summarize long reports, help tighten up writing, and even generate quick content drafts. For anyone working with lots of documentation, it’s a smart, efficient tool that makes a real difference.
FAQs
Q1: How do I get full permission on Windows 10?
You can adjust permissions manually by right-clicking the file or folder, selecting Properties, navigating to Security, and editing your user permissions to Full Control. If permissions are stubborn, reset them using the icacls "file_path" /reset command in Command Prompt.
Q2: Why can't I access my files on Windows?
There are a few common reasons: lack of user permissions, antivirus blocking access, corrupted program caches, or system file errors after Windows updates. Following the steps in this guide usually resolves most of these issues.
Q3: Why does the "Windows cannot access the specified device" error occur?
This error typically happens because of permission restrictions, antivirus interference, damaged cache files, or corrupted system files. Addressing each cause step-by-step is the fastest way to fix it without needing professional help.
Get Access Back and Stay Productive
Clearing the "Windows cannot access the specified device" error is easier than it seems once you know where to look. Adjusting permissions, updating antivirus settings, clearing old cache files, and repairing system files are all simple steps that put you back in control. Once your system is stable, having a tool like WPS Office on hand makes everyday file management even smoother. It’s a lightweight way to handle documents, spreadsheets, and presentations without slowing down your workflow, helping you stay organized and focused moving forward.

'%3e%3cpath%20d='M19.9911%204.11386V6.471H18.5894C18.0775%206.471%2017.7322%206.57814%2017.5536%206.79243C17.3751%207.00671%2017.2858%207.32814%2017.2858%207.75671V9.44421H19.9019L19.5536%2012.0871H17.2858V18.8639H14.5536V12.0871H12.2769V9.44421H14.5536V7.49779C14.5536%206.39064%2014.8632%205.53201%2015.4822%204.92189C16.1013%204.31177%2016.9257%204.00671%2017.9554%204.00671C18.8304%204.00671%2019.509%204.04243%2019.9911%204.11386Z'%20fill='%23333333'/%3e%3c/g%3e%3cdefs%3e%3cclipPath%20id='clip0_2938_8199'%3e%3crect%20width='16'%20height='16'%20fill='white'%20transform='translate(8%204.00671)'/%3e%3c/clipPath%3e%3c/defs%3e%3c/svg%3e)
'%3e%3cpath%20d='M17.5237%2010.7813L23.4811%204H22.0699L16.8949%209.88693L12.7648%204H8L14.2469%2012.9029L8%2020.0133H9.4112L14.8725%2013.7952L19.2352%2020.0133H24M9.92053%205.04213H12.0885L22.0688%2019.0224H19.9003'%20fill='%23333333'/%3e%3c/g%3e%3cdefs%3e%3cclipPath%20id='clip0_2938_8200'%3e%3crect%20width='16'%20height='16.0134'%20fill='white'%20transform='translate(8%204)'/%3e%3c/clipPath%3e%3c/defs%3e%3c/svg%3e)


