
'%3e%3cpath%20d='M8%200C12.4183%200%2016%203.58172%2016%208C16%2012.4183%2012.4183%2016%208%2016C3.58172%2016%200%2012.4183%200%208C0%203.58172%203.58172%200%208%200ZM11.6162%204.38379C11.2257%203.99337%2010.5927%203.99338%2010.2021%204.38379L8%206.58594L5.79785%204.38379C5.40732%203.99334%204.77429%203.99329%204.38379%204.38379C3.99331%204.77429%203.99335%205.40733%204.38379%205.79785L6.58594%208L4.38379%2010.2021C3.99348%2010.5927%203.99341%2011.2257%204.38379%2011.6162C4.77426%2012.0066%205.40734%2012.0065%205.79785%2011.6162L8%209.41406L10.2021%2011.6162C10.5927%2012.0066%2011.2257%2012.0067%2011.6162%2011.6162C12.0067%2011.2257%2012.0066%2010.5927%2011.6162%2010.2021L9.41406%208L11.6162%205.79785C12.0066%205.40735%2012.0066%204.77429%2011.6162%204.38379Z'%20fill='%23080E17'%20fill-opacity='0.46'/%3e%3c/g%3e%3cdefs%3e%3cclipPath%20id='clip0_3761_713'%3e%3crect%20width='16'%20height='16'%20fill='white'/%3e%3c/clipPath%3e%3c/defs%3e%3c/svg%3e)


'%3e%3cpath%20fill-rule='evenodd'%20clip-rule='evenodd'%20d='M21.4999%2010.9993C21.4999%205.20009%2016.7986%200.498901%2010.9993%200.498901C5.19994%200.498901%200.498657%205.20009%200.498657%2010.9993C0.498657%2016.2404%204.33858%2020.5844%209.35855%2021.3722V14.0346H6.69238V10.9993H9.35855V8.68594C9.35855%206.05427%2010.9262%204.60062%2013.3248%204.60062C14.4736%204.60062%2015.6753%204.80571%2015.6753%204.80571V7.38979H14.3512C13.0468%207.38979%2012.64%208.19921%2012.64%209.0296V10.9993H15.5523L15.0867%2014.0346H12.64V21.3722C17.66%2020.5844%2021.4999%2016.2404%2021.4999%2010.9993Z'%20fill='%231568EA'/%3e%3c/g%3e%3c/svg%3e)


The Excel title bar, often unheeded yet critical, plays as the gateway to efficient spreadsheet navigation and production. As users we face it on daily-basis but how much do we truly know about its components, tools and design significance? In this article, we dig into the secrets of the Excel title bar, unravelling its components and exploring the details of designing an optimal Excel interface.
What is the Excel Title Bar?
The Excel title bar is an important element that is used to style the top of your Excel sheet window. It might show as a plane strip but it plays a significant role in styling your experience with the application. It serves as both an informational hub and a navigational aid.
The main purpose of the Excel title bar is to display the name of the currently active workbook. It allows users to quickly identify the file they are working on. Moreover, it is a portal to an array of essential commands, tools and features. Some buttons like minimising, maximising, and closing the application are mostly found on this bar, and some other UI elements that facilitate ease of use and streamline workflow are also shown besides these buttons.
In this study of the Excel title bar, we disclose its various components, explore its functional significance and dig into the design principles that support its creation.
Components of the Excel Title Bar
The Excel title bar comprises a collection of discrete components that collectively help you in interaction with the application. Each element of the title bar contributes to its functionality and aesthetics as well as working in harmony to increase user experience and productivity. Its main components are as under:
1. Workbook name: The title bar displays the name of the active excel workbook in front and centre. This helps users in instant identification, though they are always aware of the file working on, even amongst a multitude of open spreadsheets.
2. Window controls: The window controls include the familiar trio like:
Minimise
Maximise/ restore
Close buttons
They all are settled at the right end. These buttons allow users in effortless manipulation of the application window, optimising screen real estate and workflow management in Excel workbook.
3. Quick access toolbar: This customizable toolbar contains frequently used commands for swift access and is nested at the left end. This personalization empowers users to tailor their excel workspace to their needs in order to boost efficiency.
There are steps to add desired commands to the Quick Access Toolbar in Excel:
Step 1. Open Excel: Launch Microsoft Excel on your personal computer.

Step 2. Locate the quick access toolbar: The Quick Access Toolbar is usually found above or below the ribbon border, depending on your version of Excel. It mostly displays some common commands such as Save, Undo, and Redo options.

Step 3. Customise the quick access toolbar:
Right-click on any command in the ribbon interface or an already exist command in the Quick Access Toolbar.
From the context menu that appears.
Select "Add to Quick Access Toolbar". The selected command will be added to the Excel toolbar.

Customising the Excel Title Bar
The Excel title bar can be changed into a personalised control centre by customising its basic components. This ability to mould the title bar according to your workflow and preferences enables its users to streamline the tasks and enhance work productivity.

Here is quick guide on how to customise the Excel title bar:
1. Accessing customization options
Launch and open any Excel workbook.
Look for the Quick Access Toolbar, nested at the left end or above/ below the ribbon interface.
Click on the tiny arrow icon at the end of the quick access toolbar to disclose a dropdown menu.
2. Adding common commands
The dropdown menu contains a list of common commands that users require and can be added to the Quick Access Toolbar. Now, right-click on any command within the ribbon boundary and select "Add to Quick Access Toolbar". This makes frequently used actions at top just a click away.
3. Exploring more commands
If your desired command is not available in the initial dropdown then choose the "More Commands" option from the menu.
The "Excel Options" window will open that shows an array of commands organised by categories.
4. Selecting and rearranging commands
Browse through the whole list and select commands that you want in your workflow. Click the "Add button” to include the commands in the Quick Access Toolbar.
To organise the toolbar commands, use the "Up" and "Down" arrow keys to adjust the order of commands.
5. Removing commands
To remove any command from the Quick Access Toolbar. Select it in the right column of the "Excel Options" and click the "Remove" button.
6. Custom icons and more
For a personal and your favourite touch in excel, consider using custom icons for commands. Within the "Excel Options" window, select a command in the right column and just click the "Modify" button. You can choose from many built-in icons or even upload your favourite one.
7. Importing and exporting customizations
If you switch computer devices or need to replicate your excel customizations, you can export your Quick Access Toolbar customization setting. For export or import, go to the "Excel Options", select "Import/Export" and follow the prompts.

8. Contextual tabs customization
Excel also provides contextual tabs that appear when some specific objects are selected, like charts or pictures. These tabs can be customised by selecting the certain objects like right-clicking on the contextual tab area and choosing "Customise the Ribbon". This enables you to add or remove your desired commands to that context.
9. Hiding or showing the ribbon
Step 1. Open Microsoft Excel workbook.
Step 2. Look for a small arrow icon (^) located at the right end of the ribbon (near trio buttons), at the top right corner of the Excel window. This is called the "Ribbon Display Options" button.

Step 3. Click on the "Ribbon Display Options" button.

Step 4. A dropdown menu will appear with undermentioned options:
Auto-hide ribbon: This option hides the ribbon and shows only the tab names. To access the ribbon for temporary use, click on a tab.
Show tabs: This option displays only the tab names. And keeps the ribbon expanded. Clicking on a tab will display content written in it.
Show tabs and commands: This option is use to display the ribbon and all its commands, as likely to the default view.

10. Changing the workbook name
Step 1. First, open the Excel Workbook:
Launch Microsoft Excel.
Open the specific workbook for which you are going to change the name.

Step 2. Find the Excel workbook name
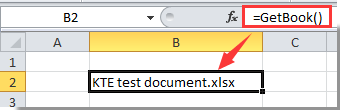
Look at the title bar located at the top of the Excel window. The current workbook name will be displayed there.

Step 3. Click on the workbook name
Now, single-click on the current workbook name showing in the title bar. This will highlight the name and let you edit and rename it.

Step 4. Edit the workbook name
Once the Excel workbook name is selected. One can start typing to replace the existing name with the new and desired name.

Step 5. Press Enter button
After changing the new name, press the "Enter" key on your keyboard.

Step 6. Confirm the change
The Excel workbook name in the title bar will update now, to the new name you typed.

Step 7. Save the Excel workbook
It is a good practice to save the workbook after rename. You can do this by going to the "File" in the menu and selecting the "Save" option or using the keyboard shortcut key Ctrl + S.


Best Free Alternative to Microsoft Office - WPS Office
What is WPS Office?
WPS Office refers to a robust and feature-packed office suite. It provides users with an array of powerful tools having multiple productivity tasks. It is well-known for its versatility and user-friendly environment. WPS Office is providing an impressive suite of applications that include a word processor, spreadsheet software, and presentation creator. The sets that stand it out from others are its capabilities and a substantial number of services entirely free of cost.
FAQs
Q.1 What is the difference between the title bar and the toolbar?
The title bar of the excel workbook refers to the topmost part in the excel window. That displays the name of the document or workbook. And the toolbar is a row of icons or buttons that helps to quickly access commonly used commands within the Excel workbook.
Q.2 What is a spreadsheet formula?
A spreadsheet formula is an equation that is used to perform calculations within a spreadsheet cell.
Q.3 How can I protect an Excel worksheet with a password?
In order to protect an Excel workbook with a password:
Go to the "Review" tab
Click "Protect Sheet"
Set a password.
This password prevents your document from others making changes.
Q.4 How do I change the font in an Excel document?
To change the font in a Excel workbook, do the following:
Select the desired text you want to change font format
Go to the "Home" tab, and look for the "Font" section.
Click the font dropdown, to choose your desired font style.
Summary
This article empowers users to reveal the potential of the Excel title bar as well as enable efficient navigation, design, and customization. By a comprehensive search of Excel components, strategies to design worksheet, and compatibility in use, users can enhance their Excel experience and overall productivity. Moreover, the WPS office suite is providing diverse tools for various productivity tasks. It's versatility and free of cost services stand out, providing users with a compelling alternative to traditional office software.

'%3e%3cpath%20d='M19.9911%204.11386V6.471H18.5894C18.0775%206.471%2017.7322%206.57814%2017.5536%206.79243C17.3751%207.00671%2017.2858%207.32814%2017.2858%207.75671V9.44421H19.9019L19.5536%2012.0871H17.2858V18.8639H14.5536V12.0871H12.2769V9.44421H14.5536V7.49779C14.5536%206.39064%2014.8632%205.53201%2015.4822%204.92189C16.1013%204.31177%2016.9257%204.00671%2017.9554%204.00671C18.8304%204.00671%2019.509%204.04243%2019.9911%204.11386Z'%20fill='%23333333'/%3e%3c/g%3e%3cdefs%3e%3cclipPath%20id='clip0_2938_8199'%3e%3crect%20width='16'%20height='16'%20fill='white'%20transform='translate(8%204.00671)'/%3e%3c/clipPath%3e%3c/defs%3e%3c/svg%3e)
'%3e%3cpath%20d='M17.5237%2010.7813L23.4811%204H22.0699L16.8949%209.88693L12.7648%204H8L14.2469%2012.9029L8%2020.0133H9.4112L14.8725%2013.7952L19.2352%2020.0133H24M9.92053%205.04213H12.0885L22.0688%2019.0224H19.9003'%20fill='%23333333'/%3e%3c/g%3e%3cdefs%3e%3cclipPath%20id='clip0_2938_8200'%3e%3crect%20width='16'%20height='16.0134'%20fill='white'%20transform='translate(8%204)'/%3e%3c/clipPath%3e%3c/defs%3e%3c/svg%3e)


