Making your PowerPoint presentation full screen is a simple but effective way to create a focused and engaging experience for your audience. By maximizing content visibility and eliminating distractions, you can ensure that your message is received loud and clear.
Whether you're a seasoned presenter or a beginner, this article will walk you through the steps of making your PowerPoint full screen, so you can deliver a polished and professional presentation with ease.
Part1: How to Make PowerPoint Full Screen Easily
Creating a PowerPoint presentation in full-screen mode is a simple process, and I'll provide a step-by-step tutorial below.
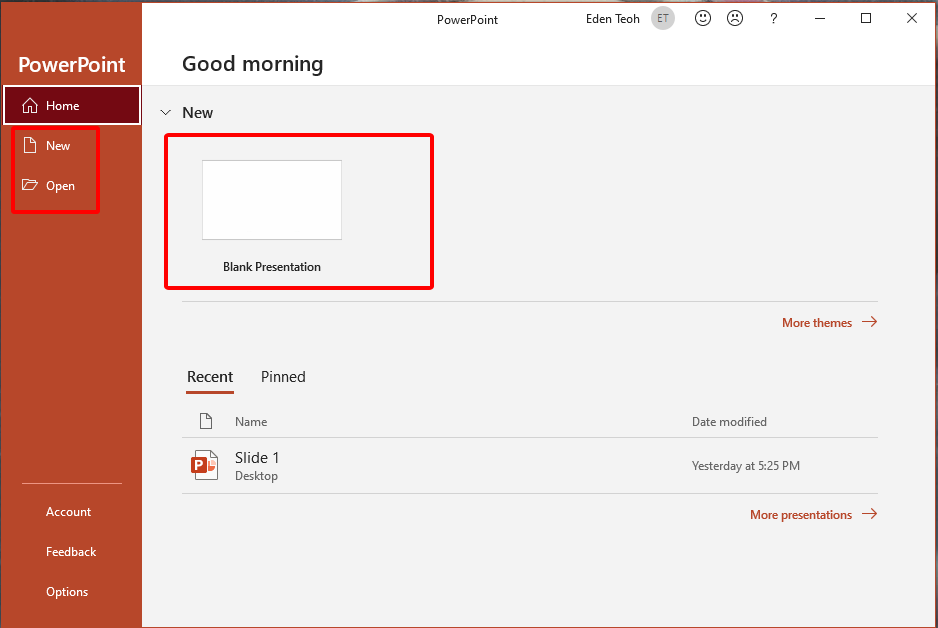
Step 1: Open Your PowerPoint Presentation
Launch Microsoft PowerPoint and open the presentation you want to view in full-screen mode.
Step 2: Enter SlideShow Mode
To enter full-screen mode, you can use any of these methods:
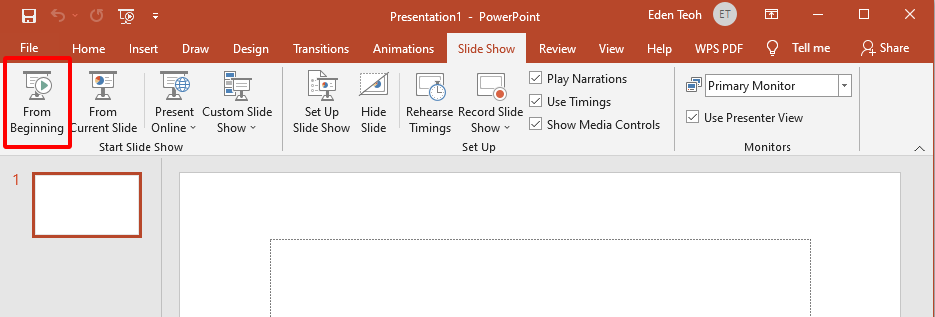
Click on the "Slide Show" tab in the ribbon at the top of the window and then click "From Beginning."
Press the F5 key on your keyboard.
Alternatively, you can press the Shift + F5 keys to start the slide show from the current slide.
Step 3: Navigate Through Your Presentation
While in full-screen mode, you can use various methods to navigate through your slides:
Click your mouse or press the Spacebar or Enter key to advance to the next slide.
Press the Backspace or Left Arrow key to go back to the previous slide.
Use the keyboard's number keys to jump to a specific slide. For example, press "3" to go to slide 3.
Step 4: End the Slide Show
To exit full-screen mode and return to normal editing mode, you can:
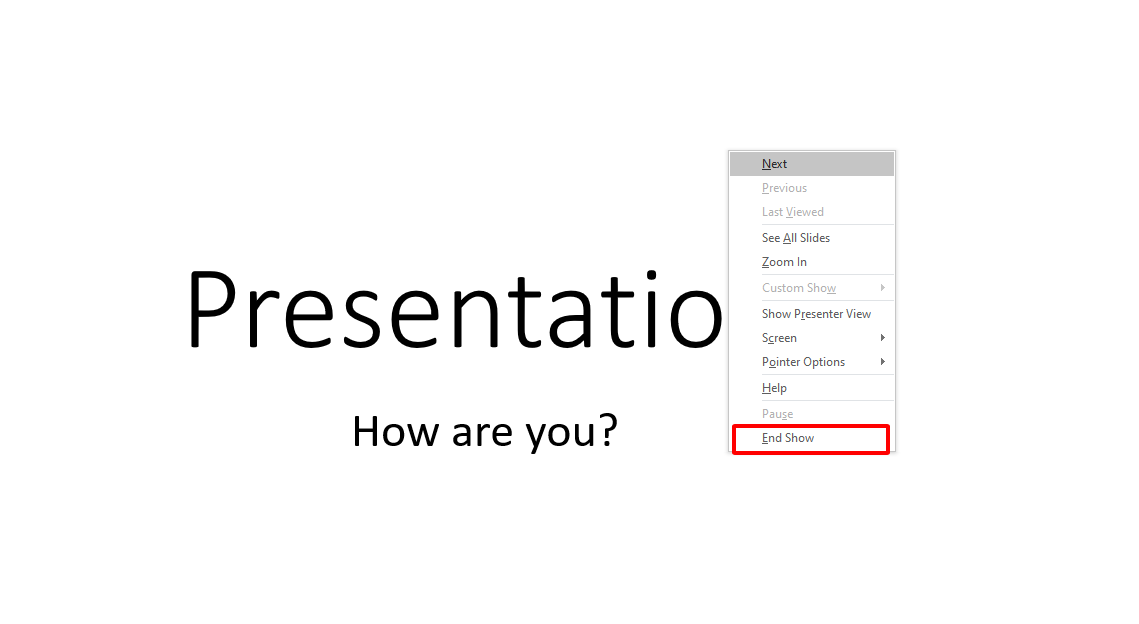
Press the Esc key on your keyboard.
Right-click anywhere on the screen and select "End Show."
And that's it! Your PowerPoint presentation should now be in full-screen mode, and you can easily navigate through your slides using the provided methods.
Part2: How to Make PowerPoint Full Screen on Projector
Making a PowerPoint presentation full screen on a projector is a common requirement for meetings and presentations. Below, I'll provide a step-by-step tutorial on how to achieve this.
Step 1: Connect Your Projector
Connect your projector to your computer using the appropriate cables (HDMI, VGA, etc.). Ensure that both the projector and your computer are powered on.
Step 2: Configure Display Settings
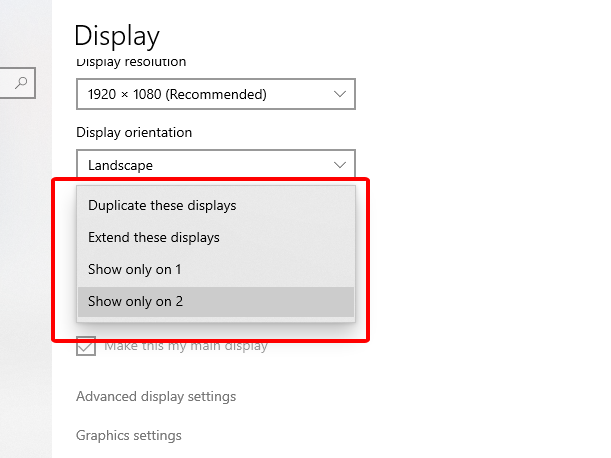
Right-click on your desktop and select "Display settings."
In the Display settings window, you'll see two displays - your computer screen and the projector (or second display).
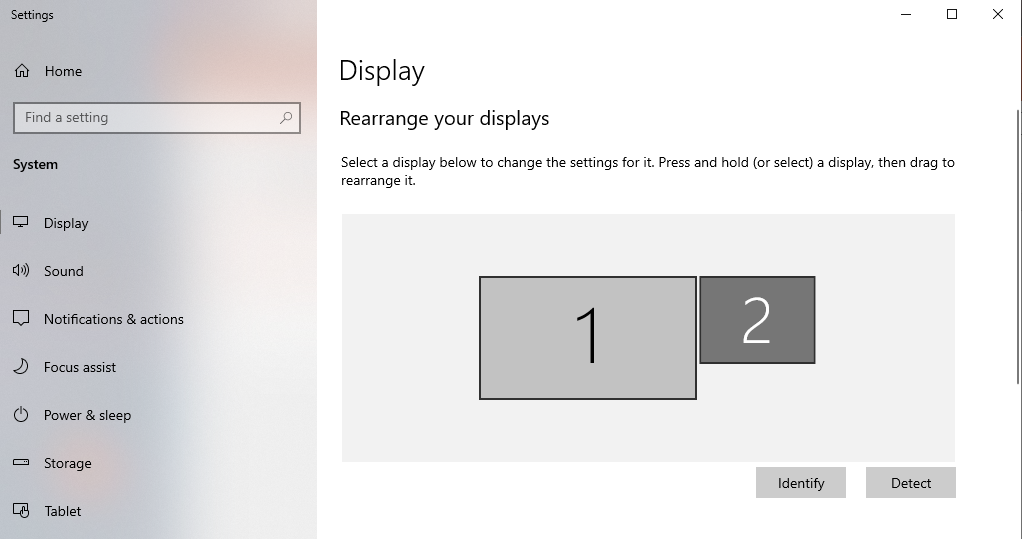
Make sure the "Multiple displays" dropdown menu is set to "Duplicate" or "Second screen only" depending on your preference. "Duplicate" will mirror your computer screen on the projector, while "Second screen only" will use the projector as the main display.
Step 3: Open Your PowerPoint Presentation
Launch Microsoft PowerPoint and open the presentation you want to display.

Step 4: Enter SlideShow Mode
To enter full-screen mode, you can use any of these methods:
Click on the "Slide Show" tab in the ribbon at the top of the window and then click "From Beginning."
Press the F5 key on your keyboard.
Alternatively, you can press the Shift + F5 keys to start the slide show from the current slide.

Step 5: Navigate Through Your Presentation
While in full-screen mode, you can navigate through your slides as explained in Part 1 of this tutorial.
Step 6: End the Slide Show
To exit full-screen mode and return to normal editing mode, you can:
Press the Esc key on your keyboard.
Right-click anywhere on the screen and select "End Show."

By following these steps, you should be able to make your PowerPoint presentation full screen on a projector.
Part3: The Shortcut Key for Starting the Slideshow
Here are the shortcut keys for starting a PowerPoint slideshow from both the beginning and the current slide on both Windows and macOS:
Windows:
F5: Start the slideshow from the beginning.
Shift + F5: Start the slideshow from the current slide.
MacOS:
Play Slideshow from Beginning:
Shift + Command + Return: Start the slideshow from the beginning.
Fn + Shift + F5: Start the slideshow from the beginning.
Play Slideshow from Current Slide:
Shift + Command + Return: Start the slideshow from the current slide.
These shortcut keys allow you to quickly initiate a PowerPoint slideshow, whether you want to begin from the start or the current slide, and they work on both Windows and macOS platforms.
Part4: Best Alternative — WPS Office

Microsoft Office has been the market leader in office productivity software for decades, offering robust applications such as Word, Excel, and PowerPoint. However, with the rise of cloud-based solutions and the increasing demand for cost-effective options, free alternatives like WPS Office have gained popularity.
Why should you choose WPS Office as an alternative to Microsoft Office?
Here are the answer:
● Free to use Word, Excel, and PPT. Powerful PDF toolkit
● Rich template store, which contains variousfree and paid templates for Word, PPT, and Excel
● Rich functions
● The light weight of the product is only 200M, and it occupies a small amount of computer memory. It is suitable for Win7, 10, and 11
● The MAC version of WPS Office is very powerful. Microsoft office ignores the experience of mac users, which can be made up by wps office
● Supportonline documents (WPS AirPage), multi-person collaborative editing
● WPS office also supports Linux systems, Android, and ios systems. To use WPS office products on different systems, you only need to log in to the same account, and all files can be synchronized
Creating a PowerPoint-like presentation with WPS Office and utilizing features like image-based storytelling, progressive image reveal, comparison slides, and virtual tours is a great way to engage your audience. Here's a step-by-step tutorial on how to make PowerPoint-style presentations with WPS Office:
Step 1: Open WPS Presentation and creating a New Presentation
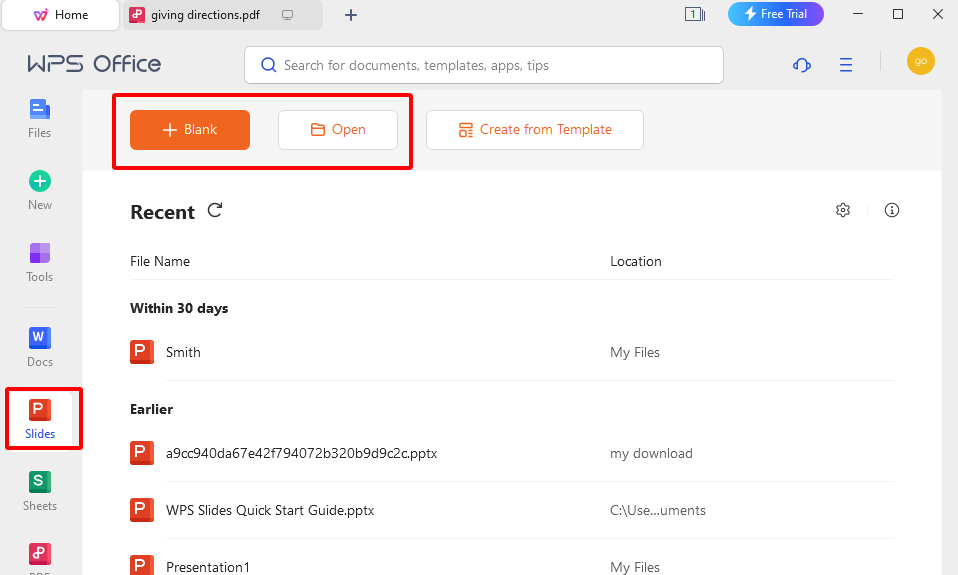
Step 2: Create Your Presentation
Create your presentation in WPS Presentation, including your slides, images, and content. You can use the features like image-based storytelling, progressive image reveal, comparison slides, and virtual tour to enhance your presentation as per your requirements.
Image-Based Storytelling
To create image-based storytelling slides:
Insert images into your slides that correspond to different parts of your story.
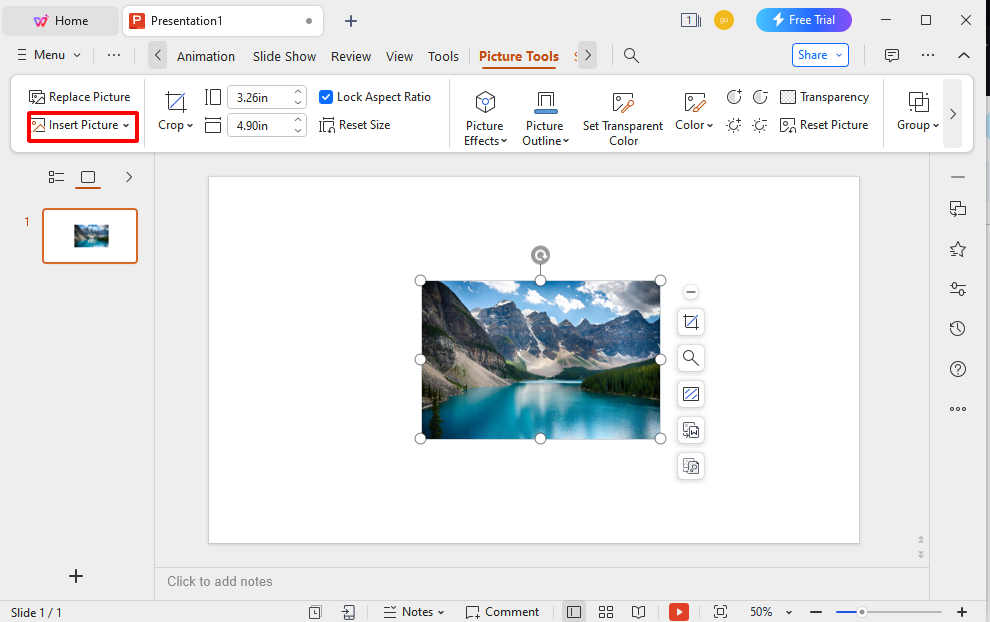
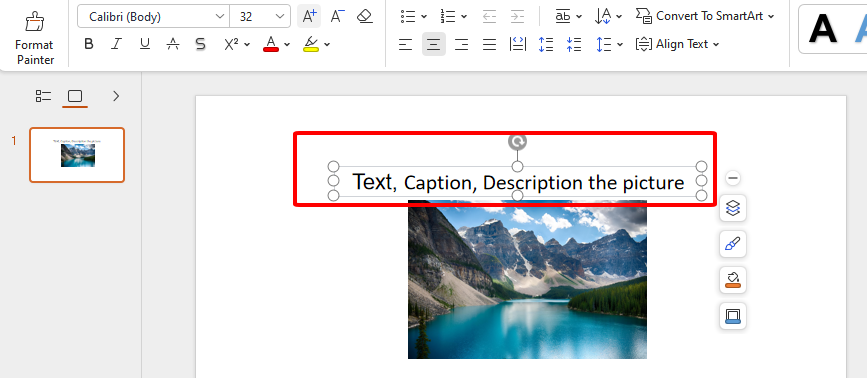
Add text, captions, or descriptions to explain the images.
Use transitions and animations to make the storytelling engaging.

Progressive Image Reveal
To create slides with progressive image reveals:
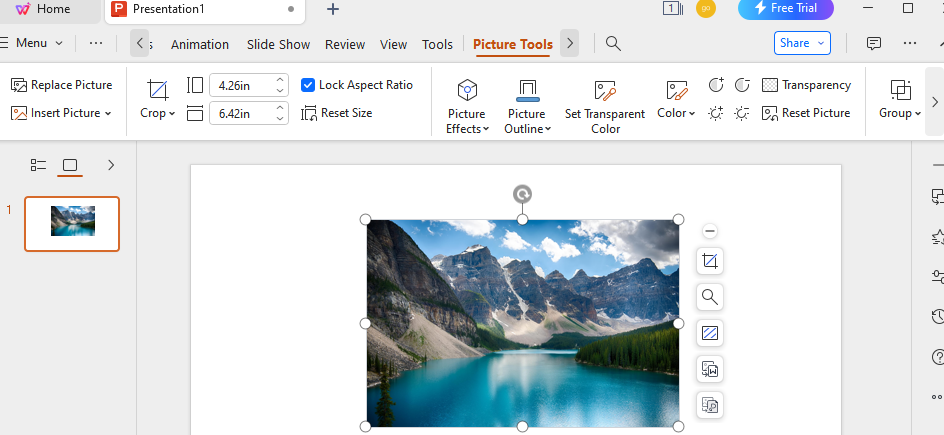
Add your main image to the slide.
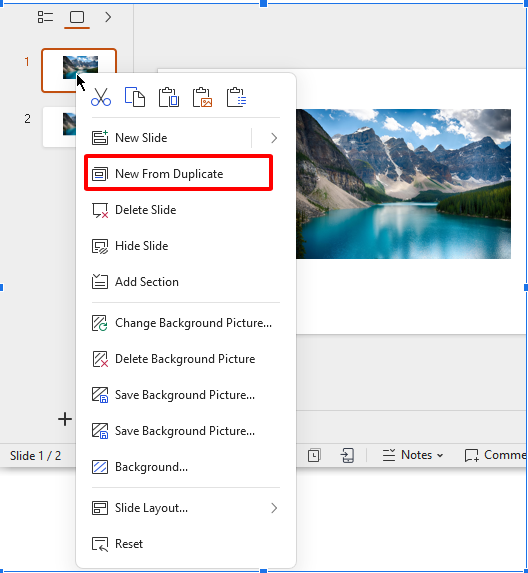
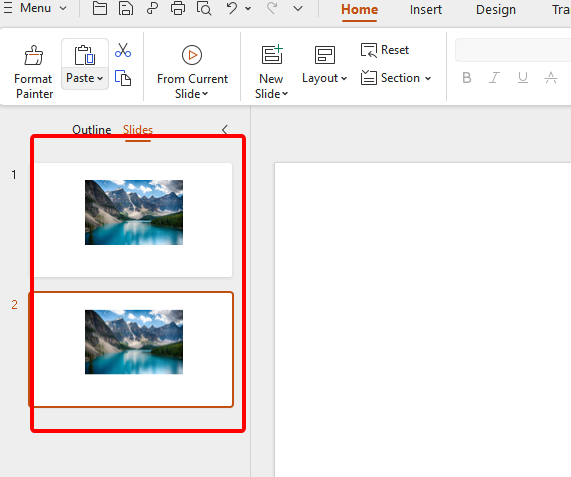
Duplicate the slide.
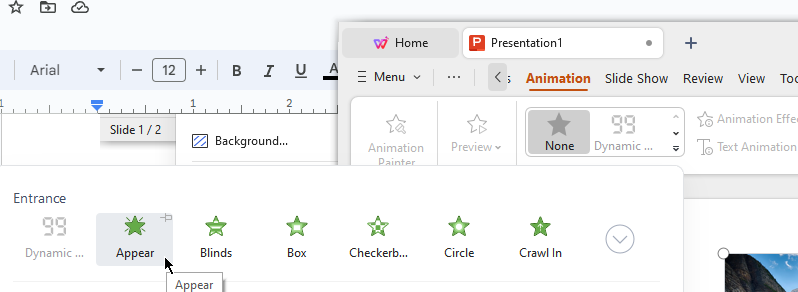
On the duplicated slide, use an object (e.g., a shape) to cover part of the image.
Add animations to the object (e.g., "Appear" animation) and set delays for each slide to reveal the image progressively.
Comparison Slides
To create comparison slides:
Use tables or split your slide into multiple sections to show comparisons side by side.
Add text and graphics to highlight the differences or similarities between the elements you're comparing.
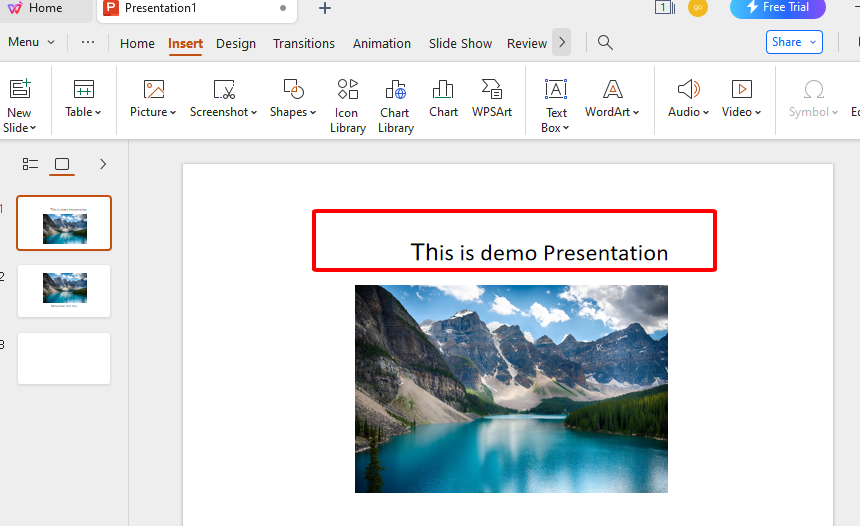
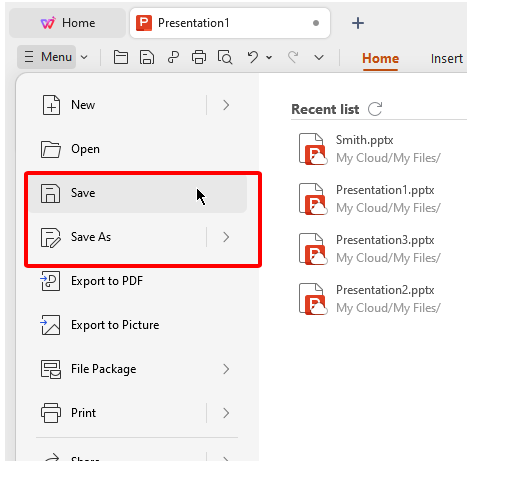
Step 3: Save Your Presentation
After creating your presentation, make sure to save your work to avoid losing any changes. Click on 'File' in the top menu, then select 'Save' or 'Save As' to save your presentation file.
Step 4: Full Screen Mode
To view your presentation in full-screen mode:
Click on the "Slide Show" option in the top menu.
Select "From Beginning" to start the presentation from the beginning.

Step 5: Press "Esc" on your keyboard to exit full-screen mode.
You feel WPS Office is the best choice for you and want to download? Don’t worry, below is step by step how to download WPS Office:
Step 1: Visit the WPS Office website:wps.com.
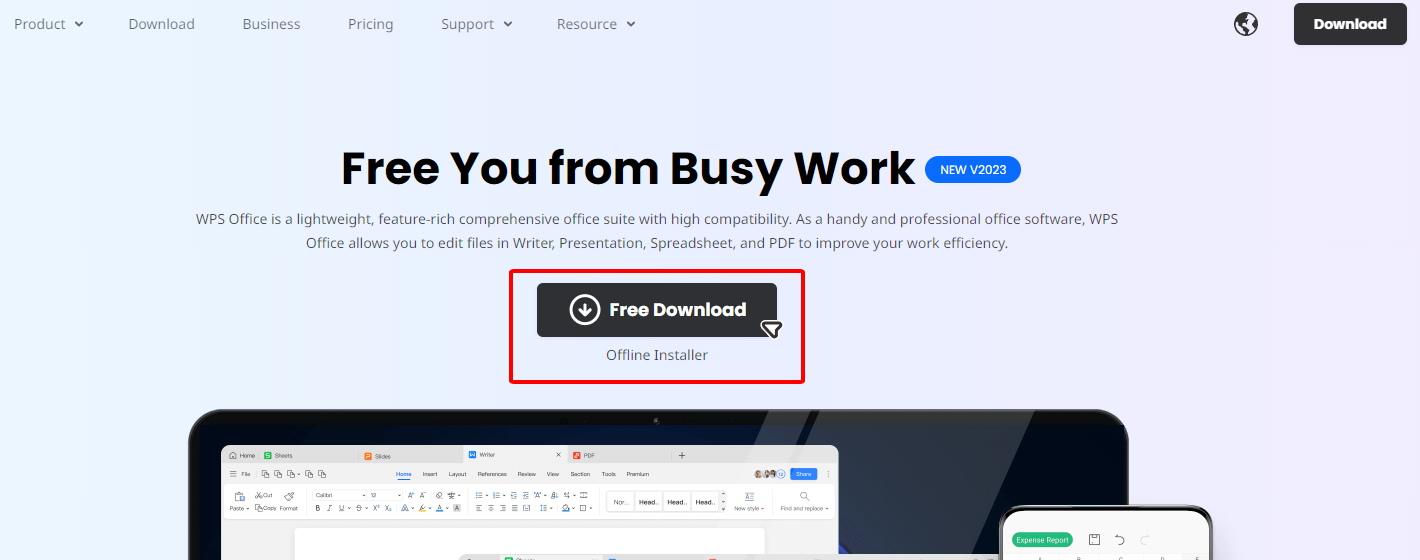
Step 2: Click “ Free Download” button
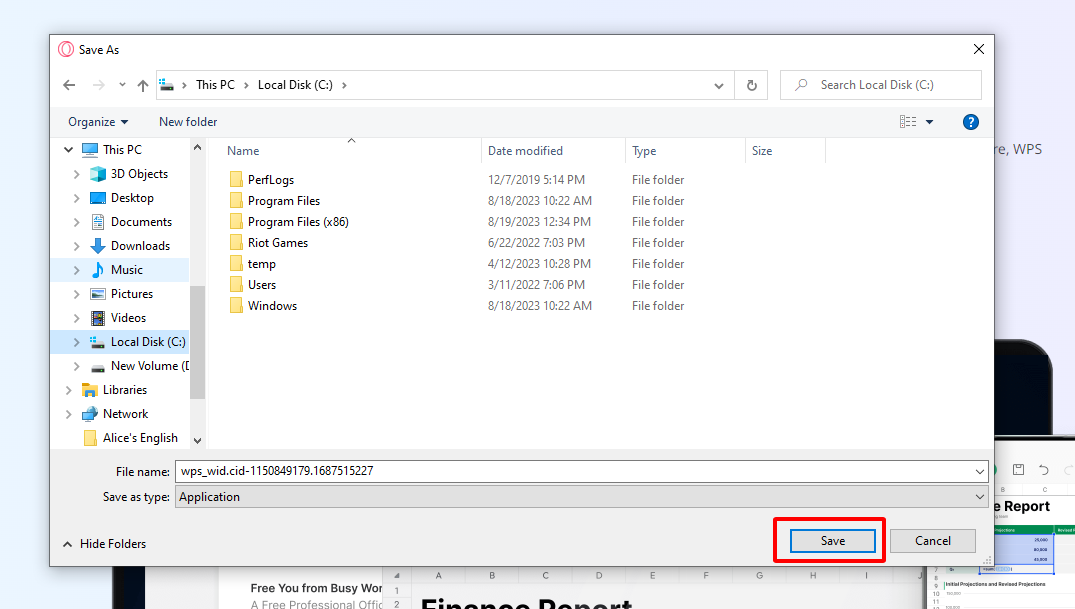
Step 3: Select the place you want to save WPS Office -> Save
Step 4: Double click on the WPS Office file in your Download file, click “Run” and follow the on-screen instructions to install
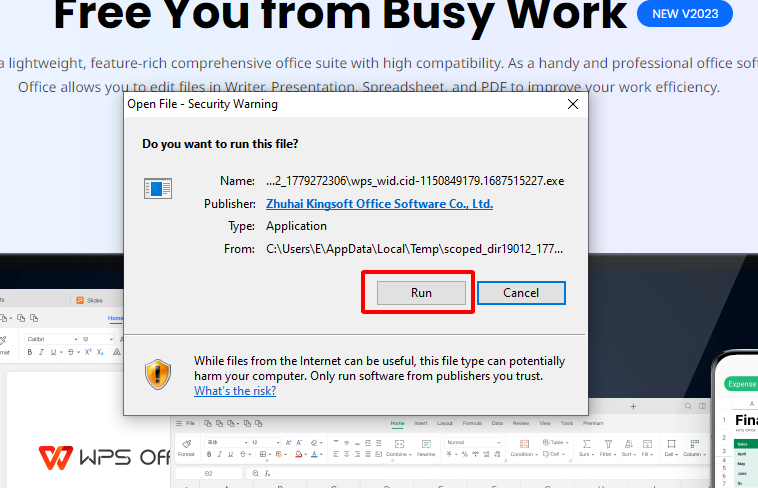
Step 5: After complete, you can enjoy all the power of WPS Office
Frequently Asked Questions (FAQs)
Q: How to use the presenter view in PowerPoint?
A: To use the presenter view in PowerPoint, follow these steps:
Connect your computer to a projector or external display.
Start your PowerPoint presentation.
Click the "Slide Show" tab in the PowerPoint ribbon.
Click "Presenter View."
The presenter view will display on your computer screen, showing the current slide, the next slide, speaker notes, and presentation controls.
Use this view to control your presentation while the audience sees only the slide.
Q: How can I resize an image while keeping the aspect ratio the same?
A: To resize an image while maintaining the aspect ratio in PowerPoint, follow these steps:
Select the image you want to resize.
Click and drag one of the corner handles of the image while holding down the Shift key on your keyboard.
This will resize the image proportionally, ensuring that the aspect ratio remains the same.
Q: How do I insert a page number in a WPS presentation?
A: To insert a page number in a WPS Presentation, follow these steps:
Click the "Insert" tab in the WPS Presentation toolbar.
Select "Page Number."
Choose the desired page number format and location (e.g., top or bottom of the slide).
The page number will be inserted into your presentation.
Summary
The article "How to Make PowerPoint Full Screen" provides a step-by-step guide for easily entering full-screen mode in PowerPoint, facilitating seamless presentations. Notably, WPS Office offers a robust alternative for creating PowerPoint presentations, with features such as image-based storytelling and progressive image reveal.With WPS Office, users can make their presentations captivating and engaging by following simple steps for entering full-screen mode. Download WPS Office now.


