
'%3e%3cpath%20d='M8%200C12.4183%200%2016%203.58172%2016%208C16%2012.4183%2012.4183%2016%208%2016C3.58172%2016%200%2012.4183%200%208C0%203.58172%203.58172%200%208%200ZM11.6162%204.38379C11.2257%203.99337%2010.5927%203.99338%2010.2021%204.38379L8%206.58594L5.79785%204.38379C5.40732%203.99334%204.77429%203.99329%204.38379%204.38379C3.99331%204.77429%203.99335%205.40733%204.38379%205.79785L6.58594%208L4.38379%2010.2021C3.99348%2010.5927%203.99341%2011.2257%204.38379%2011.6162C4.77426%2012.0066%205.40734%2012.0065%205.79785%2011.6162L8%209.41406L10.2021%2011.6162C10.5927%2012.0066%2011.2257%2012.0067%2011.6162%2011.6162C12.0067%2011.2257%2012.0066%2010.5927%2011.6162%2010.2021L9.41406%208L11.6162%205.79785C12.0066%205.40735%2012.0066%204.77429%2011.6162%204.38379Z'%20fill='%23080E17'%20fill-opacity='0.46'/%3e%3c/g%3e%3cdefs%3e%3cclipPath%20id='clip0_3761_713'%3e%3crect%20width='16'%20height='16'%20fill='white'/%3e%3c/clipPath%3e%3c/defs%3e%3c/svg%3e)


'%3e%3cpath%20fill-rule='evenodd'%20clip-rule='evenodd'%20d='M21.4999%2010.9993C21.4999%205.20009%2016.7986%200.498901%2010.9993%200.498901C5.19994%200.498901%200.498657%205.20009%200.498657%2010.9993C0.498657%2016.2404%204.33858%2020.5844%209.35855%2021.3722V14.0346H6.69238V10.9993H9.35855V8.68594C9.35855%206.05427%2010.9262%204.60062%2013.3248%204.60062C14.4736%204.60062%2015.6753%204.80571%2015.6753%204.80571V7.38979H14.3512C13.0468%207.38979%2012.64%208.19921%2012.64%209.0296V10.9993H15.5523L15.0867%2014.0346H12.64V21.3722C17.66%2020.5844%2021.4999%2016.2404%2021.4999%2010.9993Z'%20fill='%231568EA'/%3e%3c/g%3e%3c/svg%3e)


It takes more than just content to make a presentation engaging; timing is key. This guide will walk you through different techniques, resources, and software to become an expert at exact presentation timing, whether you're presenting in person or online. Let's make every second matter by utilizing WPS Presentation features, PowerPoint tricks, and online timers.
Effective time management transforms presentations from monotonous monologues into dynamic conversations. Beyond just tracking minutes, it encompasses three core principles:
1. Strategic Chunking: Divide your content into 7-10 minute segments with clear transitions. Neuroscience shows this aligns with average attention spans, boosting retention by up to 40%.
2. Buffer Zones: Always allocate 15% of your total time for unexpected pauses – audience questions, technical checks, or emphasis moments. For a 20-minute talk, reserve 3 minutes as flexible buffer.
3. Audience Rhythm: Alternate between data-heavy slides and interactive elements every 5 minutes. Tools like WPS Presentation's "Rehearse Timings" help visualize these cadence checkpoints.
Mastering these techniques ensures your message resonates long after the timer stops.
How to Use Timer for Presentations Online for Free
There are a lot of Timer for Presentation that can be found online for free. Discover the world of online timers with Stagetimer.io and Online Stopwatch. These free tools come with their unique features. Let’s explore their unique features to find the perfect fit for your presentation needs.
Stagetimer.io

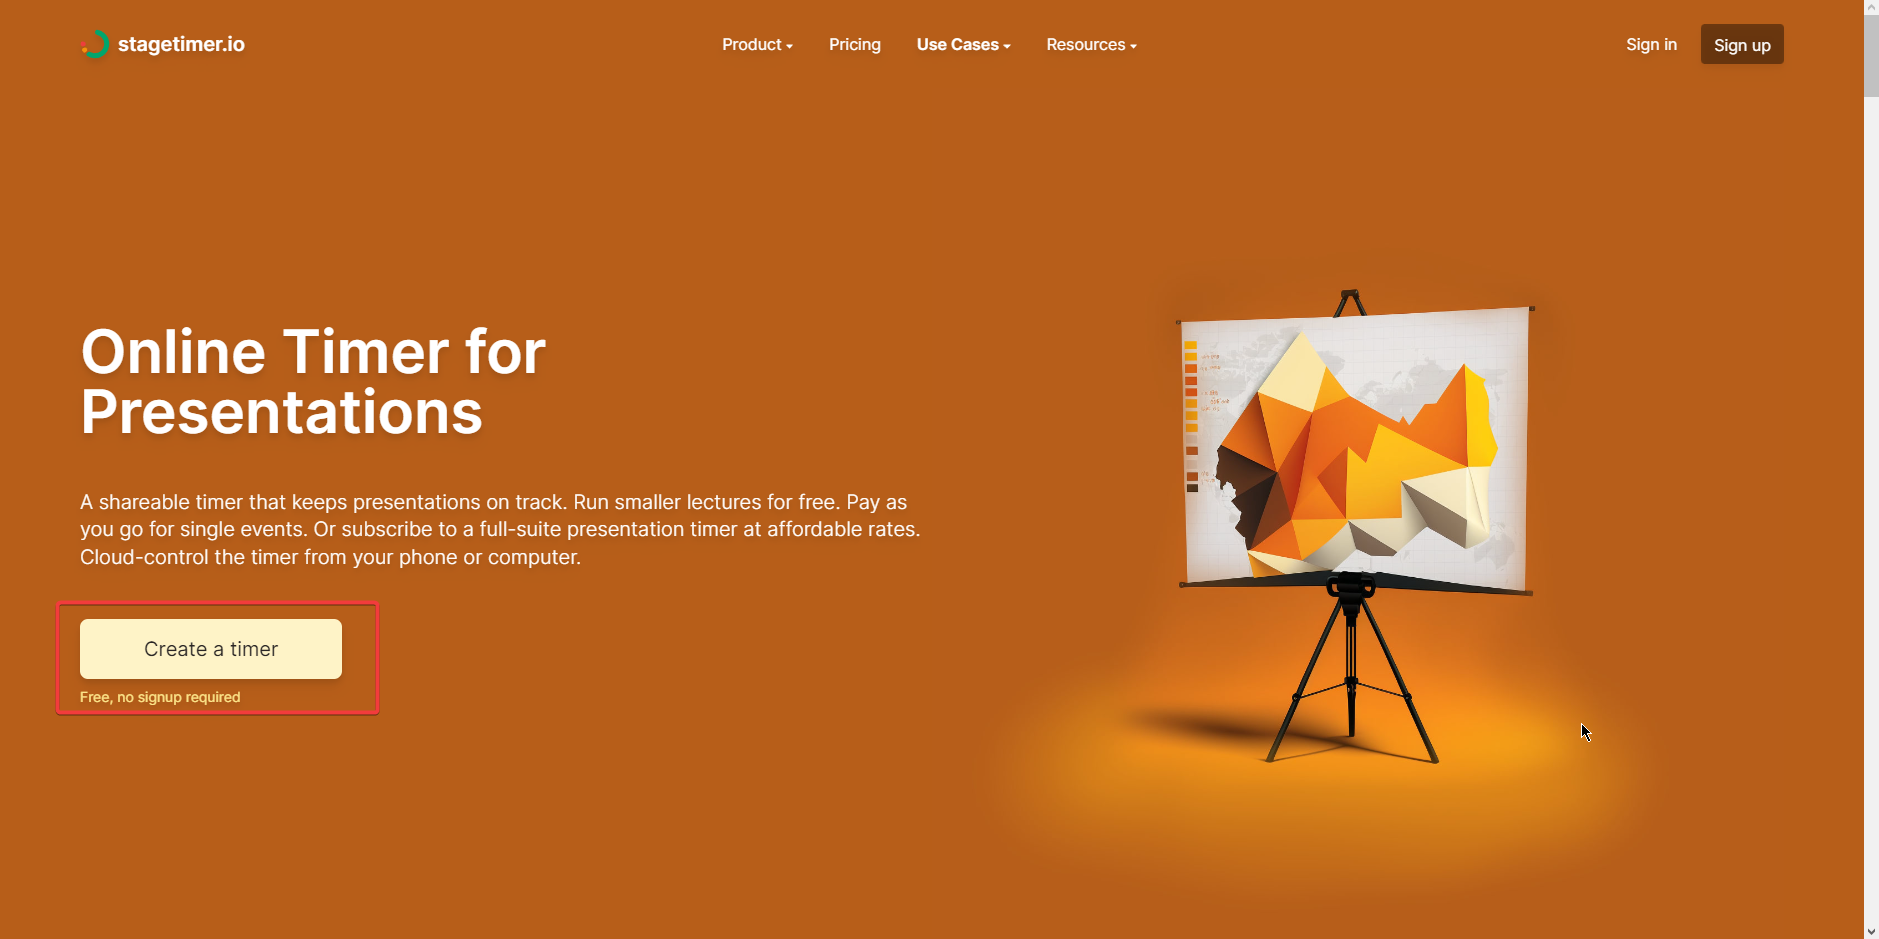
Stagetimer.io is an online timer tool designed to assist presenters and speakers in managing their time effectively during presentations. Its user-friendly interface and customizable features make it a popular choice for those seeking precise timing control.
How to Use Stagetimer.io:
Step 1: Visit Stagetimer.io
Step 2: Click on "Create a Timer."
Step 3: Set the desired countdown duration and customize visual options such as colors and font size.

Step 4: Once configured, click "Start Timer" to initiate the countdown.

Pros of Stagetimer.io:
Customizable Countdowns
Clear Visual Cues
Cons of Stagetimer.io:
Limited Advanced Features
Simplicity Might Limit Functionality
Online Stopwatch

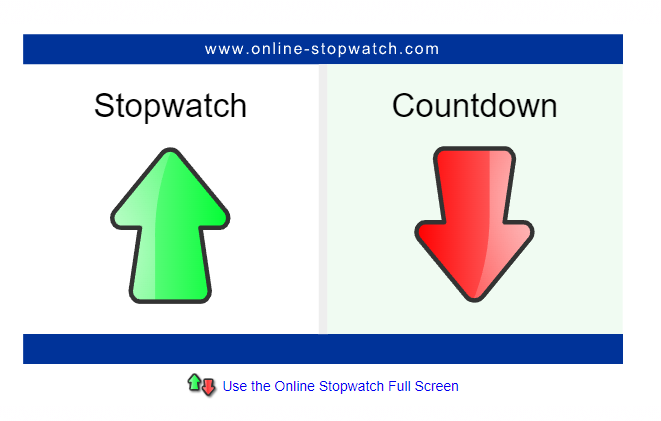
Online Stopwatch is a web-based tool designed to provide users with a simple and accessible means of tracking time, whether for personal use, presentations, or various activities. Offering both countdown and stopwatch functionalities, Online Stopwatch caters to users with diverse timing needs.
How to Use Online Stopwatch:
Step 1: Visit Online Stopwatch
Step 2: On the homepage, choose between "Countdown Timer" or "Stopwatch" based on your requirements.
Step 3: For the Countdown Timer, set your desired time duration and customize settings
Step 4: Click "Start" to initiate the timer.
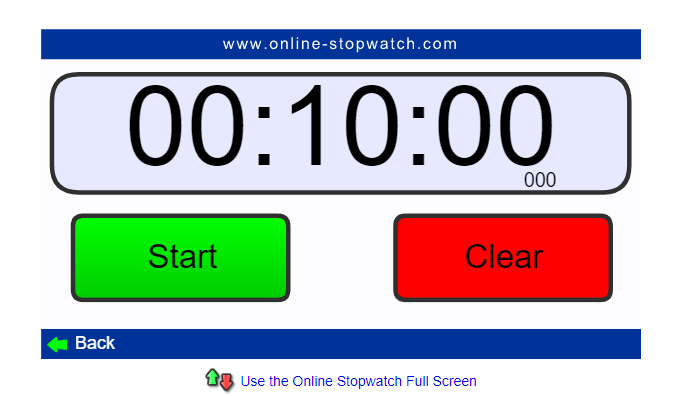
Step 5: For the Stopwatch, click "Start" to begin timing.
Pros of Online Stopwatch:
Simplicity and Ease of Use
Variety of Timer Options
Cons of Online Stopwatch:
Limited Customization
Less Advanced Features
How to Use Presentation Timer in Microsoft PowerPoint
Microsoft PowerPoint offers multiple methods to incorporate a presentation timer. In this article, we will go through two methods of how to use presentation timer in Microsoft PowerPoint, sharing a practical PowerPoint presentation tip to keep your presentations on track.
Method 1: Download Premade Timer Templates Online for Free
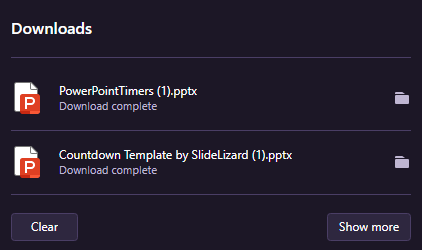
Download free timer templates from reputable sources like CBSD and SlideLizard. Let’s learn how to use these templates in your PowerPoint presentations.
Step 1: Visit and download the template source (CBSD PowerPoint Timers / Slidelizard)
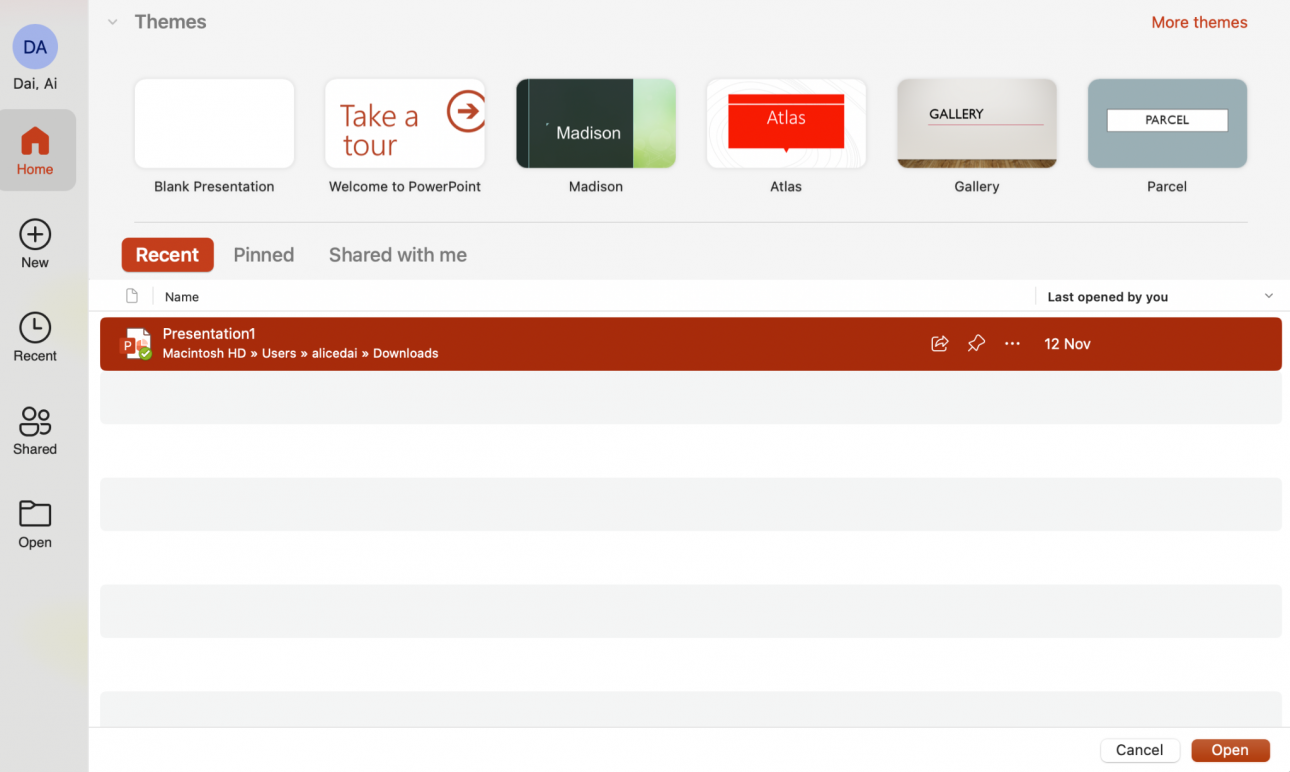
Step 2: Open the Microsoft Powerpoint
Step 3: Click the File tab in the top menu bar.
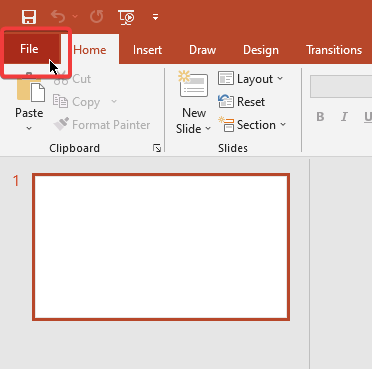
Step 4: Select Open from the drop-down menu
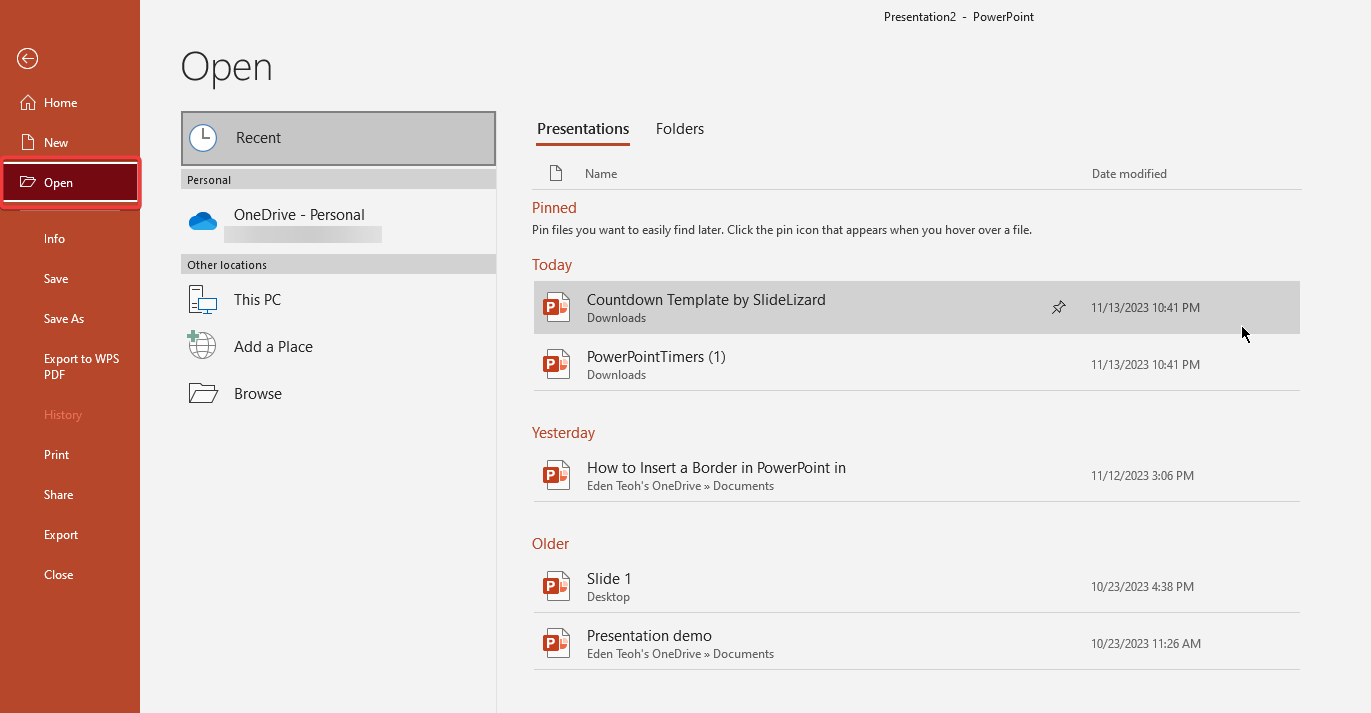
Step 5: Locate and open the downloaded timer template file on your computer

Step 6: Select the template you need and copy it

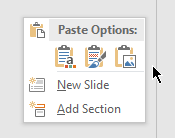
Step 7: Paste the slide to the Powerpoint
Step 8: Start the Timer During Your Presentation slideshow

Method 2: Use Free Timer Add-ins
Microsoft PowerPoint offers versatile options for incorporating presentation timers. Let’s learn how to use Add-ins in your PowerPoint presentations.
Step 1: Open the Powerpoint file that you want to add Timer
Step 2: Go to Insert tab in the top menu bar and locate Get Add-ins
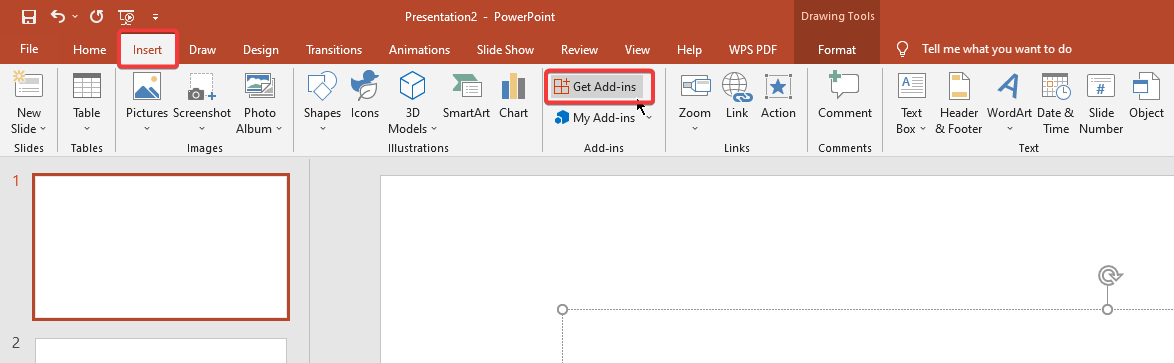
Step 3: Search for Timer in the search bar.
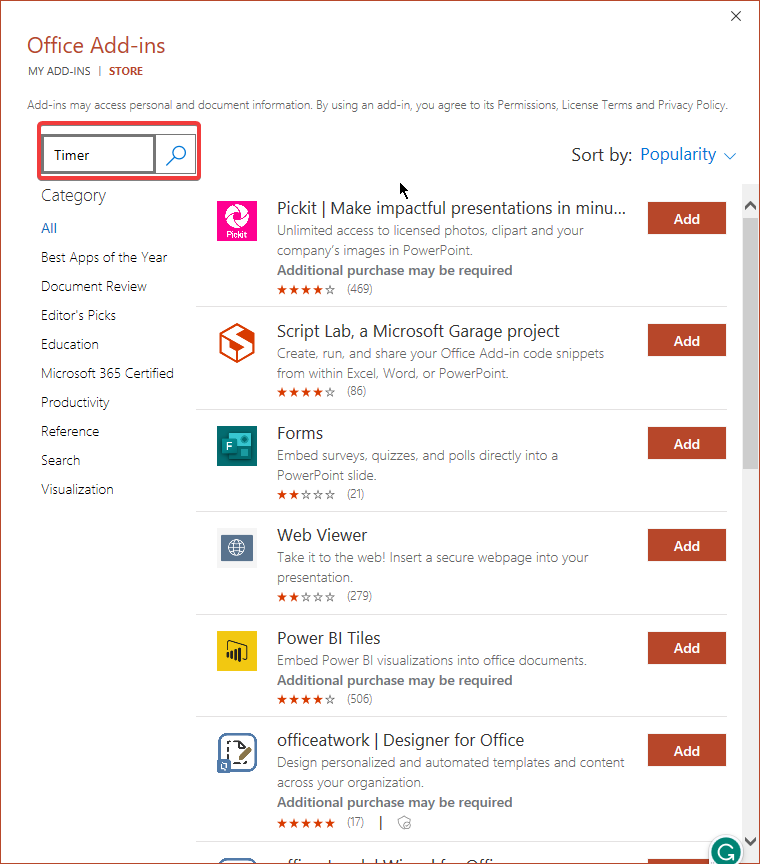
Step 4: Pick the best Timer that fit your own needs and click Add
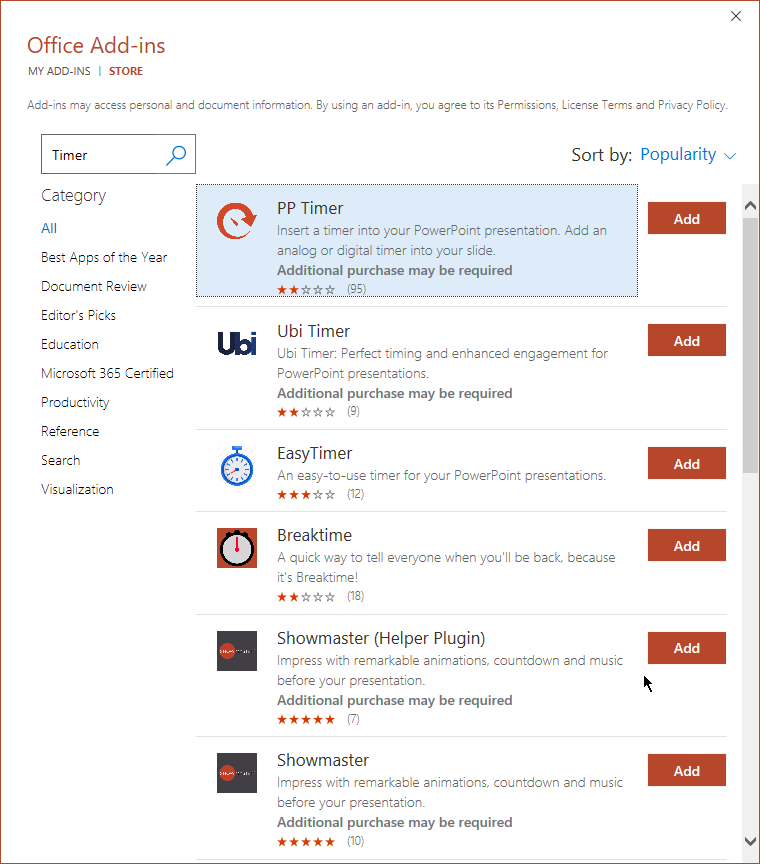
Congratulations, you can start to use the timer in your presentation slide. There are many choices of Timer that can be chosen. Here are my recommended Add-ins Timer, EasyTimer and Breaktime timer. Both timers have a clear and straightforward layout which can be easy to use.
EasyTimer


How to Create a Presentation Timer in Google Slides
Method 1: Embed a YouTube Countdown Video as a Timer
Step 1: Open your Google Slides presentation.
Step 2:Select the slide where you want to add the timer.
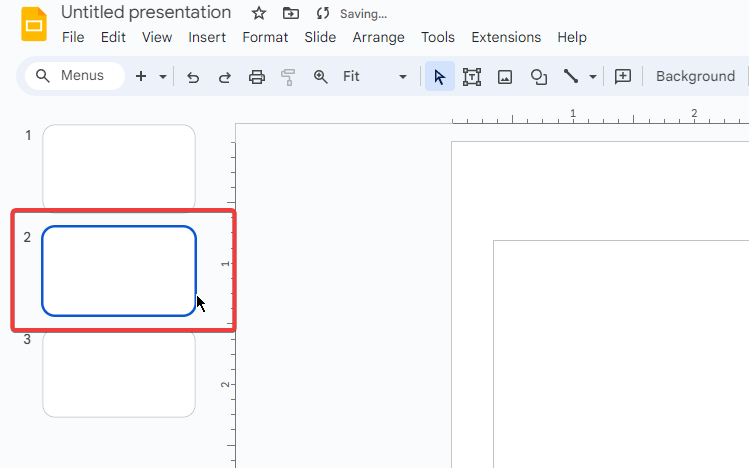
Step 3:Click the Insert tab in the top menu bar and click on Video

Step 4:In the Insert Video dialog box, choose the YouTube tab.

Step 6:Search for "countdown timer with second” and insert the wanted video

Step 8: Resize and position the video as desired on your slide.

Step 9:To start the timer during your presentation, click on the start video.
Method 2: Use Free Timer Add-ins Chrome Extension
Step 1: Go to Chrome Webstore and add the Slides Timer to Chrome

Step 2: Open your Google Slides presentation.
Step 3: Select the slide where you want to add the timer.
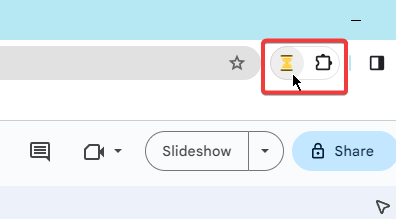
Step 4: Click the Slides Timer icon in the Chrome extensions bar.
Step 5: Enter the desired duration in the Set Timer dialog box.

Step 6: The timer will appear on your slide and count down visually.
Both methods have their advantages. A YouTube countdown video is a good option if you want a visually appealing and customizable timer. If you prefer a simple and easy-to-use timer, the Timer Add-ins Chrome extension is an excellent option.
Additional Tips:
You can add multiple timers to your presentation if needed.
You can mute the sound of the countdown timer if you prefer.
You can use the timer to manage your presentation time and keep yourself on track.
Best Free PowerPoint Presentation Software - WPS Presentation
What Is WPS Office?

Microsoft Office has been the market leader in office productivity software for decades, offering robust applications such as Word, Excel, and PowerPoint. However, with the rise of cloud-based solutions and the increasing demand for cost-effective options, free alternatives like WPS Office have gained popularity.
Why should you choose WPS Office as an alternative to Microsoft Office?
Here are the answer:
● Free to use Word, Excel, and PPT. Powerful PDF toolkit
● Rich template store, which contains variousfree and paid templates for Word, PPT, and Excel
● Rich functions
● The light weight of the product is only 200M, and it occupies a small amount of computer memory. It is suitable for Win7, 10, and 11
● The MAC version of WPS Office is very powerful. Microsoft office ignores the experience of mac users, which can be made up by wps office
● Supportonline documents (WPS AirPage), multi-person collaborative editing
● WPS office also supports Linux systems, Android, and ios systems. To use WPS office products on different systems, you only need to log in to the same account, and all files can be synchronized
WPS AI is an artificial intelligence (AI) writing assistant that can help you with tasks such as writing emails, generating content, and translating languages.
Key Features of WPS AI:
Smart Document Analysis:
WPS AI analyzes your documents to extract key information, identify writing patterns, and suggest improvements.
Efficient Formatting Assistant:
WPS AI simplifies document formatting tasks, saving you time and effort.
Intelligent Content Recommendations:
WPS AI goes beyond basic spell checking and grammar correction.
Benefits of Using WPS AI:
Enhanced Productivity
Improved Writing Quality
Simplified Formatting
Overall, WPS AI is a valuable addition to WPS Office, offering a range of AI-powered features such as WPS AI Writing, WPS AI PPT maker and WPS AI PDF that enhance productivity, improve writing quality, and simplify document formatting. Now you can already use the WPS AI function with no cost at all. How great is it! Really recommend you should try this NOW.
How to Add a Timer in WPS Presentation
Method 1: Using the Rehearse Timings feature
Step 1: Open the presentation that you want to add a timer to.

Step 2: Click the Slide Show tab and select Rehearse Timings

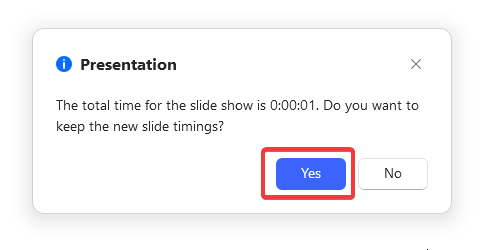
Step 3: Rehearse timing box will open and enter the amount of time in Slider time section

Step 4: Once you done the timer click yes to keep the slide timings
Congratulations, you have set up the timer for each slide. This is the easiest way to set up a timer for each slide.
Method 2: Using the Insert > Shapes > Timer menu option
Step 1: Open the presentation that you want to add a timer to.
Step 2: Click the Insert tab and select Icon Library or Shapes Option

Step 3: Search Timer in the search bar or create a shape you want to insert timer

Step 4: Resize and position the shape as needed and add text to indicate the time.

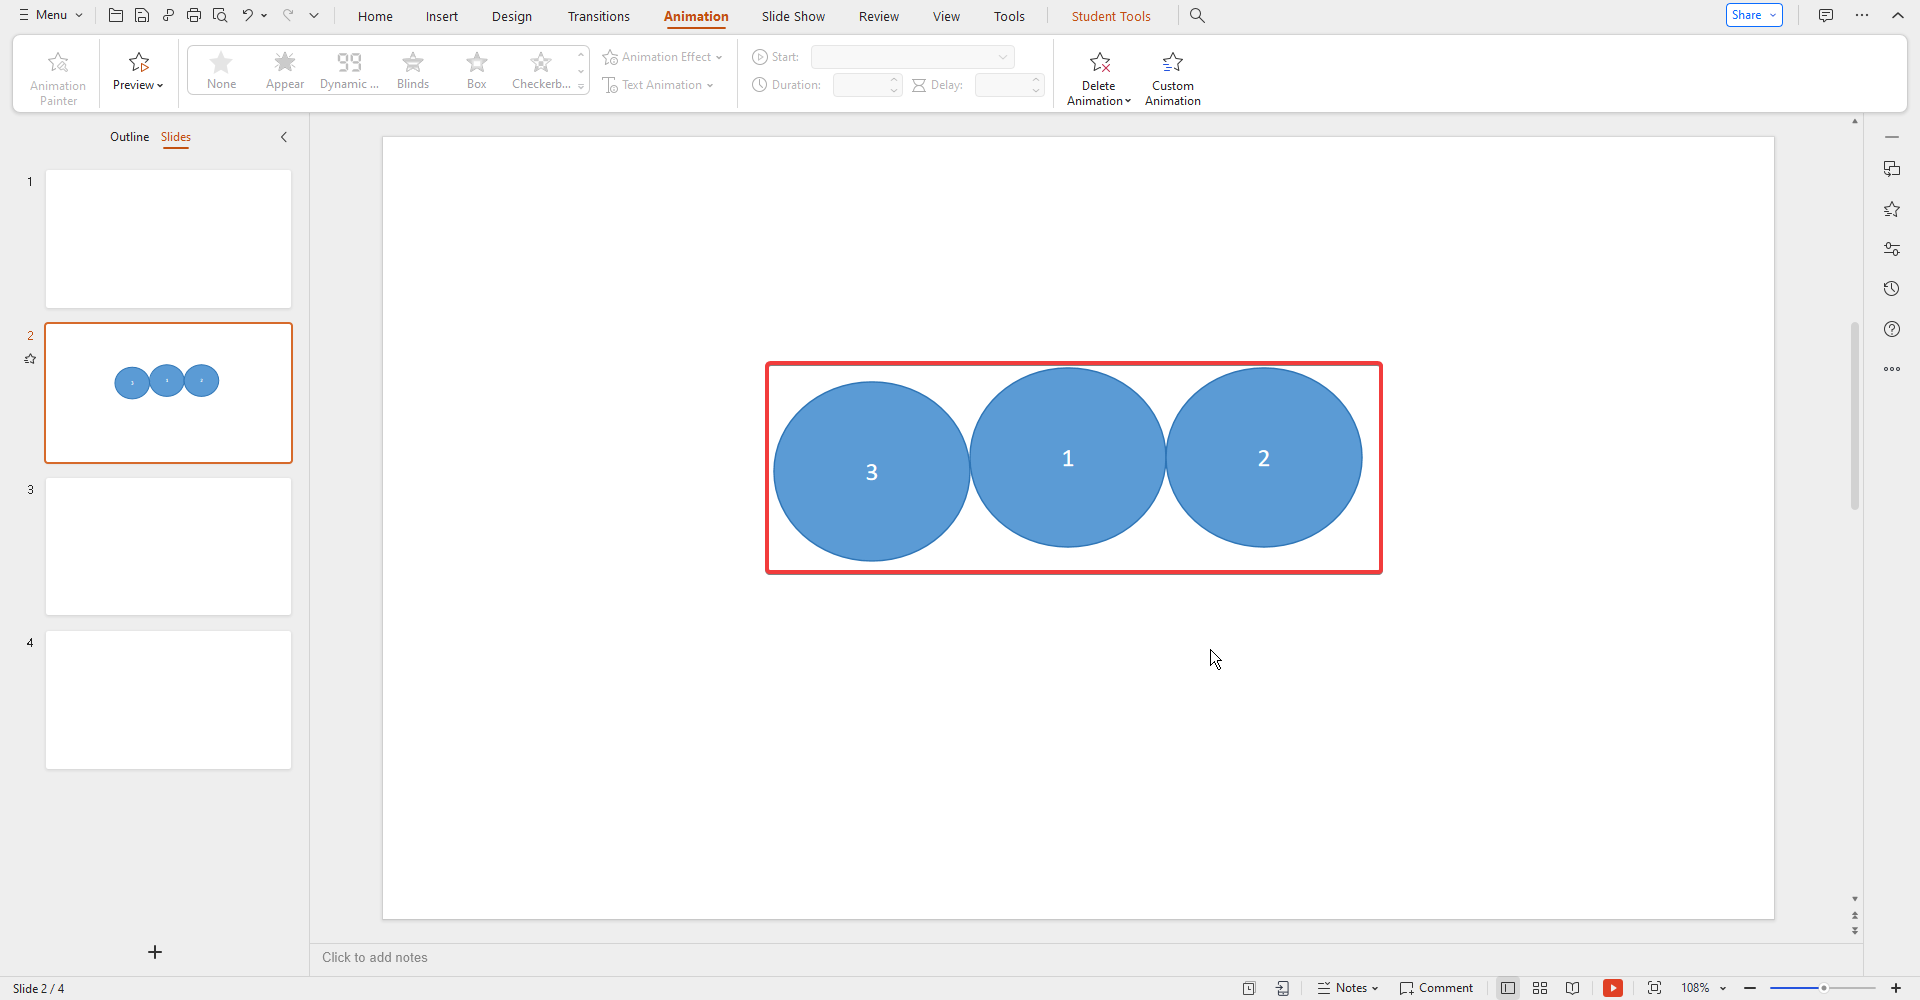
Step 5: Go to the Animation tab and select the entrance animation

Step 6: Adjust the duration, delay, etc according your preference

Step 7:
Duplicate the shape for each segment of the timer and adjust the text on each shape to represent different time intervals.
Step 8: Test the timer by start the slideshow


FAQs:
Q1: How do I make PowerPoint slides play automatically without clicking?
Open the PowerPoint presentation you want to set to play automatically.
Click the Slide Show tab in the top menu bar. In the Set Up group, click the Set Up Slide Show button.

In the Set Up Slide Show dialog box, select the Browsed by an individual (window) option under Show type. Check the Loop continuously until 'Esc' box to make the presentation loop. Click OK to apply the changes.

Q2: How to Add a Real-Time Clock to Your Presentation in PowerPoint
Open the PowerPoint presentation you want to add a real-time clock to.

Click the Insert tab in the top menu bar. In the Text group, click the Date & Time button.

In the Date and Time dialog box, select the desired format for the clock and click OK.

To make the clock update automatically, right-click on it and select Link to file. In the Link to File or URL dialog box, select the Update automatically when the file is opened and click OK.

Summary
This comprehensive guide walks you through the most popular presentation apps, including WPS Office, Google Slides, and PowerPoint. It ensures effective presentations by emphasizing WPS Office's user-friendly features, free usage, and advanced capabilities. The guide simplifies presentation timing by comparing user feedback and seamlessly adding timers. Users can improve their skills, with a focus on WPS Office, in just a few steps for a seamless and impactful presentation experience.

'%3e%3cpath%20d='M19.9911%204.11386V6.471H18.5894C18.0775%206.471%2017.7322%206.57814%2017.5536%206.79243C17.3751%207.00671%2017.2858%207.32814%2017.2858%207.75671V9.44421H19.9019L19.5536%2012.0871H17.2858V18.8639H14.5536V12.0871H12.2769V9.44421H14.5536V7.49779C14.5536%206.39064%2014.8632%205.53201%2015.4822%204.92189C16.1013%204.31177%2016.9257%204.00671%2017.9554%204.00671C18.8304%204.00671%2019.509%204.04243%2019.9911%204.11386Z'%20fill='%23333333'/%3e%3c/g%3e%3cdefs%3e%3cclipPath%20id='clip0_2938_8199'%3e%3crect%20width='16'%20height='16'%20fill='white'%20transform='translate(8%204.00671)'/%3e%3c/clipPath%3e%3c/defs%3e%3c/svg%3e)
'%3e%3cpath%20d='M17.5237%2010.7813L23.4811%204H22.0699L16.8949%209.88693L12.7648%204H8L14.2469%2012.9029L8%2020.0133H9.4112L14.8725%2013.7952L19.2352%2020.0133H24M9.92053%205.04213H12.0885L22.0688%2019.0224H19.9003'%20fill='%23333333'/%3e%3c/g%3e%3cdefs%3e%3cclipPath%20id='clip0_2938_8200'%3e%3crect%20width='16'%20height='16.0134'%20fill='white'%20transform='translate(8%204)'/%3e%3c/clipPath%3e%3c/defs%3e%3c/svg%3e)


