
'%3e%3cpath%20d='M8%200C12.4183%200%2016%203.58172%2016%208C16%2012.4183%2012.4183%2016%208%2016C3.58172%2016%200%2012.4183%200%208C0%203.58172%203.58172%200%208%200ZM11.6162%204.38379C11.2257%203.99337%2010.5927%203.99338%2010.2021%204.38379L8%206.58594L5.79785%204.38379C5.40732%203.99334%204.77429%203.99329%204.38379%204.38379C3.99331%204.77429%203.99335%205.40733%204.38379%205.79785L6.58594%208L4.38379%2010.2021C3.99348%2010.5927%203.99341%2011.2257%204.38379%2011.6162C4.77426%2012.0066%205.40734%2012.0065%205.79785%2011.6162L8%209.41406L10.2021%2011.6162C10.5927%2012.0066%2011.2257%2012.0067%2011.6162%2011.6162C12.0067%2011.2257%2012.0066%2010.5927%2011.6162%2010.2021L9.41406%208L11.6162%205.79785C12.0066%205.40735%2012.0066%204.77429%2011.6162%204.38379Z'%20fill='%23080E17'%20fill-opacity='0.46'/%3e%3c/g%3e%3cdefs%3e%3cclipPath%20id='clip0_3761_713'%3e%3crect%20width='16'%20height='16'%20fill='white'/%3e%3c/clipPath%3e%3c/defs%3e%3c/svg%3e)


'%3e%3cpath%20fill-rule='evenodd'%20clip-rule='evenodd'%20d='M21.4999%2010.9993C21.4999%205.20009%2016.7986%200.498901%2010.9993%200.498901C5.19994%200.498901%200.498657%205.20009%200.498657%2010.9993C0.498657%2016.2404%204.33858%2020.5844%209.35855%2021.3722V14.0346H6.69238V10.9993H9.35855V8.68594C9.35855%206.05427%2010.9262%204.60062%2013.3248%204.60062C14.4736%204.60062%2015.6753%204.80571%2015.6753%204.80571V7.38979H14.3512C13.0468%207.38979%2012.64%208.19921%2012.64%209.0296V10.9993H15.5523L15.0867%2014.0346H12.64V21.3722C17.66%2020.5844%2021.4999%2016.2404%2021.4999%2010.9993Z'%20fill='%231568EA'/%3e%3c/g%3e%3c/svg%3e)


Learning how to create tables is the essential foundation when beginning to use any spreadsheet software. To give you a solid start in honing your data management skills, we've prepared a comprehensive guide on how to create an Excel Table in WPS Office, giving you the confidence and know-how needed to navigate and organize information effectively.

What is WPS Office
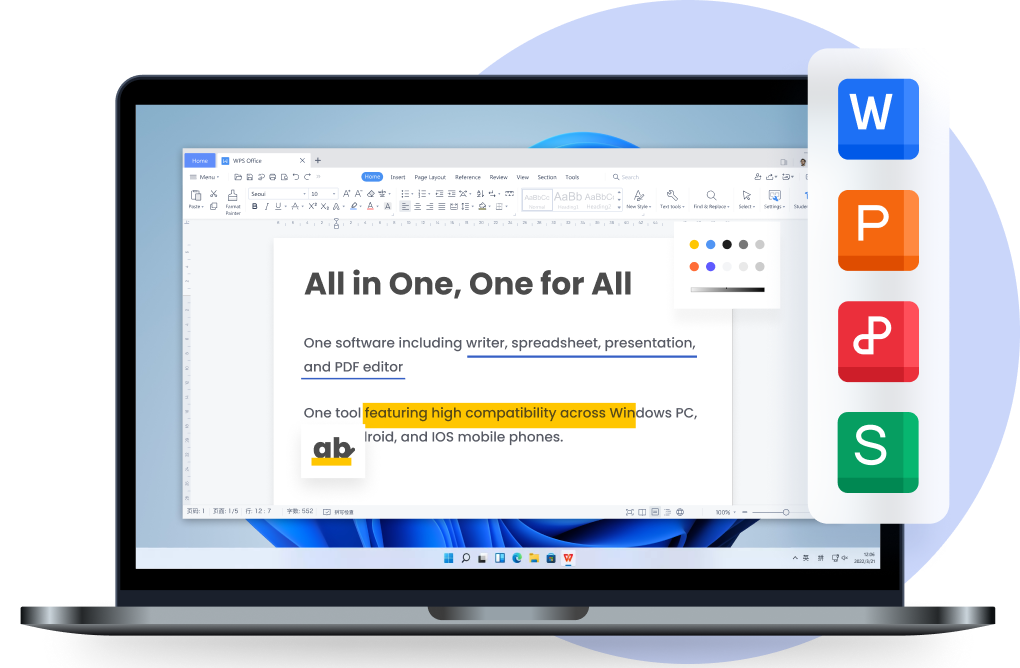
Similar to other productivity suites, WPS Office offers familiar tools such as Writer for document creation, Spreadsheet for data management, and Presentation for creating impactful slideshows. However, what sets WPS Office apart is its additional PDF tool, which offers extensive capabilities, including OCR (optical character recognition) and signature features.

What makes WPS Office truly unique is its integrated design. Unlike many other office suites, you don't need to open separate windows for each tool. Instead, everything can be accessed within a single window, making it a comprehensive all-in-one productivity suite. Moreover, WPS Office goes a step further by incorporating integrated AI, enhancing the overall productivity experience for users.
Ways to Create an Excel Table in WPS Office
Create a Simple Excel Table
In this section, we will learn how to insert an Excel table in WPS Office. Here’s how:
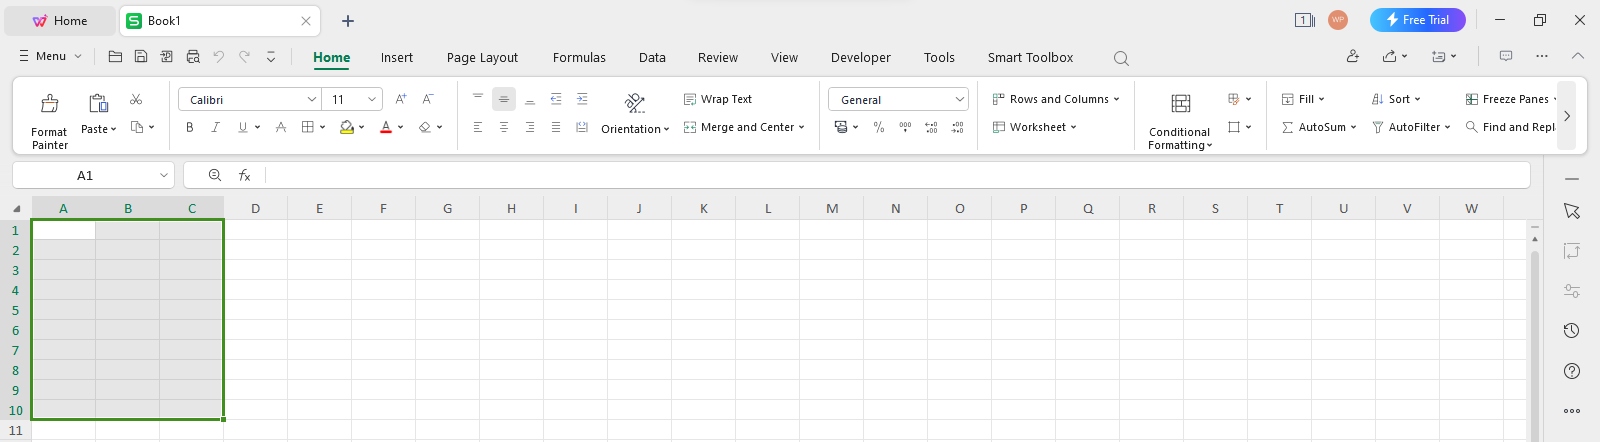
Step 1: Open WPS Office on your system and select “New” from the Sidebar menu.

Step 2: Visit the Sidebar menu again and select “Sheets” followed by “Blank” to create a new blank sheet in WPS Office

Step 3: Choose the range of cells you want for the table.
Step 4: Visit the “Insert” Tab and click on “Table” from the ribbon menu.

Step 5: Since we have already selected the range, press “OK” in the “Create Table” dialog box. Users can also select the range or alter the range in the “Create Table” dialog box.

Step 6: Once the table has been inserted, WPS Office allows easy handling of the data. In the first row of each column, labeled "Column 1-3", click the arrow at the bottom right corner to filter the column. For instance, you can sort data in column A in descending order by clicking the arrow in A1.

Step 7: Users can also change the colors of their table by simply visiting the “Table Tools” tab and selecting the color of their choice from the ribbon menu.

Create an Excel Table with Subcategories
To create a table with subcategories in WPS Office, we need a data set that contains the main categories and their subcategories.
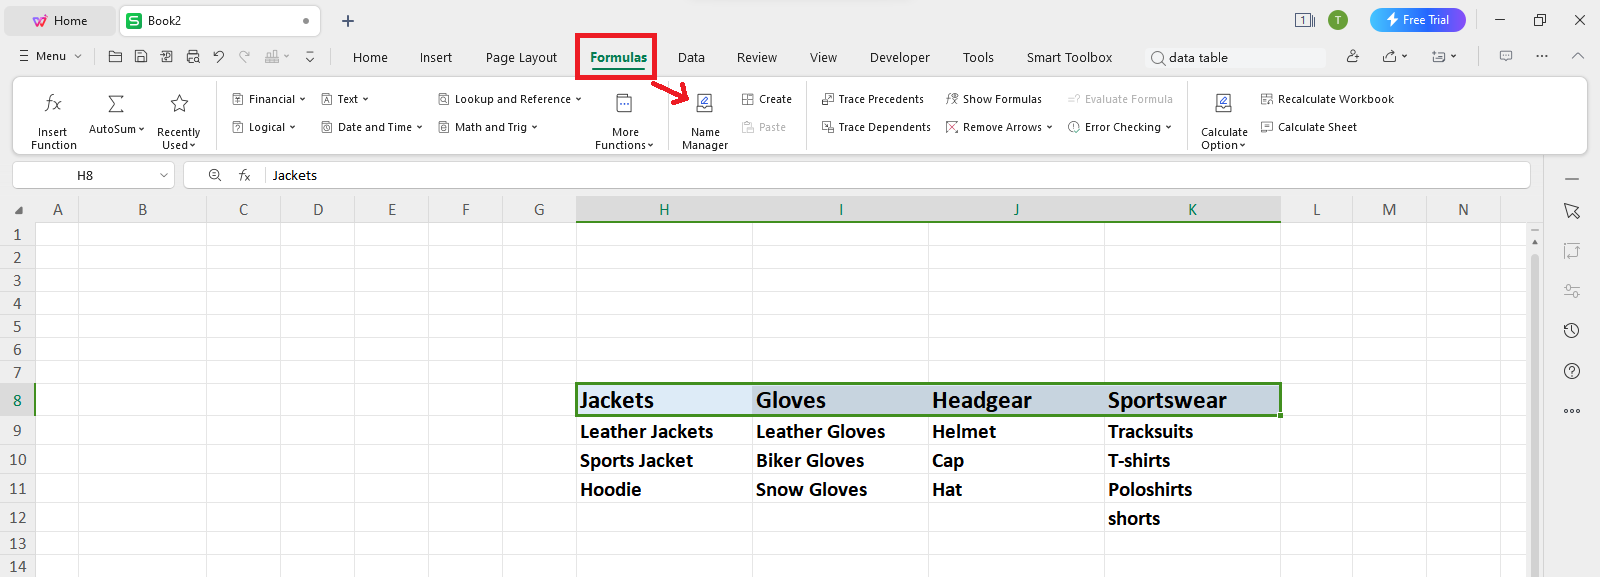
Let’s take the example of the store “Xfactor”. The store sells clothing goods, such as jackets, headgear, gloves, and sportswear. Here are the steps to create a table with subcategories for their products:
Step 1: Create a “MainItem” list. Navigate to the Formula tab, then pick “Name Manager”.
Step 2: Click on “New”.

Step 3: In the “Name” field, type “MainItem”. In the “Refer to” field, select the cells that contain the main items: H8:K8.

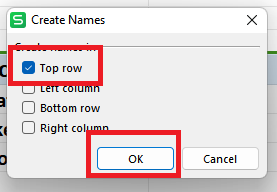
Step 4: To create the subcategories, select all the cells with Store data. Visit the Formula tab and select “Create”.

Step 5: Opt for “Top row” and press “OK”.
Step 6: Check the names of the main categories and subcategories. Access “Name Manager” to see all the lists.

Step 7: In cells A1 and A2, type Main Item and Subitem respectively.
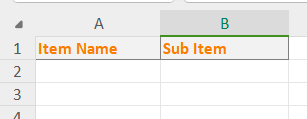
Step 8: To create a drop-down list for the main items, select the cells below A1. Go to the Data tab and select Validation.

Step 9: In the Data Validation window, select “List” for the “Allow” field. In the “Source” field, enter “=MainItem” and click “OK”.

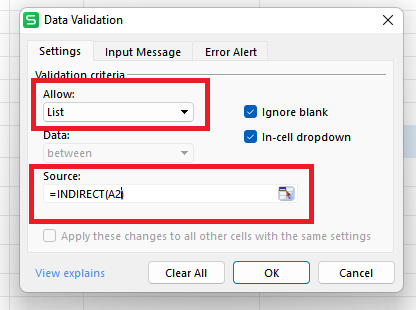
Step 10: To create a drop-down list for the “subitems”, select the cells below A2. Go to the Data tab and select “Validation” again.
Step 11: In the Data Validation window, select “List” for the “Allow” field. In the “Source” field, enter “=INDIRECT(A2)” and click OK.
You have created a table with subcategories in WPS Office. You can now select the main item and the sub-items under it from the drop-down lists. This makes stock management easier.


How to download WPS Office?
Step 1: Open the WPS Office website, and click the "Download" button at the screen center.

Step 2: To begin installing the WPS Office suite, double-click the downloaded file.

Step 3: Once the installation is finished, you will be able to utilize the WPS Office suite.

FAQs
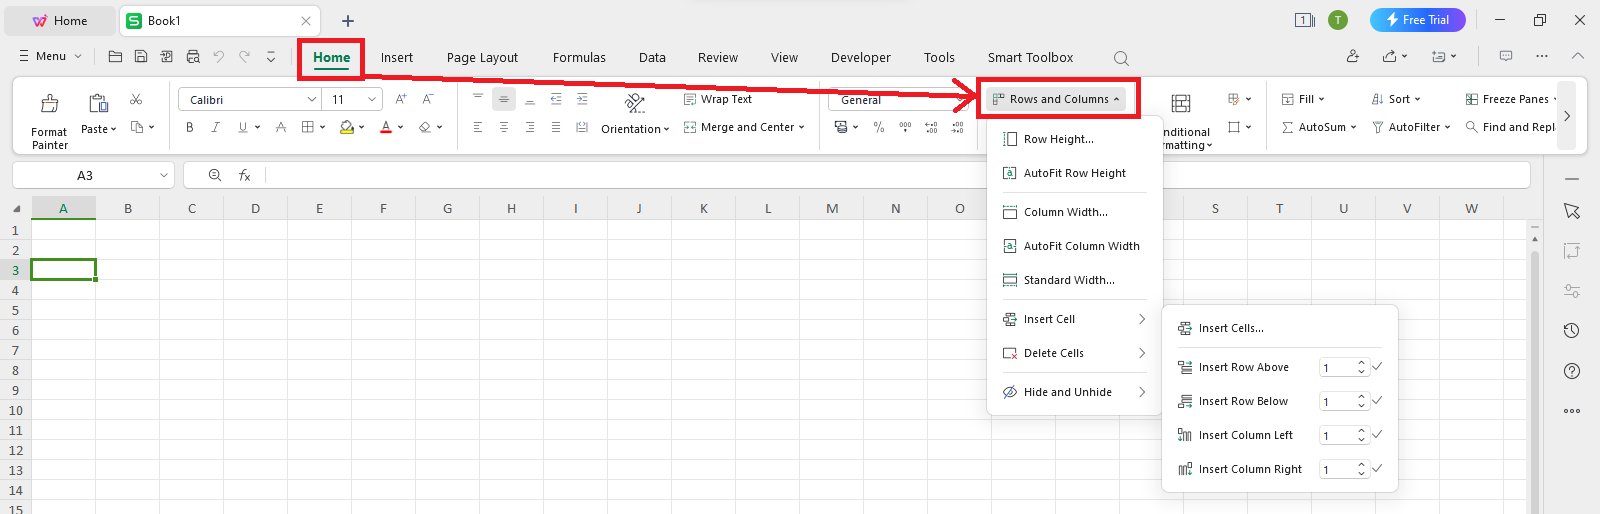
Q1. How do I make rows and columns in WPS?
To make rows and columns in WPS Spreadsheet, you can use the Rows and Columns tool in the Home tab. This tool can help you set the rows and columns of cells and make your work easier with WPS Spreadsheet.
Q2. How can I enhance the appearance of my Excel table in the WPS Office?
WPS Spreadsheet provides various formatting choices to improve the appearance of your Excel table. Fonts, cell colors, and borders may all be customized. This tool allows you to build visually stunning tables that improve the design of your page.
Q3. Is it possible to add a header row to my Excel table in WPS Office?
Yes, you can insert a header row into your Excel table in WPS Office. This function is beneficial since it allows you to assign names to your columns, making your data much more structured and understandable. With this effortless transformation, you immediately recognize the text of each column, improving the table's visibility and readability.
Q4. How can I resize columns and rows in an Excel table using the WPS office?
Resizing columns and rows in an Excel table is effortless in WPS Office. You can change the widths or heights of the columns or rows by clicking and dragging their border lines. This feature allows you to change the table arrangement, ensuring that your data fits precisely and is in an orderly pattern.
Master Table Creation in WPS Spreadsheets
In this article, you've gained valuable insights on how to create Excel tables in WPS Office. The process of how to create an Excel table in WPS Office is straightforward, and as you become more comfortable with it, you'll be well-prepared to delve into the array of advanced features that WPS Spreadsheet has to offer. Take a step forward by downloading WPS Office today to unlock its full potential.

'%3e%3cpath%20d='M19.9911%204.11386V6.471H18.5894C18.0775%206.471%2017.7322%206.57814%2017.5536%206.79243C17.3751%207.00671%2017.2858%207.32814%2017.2858%207.75671V9.44421H19.9019L19.5536%2012.0871H17.2858V18.8639H14.5536V12.0871H12.2769V9.44421H14.5536V7.49779C14.5536%206.39064%2014.8632%205.53201%2015.4822%204.92189C16.1013%204.31177%2016.9257%204.00671%2017.9554%204.00671C18.8304%204.00671%2019.509%204.04243%2019.9911%204.11386Z'%20fill='%23333333'/%3e%3c/g%3e%3cdefs%3e%3cclipPath%20id='clip0_2938_8199'%3e%3crect%20width='16'%20height='16'%20fill='white'%20transform='translate(8%204.00671)'/%3e%3c/clipPath%3e%3c/defs%3e%3c/svg%3e)
'%3e%3cpath%20d='M17.5237%2010.7813L23.4811%204H22.0699L16.8949%209.88693L12.7648%204H8L14.2469%2012.9029L8%2020.0133H9.4112L14.8725%2013.7952L19.2352%2020.0133H24M9.92053%205.04213H12.0885L22.0688%2019.0224H19.9003'%20fill='%23333333'/%3e%3c/g%3e%3cdefs%3e%3cclipPath%20id='clip0_2938_8200'%3e%3crect%20width='16'%20height='16.0134'%20fill='white'%20transform='translate(8%204)'/%3e%3c/clipPath%3e%3c/defs%3e%3c/svg%3e)


