
'%3e%3cpath%20d='M8%200C12.4183%200%2016%203.58172%2016%208C16%2012.4183%2012.4183%2016%208%2016C3.58172%2016%200%2012.4183%200%208C0%203.58172%203.58172%200%208%200ZM11.6162%204.38379C11.2257%203.99337%2010.5927%203.99338%2010.2021%204.38379L8%206.58594L5.79785%204.38379C5.40732%203.99334%204.77429%203.99329%204.38379%204.38379C3.99331%204.77429%203.99335%205.40733%204.38379%205.79785L6.58594%208L4.38379%2010.2021C3.99348%2010.5927%203.99341%2011.2257%204.38379%2011.6162C4.77426%2012.0066%205.40734%2012.0065%205.79785%2011.6162L8%209.41406L10.2021%2011.6162C10.5927%2012.0066%2011.2257%2012.0067%2011.6162%2011.6162C12.0067%2011.2257%2012.0066%2010.5927%2011.6162%2010.2021L9.41406%208L11.6162%205.79785C12.0066%205.40735%2012.0066%204.77429%2011.6162%204.38379Z'%20fill='%23080E17'%20fill-opacity='0.46'/%3e%3c/g%3e%3cdefs%3e%3cclipPath%20id='clip0_3761_713'%3e%3crect%20width='16'%20height='16'%20fill='white'/%3e%3c/clipPath%3e%3c/defs%3e%3c/svg%3e)


'%3e%3cpath%20fill-rule='evenodd'%20clip-rule='evenodd'%20d='M21.4999%2010.9993C21.4999%205.20009%2016.7986%200.498901%2010.9993%200.498901C5.19994%200.498901%200.498657%205.20009%200.498657%2010.9993C0.498657%2016.2404%204.33858%2020.5844%209.35855%2021.3722V14.0346H6.69238V10.9993H9.35855V8.68594C9.35855%206.05427%2010.9262%204.60062%2013.3248%204.60062C14.4736%204.60062%2015.6753%204.80571%2015.6753%204.80571V7.38979H14.3512C13.0468%207.38979%2012.64%208.19921%2012.64%209.0296V10.9993H15.5523L15.0867%2014.0346H12.64V21.3722C17.66%2020.5844%2021.4999%2016.2404%2021.4999%2010.9993Z'%20fill='%231568EA'/%3e%3c/g%3e%3c/svg%3e)


In the fast-paced world of document sharing and collaboration, safeguarding your valuable data is paramount. However, the task of making an Excel file read only can be perplexing for some. If you find yourself grappling with this question, worry not! This comprehensive guide will lead you through the process, empowering you to protect your files effortlessly and ensure your data remains unaltered. Let's delve into the journey of making an Excel file read only and unlock the key to secure document management.
Part 1:What is read-only in Excel?

When working with Excel files, you may come across the term "Read-Only." Understanding what it means is crucial for effective file management. A Read-Only Excel file is one that can be viewed but not edited or modified. This feature ensures that the content remains unchanged, making it ideal for sharing with others or providing reference materials.
Understanding what Read-Only means in Excel empowers you to control the access and editing permissions of your files effectively. By following this simple step-by-step tutorial, you can ensure the security and integrity of your Excel documents when sharing or distributing them to others.
Part 2: Step-by-step to make an Excel file read-only
Making an Excel file read-only is an effective way to prevent unauthorized changes to your spreadsheet data while still allowing others to view its contents. This security measure ensures the integrity of your data and protects sensitive information from accidental or intentional alterations. In this step-by-step guide, we will walk you through the process of making an Excel file read-only using Microsoft Excel, a widely used spreadsheet application.
To get a better grasp of Read-Only in Excel, follow this step-by-step tutorial:
Step 1: Open the Excel file you want to make read-only.
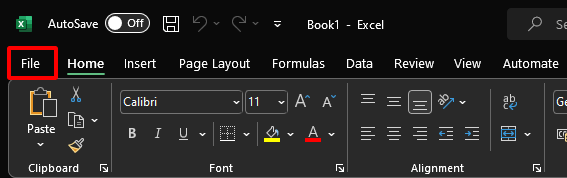
Step 2: Click on "File" in the top-left corner.
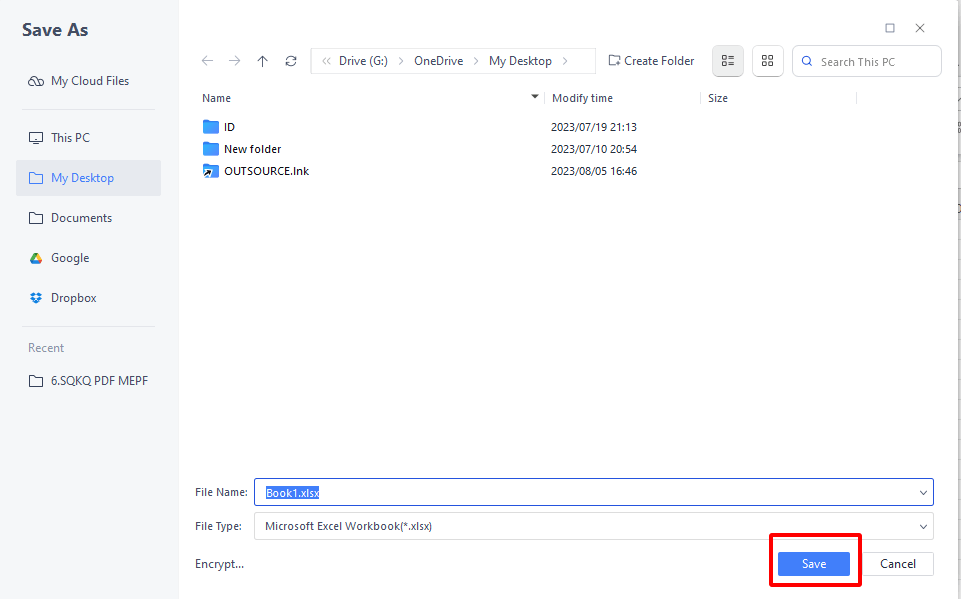
Step 3: Select "Save As" from the options.

Step 4: Choose the location to save the file and give it a new name if needed.

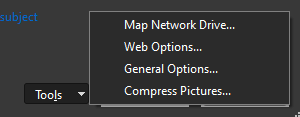
Step 5: Click on "Tools" at the bottom-right corner and choose "General Options."
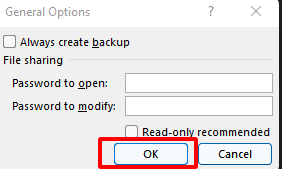
Step 6: Check the "Read-only recommended" box.

Step 7: Optionally, set a password for added security.
Step 8: Click "OK" and then "Save" to save the file as read-only.
By following these straightforward steps, Your Excel file is now read-only, ensuring that others can only view the content while preventing any unauthorized modifications. This step-by-step guide helps you maintain the integrity of your data and exercise control over who can edit your spreadsheet, enhancing security and data protection.
Tip: To further protect your read-only Excel file, consider using strong password protection. By setting a password for the workbook or individual sheets, you can prevent unauthorized access even if someone attempts to remove the read-only restriction. Make sure to use a complex password with a mix of letters, numbers, and special characters to enhance security. Additionally, keep the password safe and share it only with trusted individuals who need access to the file. This extra layer of protection adds an additional level of security to your important spreadsheet data.
Part 3: How to edit your Excel documents for Free?

WPS Office is a powerful and free office suite that allows you to open, create, edit, and save Microsoft Office files, including Word, Excel, and PowerPoint. It offers full compatibility with both Windows and Mac platforms, providing a user-friendly alternative to expensive office software.
Here are the key features of WPS Office in a simple list:
Word Processing (WPS Writer)
Spreadsheet Management (WPS Spreadsheets)
Presentation Creation (WPS Presentation)
Cloud Support and Sync
PDF Editing and Conversion
Cross-platform Compatibility
Collaboration and Sharing
Free Version with No Subscription Fees
User-friendly Interface
Extensive File Format Support
Follow these simple steps to edit your Excel documents for free:
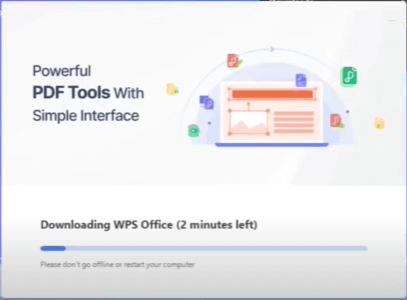
Step 1: Download and Install WPS Office from the official website.
Step 2: Launch WPS Office and click on "Spreadsheets" to open the Excel application.

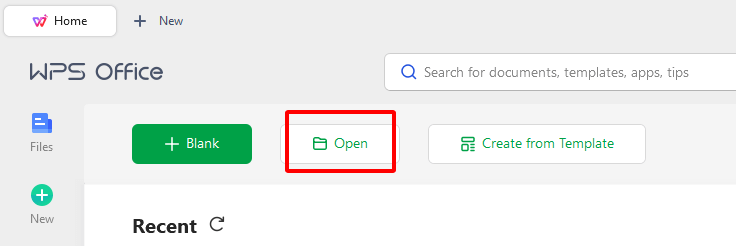
Step 3: Open the desired Excel file by clicking on "Open" and selecting the file from your computer.
Step 4: Edit the Excel file by making changes, formatting, or calculations as needed.
Step 5: Save your edits by clicking on "File" and then "Save."

Optional Step 6: Choose a compatible file format by clicking on "Save As" if you need to share the file with Microsoft Office users.
Step 7: Enter a new name and save the file to your preferred location.
Downloading WPS Office is quick and easy. Follow these simple steps:
Step 1: Go to the official WPS Office website at [https://www.wps.com/].
Step 2: Look for the "Download" or "Get WPS Office" button on the website's homepage.

Step 3: Click on the button to initiate the download process.
Step 4: Choose the appropriate version for your device (Windows, macOS, Android, or iOS).
Step 5: Wait for the download to complete. The time may vary based on your internet connection speed.

Step 6: Once the download is finished, open the installation file.
Step 7: Follow the on-screen instructions to install WPS Office on your device.
Step 8: Launch WPS Office after installation.
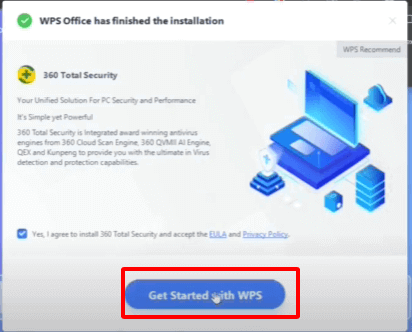
Congratulations! WPS Office has been successfully downloaded and installed.. Start enjoying the convenience and power of this modern office suite for all your document needs.
With WPS Office, you can seamlessly edit your Word, Excel, and PowerPoint documents for free. Its compatibility with Windows and Mac, along with its comprehensive features, makes it an excellent choice for efficient document editing and management without the need for expensive software


FAQS:
How To Protect a Document Using the Protect Workbook ?
To protect an Excel document using the "Protect Workbook" feature, follow these simple steps:
Step 1: Open the Excel Document.
Step 2: In the “File” menu, choose “Protect Workbook.”
Step 3: Choose "Protect Structure and Windows" or "Protect Current Sheet" (Optional).
Step 4: Set a Password (Optional).
Step 5: Click "OK" to apply the protection.
Step 6: Save the protected workbook.
By following these steps, you can easily protect your Excel document from unwanted changes, ensuring data integrity and security when sharing or collaborating.
Can You Create A Read-Only Excel File Without A Password?
Yes, you can make an Excel file read-only without using a password. Simply utilize Excel’s “Mark as Final” function. It indicates that the document is complete and should not be edited. When you mark a file as final, it becomes read-only when opened by others. They can view the content but can't make changes. Keep in mind that this method is not as secure as using a password for protection.
Summary
The article provides a comprehensive guide on how to make an Excel file read-only and protect it from unwanted changes. It explains the concept of read-only in Excel and offers step-by-step tutorials with images for marking an Excel file as read-only. Additionally, it highlights the benefits of using WPS Office, a free and compatible alternative for editing Microsoft Office files on Windows and Mac. By following the instructions, users can easily safeguard their important data and efficiently manage their Excel documents, all while emphasizing the advantages of using WPS Office for a seamless editing experience.

'%3e%3cpath%20d='M19.9911%204.11386V6.471H18.5894C18.0775%206.471%2017.7322%206.57814%2017.5536%206.79243C17.3751%207.00671%2017.2858%207.32814%2017.2858%207.75671V9.44421H19.9019L19.5536%2012.0871H17.2858V18.8639H14.5536V12.0871H12.2769V9.44421H14.5536V7.49779C14.5536%206.39064%2014.8632%205.53201%2015.4822%204.92189C16.1013%204.31177%2016.9257%204.00671%2017.9554%204.00671C18.8304%204.00671%2019.509%204.04243%2019.9911%204.11386Z'%20fill='%23333333'/%3e%3c/g%3e%3cdefs%3e%3cclipPath%20id='clip0_2938_8199'%3e%3crect%20width='16'%20height='16'%20fill='white'%20transform='translate(8%204.00671)'/%3e%3c/clipPath%3e%3c/defs%3e%3c/svg%3e)
'%3e%3cpath%20d='M17.5237%2010.7813L23.4811%204H22.0699L16.8949%209.88693L12.7648%204H8L14.2469%2012.9029L8%2020.0133H9.4112L14.8725%2013.7952L19.2352%2020.0133H24M9.92053%205.04213H12.0885L22.0688%2019.0224H19.9003'%20fill='%23333333'/%3e%3c/g%3e%3cdefs%3e%3cclipPath%20id='clip0_2938_8200'%3e%3crect%20width='16'%20height='16.0134'%20fill='white'%20transform='translate(8%204)'/%3e%3c/clipPath%3e%3c/defs%3e%3c/svg%3e)


