
'%3e%3cpath%20d='M8%200C12.4183%200%2016%203.58172%2016%208C16%2012.4183%2012.4183%2016%208%2016C3.58172%2016%200%2012.4183%200%208C0%203.58172%203.58172%200%208%200ZM11.6162%204.38379C11.2257%203.99337%2010.5927%203.99338%2010.2021%204.38379L8%206.58594L5.79785%204.38379C5.40732%203.99334%204.77429%203.99329%204.38379%204.38379C3.99331%204.77429%203.99335%205.40733%204.38379%205.79785L6.58594%208L4.38379%2010.2021C3.99348%2010.5927%203.99341%2011.2257%204.38379%2011.6162C4.77426%2012.0066%205.40734%2012.0065%205.79785%2011.6162L8%209.41406L10.2021%2011.6162C10.5927%2012.0066%2011.2257%2012.0067%2011.6162%2011.6162C12.0067%2011.2257%2012.0066%2010.5927%2011.6162%2010.2021L9.41406%208L11.6162%205.79785C12.0066%205.40735%2012.0066%204.77429%2011.6162%204.38379Z'%20fill='%23080E17'%20fill-opacity='0.46'/%3e%3c/g%3e%3cdefs%3e%3cclipPath%20id='clip0_3761_713'%3e%3crect%20width='16'%20height='16'%20fill='white'/%3e%3c/clipPath%3e%3c/defs%3e%3c/svg%3e)


'%3e%3cpath%20fill-rule='evenodd'%20clip-rule='evenodd'%20d='M21.4999%2010.9993C21.4999%205.20009%2016.7986%200.498901%2010.9993%200.498901C5.19994%200.498901%200.498657%205.20009%200.498657%2010.9993C0.498657%2016.2404%204.33858%2020.5844%209.35855%2021.3722V14.0346H6.69238V10.9993H9.35855V8.68594C9.35855%206.05427%2010.9262%204.60062%2013.3248%204.60062C14.4736%204.60062%2015.6753%204.80571%2015.6753%204.80571V7.38979H14.3512C13.0468%207.38979%2012.64%208.19921%2012.64%209.0296V10.9993H15.5523L15.0867%2014.0346H12.64V21.3722C17.66%2020.5844%2021.4999%2016.2404%2021.4999%2010.9993Z'%20fill='%231568EA'/%3e%3c/g%3e%3c/svg%3e)


Excel graphs are vital for data analysis and presentation, and they offer several ways to display and emphasize data based on individual needs. Adding a vertical line to your Excel graph helps highlight important data points. Adding a vertical line in Excel graph is easy, even for Excel beginners. A vertical line on a graph can highlight a value, show a trend or event, or enhance your presentation. This tutorial will teach how to utilize Excel charts confidently.
Introduction
Excel lets users create beautiful, informative graphs, charts, and presentations for data analysis and display. Excel allows this. If one is unfamiliar with charting methods, it may be difficult to emphasize important data.
An Excel graph with a vertical line looks beautiful and adds information. It's a simple way to highlight a target value or threshold and provide your viewers more information. This simple approach works.
This video shows how to add a vertical line to any Excel graph to boost data visualization and graph power. Please sit, put your feet up, and let's begin!
Function of Adding Vertical Lines to Excel Graph
Vertical lines in Excel graphs have many benefits. Highlighting data points on the graph is crucial. Vertical lines help viewers distinguish significant numbers.
Vertical lines also make it easy to compare different time periods, categories, or data groups. Vertical lines help Excel graphs look better and read better, making data easier to interpret.
Excel graphs' visual aspects are crucial to spreadsheet performance. Colors, charts, and graphs are examples. Visual aids help people understand complex material faster than text alone.
Excel graphs using color and graphics help simplify big data sets. For example, precise axis labels and chart titles help readers understand the information. Strategically using graphic elements can improve data communication and make it more engaging.
How To Include a Vertical Lines in Excel Graph
Step 1
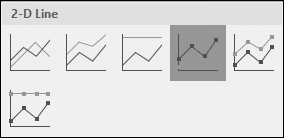
Simply clicking on a chart will allow you to select it. After that, a tab labeled "Chart Tools" will show up on the menu bar.
Step 2
Select the data point that will serve as the starting point for the vertical line. Once you have selected the chart, the next step is to determine which data point will be added to the vertical line in an Excel graph. Simply clicking on a data point will allow you to choose it.
Pick the one that best fits your needs; the starting point for your vertical line will be the selected data point.
Step 3
Add a new data series to the spreadsheet. After choosing the "Design" option, proceed to add a new data series by clicking the "Select Data" button. To include a new data series, open the "Select Data Source" dialogue box and select "Add" from the menu.
After giving the series a name, you may close the dialogue box by clicking the "OK" button.
Step 4
To change the type of graph displayed, you need to click on the new data series in the chart. Use your mouse's right-click menu to choose "Change Series Chart Type."
Choose "Line" from the drop-down menu in the "Change Chart Type" dialogue box, and then click "OK" to exit that box.

Step 5
To add the vertical line, you will need to click on the new data series. Use your mouse's right-click menu to pick "Add Data Labels." As a direct consequence of this action, data labels will be included at the very end of your line.
After that, click on the data label that corresponds to the location where the vertical line in an Excel graph will be inserted to make it the active selection. Use your mouse's right-click menu to pick "Format Data Labels."
Choose "Value from Cells" from the drop-down menu in the "Format Data Labels" dialogue box, and then choose the cell that has the value you want for your vertical line.

Step 6
After you have added the vertical line, you are free to format it anyway you would like. You need to change the color of the line as well as its style and thickness. This is something that may be done through the "Format Data Series" dialogue box.
To bring up this dialogue box, click the right mouse button on the newly added data series, then click the option labeled "Format Data Series." After that, the vertical line can be changed in order to add effects such as shine or shadow.
If you are satisfied with the changes you made, you can exit this dialogue box by clicking the "OK" button.


How to Add Vertical Line in Excel Graph Scatter Plot
Adding a vertical line to an Excel graph scatter plot can be accomplished in a few simple steps.
Step 1
Select the chart and go to the "Design" tab on the toolbar
Step 2
Click on the "Add Chart Element" button, followed by "Lines" and then "Vertical Line." A vertical line will appear in your chart, but it will be positioned at the center of the chart by default.
Step 3
To position the line to the value you want to highlight, right-click on the line and select "Format Data Series." In the "Format Data Series" pane, switch to the "Series Options" tab and select "Secondary Axis."

Step 4
Input the value you want to highlight and the line will move to that position. This will help to visually highlight the value you want to emphasize on your scatter plot and make it easier for your audience to interpret the data.
How to Add Vertical Line in Excel Graph on Mac
Adding a vertical line to an Excel graph on a Mac is an easy process that can significantly increase the visual appeal and informativeness of your work.
Step 1
Firstly, you need to select the column chart that you wish to add the vertical line to.
Step 2
Next, choose the value in the chart where you want to add the vertical line. Once you have selected the value, go to the "Insert" tab on the top menu and click on the "Shapes" icon to find the line option. Hold down the shift key and draw a straight line from the top to the bottom of the chart to create the vertical line.
Step 3
Right-click on the line and select the "Format Shape" option to customize the color, width, and style of the line.
Step 4
Finally, adjust the position of the line to align it with the desired value on the chart. By following these straightforward steps, you can make your Excel graph more visually appealing and informative.

WPS Spreadsheet - The Best Free Office Suite
WPS Spreadsheet, a free office suite, makes spreadsheet editing easy and fun. Its intuitive graphical user interface makes it easy to use for novices.
Pivot tables, graphing, and conditional formatting help users analyze complex data.
WPS Spreadsheet can also import and export data and is compatible with Microsoft Excel. It also has templates for finance, education, and healthcare, which might help users in these fields. Download it now to see!
WPS Spreadsheet supports Windows, macOS, iOS, and Android. Free here. Thus, it is recommended for everyone seeking a free, user-friendly spreadsheet tool. If you wisely download the WPS Spreadsheet, you can save time, effort, and money.
FAQs
How do I get a vertical axis line in Excel?
Excel requires you to choose the data series before adding a line to the vertical axis.
Step 1 After you have selected your data, select "Chart Tools" from the menu that appears at the very top of the screen.
Step 2 On the menu, you should look for an option that's labeled "Add Element."
Step 3 Make your selection under "Vertical Line."
You are now free to structure the line in any way you like and position it anywhere on the chart you choose. It is important to keep in mind that the vertical line function is only available in certain kinds of charts, such as line, scatter, and radar charts.
How do I insert a horizontal line in Excel?
Excel's process for adding horizontal and vertical lines follows a very similar procedure. First, determine which of the data series you want to include the line in.
Step 1 Navigate to the "Chart Tools" menu and select "Add Element" from the available options there.
Step 2 This time, select the "Horizontal Line" option. It will be possible to view options for adjusting the position of the line as well as its formatting.
When dividing a chart into various parts, such as in a histogram, using horizontal lines is an effective method for drawing attention to particular values within the chart.
How do I add a vertical line between columns in Excel?
When comparing multiple data sets, the vertical line in an Excel graph could prove to be helpful. To get started, select the column chart that will get an additional vertical line added to it. After that, select the column that contains the position where the line ought to start and click on it.
Step 1 Navigate to the "Chart Tools" menu and select "Format Data Series." This will bring you a list of available formatting options.
Step 2 Navigate to "Series Options" in the panel by scrolling down and adjusting the chart's gap width until there is sufficient room between the columns for the vertical line to fit.
This may be done by adjusting the chart's gap width. The line can then be formatted in the manner of your choosing once you have selected it and made modifications to its color, thickness, and other features.
Summary
A vertical line in an Excel graph can enhance its visual appeal and highlight key data points. Despite the initial difficulty, anyone can add a vertical line to Excel graphs by following a few simple steps.
Users can utilize WPS Office to highlight key figures, trends, or changes in their data, making it more visually appealing and graphical. Finally, adding vertical lines to an Excel graph can help users get more data and make better decisions.
Data visualization allows this. These simple tutorials can help anyone comprehend data analysis and add vertical lines to Excel graphs.

'%3e%3cpath%20d='M19.9911%204.11386V6.471H18.5894C18.0775%206.471%2017.7322%206.57814%2017.5536%206.79243C17.3751%207.00671%2017.2858%207.32814%2017.2858%207.75671V9.44421H19.9019L19.5536%2012.0871H17.2858V18.8639H14.5536V12.0871H12.2769V9.44421H14.5536V7.49779C14.5536%206.39064%2014.8632%205.53201%2015.4822%204.92189C16.1013%204.31177%2016.9257%204.00671%2017.9554%204.00671C18.8304%204.00671%2019.509%204.04243%2019.9911%204.11386Z'%20fill='%23333333'/%3e%3c/g%3e%3cdefs%3e%3cclipPath%20id='clip0_2938_8199'%3e%3crect%20width='16'%20height='16'%20fill='white'%20transform='translate(8%204.00671)'/%3e%3c/clipPath%3e%3c/defs%3e%3c/svg%3e)
'%3e%3cpath%20d='M17.5237%2010.7813L23.4811%204H22.0699L16.8949%209.88693L12.7648%204H8L14.2469%2012.9029L8%2020.0133H9.4112L14.8725%2013.7952L19.2352%2020.0133H24M9.92053%205.04213H12.0885L22.0688%2019.0224H19.9003'%20fill='%23333333'/%3e%3c/g%3e%3cdefs%3e%3cclipPath%20id='clip0_2938_8200'%3e%3crect%20width='16'%20height='16.0134'%20fill='white'%20transform='translate(8%204)'/%3e%3c/clipPath%3e%3c/defs%3e%3c/svg%3e)


