
'%3e%3cpath%20d='M8%200C12.4183%200%2016%203.58172%2016%208C16%2012.4183%2012.4183%2016%208%2016C3.58172%2016%200%2012.4183%200%208C0%203.58172%203.58172%200%208%200ZM11.6162%204.38379C11.2257%203.99337%2010.5927%203.99338%2010.2021%204.38379L8%206.58594L5.79785%204.38379C5.40732%203.99334%204.77429%203.99329%204.38379%204.38379C3.99331%204.77429%203.99335%205.40733%204.38379%205.79785L6.58594%208L4.38379%2010.2021C3.99348%2010.5927%203.99341%2011.2257%204.38379%2011.6162C4.77426%2012.0066%205.40734%2012.0065%205.79785%2011.6162L8%209.41406L10.2021%2011.6162C10.5927%2012.0066%2011.2257%2012.0067%2011.6162%2011.6162C12.0067%2011.2257%2012.0066%2010.5927%2011.6162%2010.2021L9.41406%208L11.6162%205.79785C12.0066%205.40735%2012.0066%204.77429%2011.6162%204.38379Z'%20fill='%23080E17'%20fill-opacity='0.46'/%3e%3c/g%3e%3cdefs%3e%3cclipPath%20id='clip0_3761_713'%3e%3crect%20width='16'%20height='16'%20fill='white'/%3e%3c/clipPath%3e%3c/defs%3e%3c/svg%3e)


'%3e%3cpath%20fill-rule='evenodd'%20clip-rule='evenodd'%20d='M21.4999%2010.9993C21.4999%205.20009%2016.7986%200.498901%2010.9993%200.498901C5.19994%200.498901%200.498657%205.20009%200.498657%2010.9993C0.498657%2016.2404%204.33858%2020.5844%209.35855%2021.3722V14.0346H6.69238V10.9993H9.35855V8.68594C9.35855%206.05427%2010.9262%204.60062%2013.3248%204.60062C14.4736%204.60062%2015.6753%204.80571%2015.6753%204.80571V7.38979H14.3512C13.0468%207.38979%2012.64%208.19921%2012.64%209.0296V10.9993H15.5523L15.0867%2014.0346H12.64V21.3722C17.66%2020.5844%2021.4999%2016.2404%2021.4999%2010.9993Z'%20fill='%231568EA'/%3e%3c/g%3e%3c/svg%3e)


Crafting a standout resume is an art, and every detail matters. A subtle touch like a vertical line can make all the difference. In this step-by-step guide, we'll unravel the secrets to elegantly inserting a vertical line in Word.
Elevate your resume's visual impact and leave a lasting impression on potential employers. Let's embark on this journey to refine your resume and enhance your professional image.
Why Use Vertical Lines in Your Resume?

Vertical lines can be a useful tool for organizing and formatting your resume. They can help to:
Separate different sections of your resume: Vertical lines can be used to separate different sections of your resume, such as your contact information, work experience, education, and skills. This can make it easier for recruiters and hiring managers to scan your resume and find the information they are looking for.
Emphasize important information: Vertical lines can also be used to emphasize important information on your resume, such as your job titles, company names, and dates of employment. This can help to draw the attention of recruiters and hiring managers to your most relevant qualifications.
Create a more polished and professional appearance: Vertical lines can also help to create a more polished and professional appearance for your resume. When used correctly, they can make your resume look more organized and easier to read.
However, it is important to use vertical lines sparingly and only when necessary. Too many vertical lines on your resume can make it look cluttered and unprofessional.
How to Insert Vertical Line in Word for Resume
To Insert a Vertical Line in Word for a Resume, follow these steps:
Step 1: Open your resume in Word and place your cursor where you want to insert the vertical line.
Step 2: Click the Insert tab in the ribbon then click the Shapes button in the Illustrations group.

Step 3: Select the Line shape from the drop-down menu.
Step 4: Click and drag your mouse to draw a vertical line on your resume.

Step 5: Once you have drawn the line, release the mouse button.
Step 6: You can now resize and reposition the line as needed.

To resize the line:
Click and drag the handles on the edge of the line.
To reposition the line:
Click and drag the line to its desired location.
To format the line:
Right-click the line and select Format Shape.
In the Format Shape dialog box, select the Line tab.
You can now change the line color, line thickness, and other formatting options.
To remove the line:
Click the line to select it.
Press the Delete key on your keyboard.
Tips:
You can also insert a vertical line in Word by using the keyboard shortcut Shift + ** (backslash).
By following these steps, you can easily insert a vertical line in Word for your resume. Vertical lines can be a useful tool for organizing and formatting your resume, and they can help to make it look more polished and professional.
Where Can I Get Resume Templates in Word Online for Free?
To get free resume templates in Word Online:
Step 1: Go to the Microsoft Templates website and browse Resumes.

Step 2: Click the Download button to download the resume template to your computer.

Step 3: Open the resume template in Word Online and make your desired changes.
Step 4: Save the resume template.
To get free resume templates in WPS Office:
Step 1: Go to the WPS Templates website and browse the Resumes tab.
Step 2: Click the Download button to download the resume template to your computer.

Step 3: Open the resume template in WPS Office and make your desired changes.
Step 4: Save the resume template.
Tips:
Before you download a resume template, make sure that you have the latest version of Word Online or WPS Office installed on your computer.
If you are having trouble opening a resume template, try downloading it again or saving it to a different location on your computer.
Be sure to customize the resume template to match your own qualifications and experience.
Once you have finished editing the resume template, proofread it carefully before submitting it to potential employers.
Best Free Resume Templates Editor - WPS Office

WPS Office is a free and open-source office suite that includes a powerful PDF editor and a built-in template library with a wide variety of free resume templates, making it the ideal resume builder for creating and editing professional-looking resumes. The template library is especially useful for job seekers, as it not only offers resumes but also includes matching cover letter templates, job application letters, reference letter templates, and other essential career documents, helping users present a consistent and polished application package.
Compatibility: WPS Office is compatible with most of the file formats used in Microsoft Office, so you can easily open and edit your existing Microsoft Office resume templates.
Ease of use: The WPS PDF editor is easy to use and provides a wide range of editing features, making it the perfect tool for customizing resume templates to meet your individual needs.
Affordability: WPS Office is completely free to use, so you can create and edit professional-looking resumes without spending a dime.
How to edit resume templates using WPS PDF tools:
Step 1: Open the resume template in WPS Office by clicking the File tab and selecting Open.
Step 2: Click the PDF tab to open the WPS PDF editor.
Step 3: Make your desired changes to the resume template, such as adding and removing text, images, and other objects in word; changing the font, font size, and other formatting options; and adding or removing sections.
Step 4: Once you are finished editing the resume template, click the File tab and select Save to save your changes.
How to export a resume as a PDF or Word document:
Step 1: Open the edited resume template in WPS Office.
Step 2: Click the File tab.
Step 3: Select Export as and then select the file format that you want to export the resume to (PDF or Word).
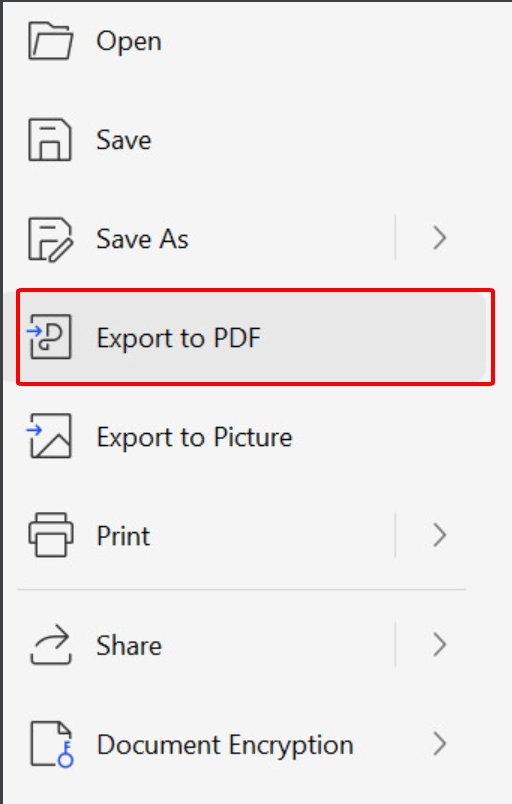
Step 4: Enter a name for the exported file and click Export.
Tips for creating professional-looking resumes with WPS Office:
Use the built-in template library to find a resume template that matches your desired style and professionalism.
Customize the resume template to fit your individual needs and experience.
Use the WPS PDF editor to add and remove text, images, and other objects; change the font, font size, and other formatting options; and add or remove sections.
Proofread your resume carefully before exporting it to a PDF or Word document.
By following these tips, you can use WPS Office to create professional-looking resumes that will help you stand out to potential employers.
FAQs
How to insert a line in Google Docs for a resume?
Step 1: Open your resume in Google Docs.
Step 2: Go to "Insert" > "Drawing" > "+ New."

Step 3: Select the line tool and draw your line.
Step 4: Position and customize as desired.
Step 5: Click "Save and Close" to insert the line.
What is the keyboard shortcut to add a line in Word?
The keyboard shortcut to add a line in Word is:
Ctrl + Shift + \ (Backslash)
Can I customize the color and thickness of the vertical line in Word?
Absolutely! After inserting the vertical line, right-click on it and select "Format Shape." In the Format Shape panel, navigate to the "Line" options. Here, you can choose your preferred color and adjust the thickness to suit your resume's aesthetics. This way, you can personalize the vertical line to complement your overall design.
Summary
This guide covers inserting a vertical line in Word for resumes. It stresses the impact of this detail. Benefits include organization and emphasis. Step-by-step instructions are provided. It highlights getting free templates in Word and WPS Office. WPS Office is lauded for compatibility, ease of use, and affordability. Tips for using its PDF tools are outlined. This resource enables creating standout resumes.

'%3e%3cpath%20d='M19.9911%204.11386V6.471H18.5894C18.0775%206.471%2017.7322%206.57814%2017.5536%206.79243C17.3751%207.00671%2017.2858%207.32814%2017.2858%207.75671V9.44421H19.9019L19.5536%2012.0871H17.2858V18.8639H14.5536V12.0871H12.2769V9.44421H14.5536V7.49779C14.5536%206.39064%2014.8632%205.53201%2015.4822%204.92189C16.1013%204.31177%2016.9257%204.00671%2017.9554%204.00671C18.8304%204.00671%2019.509%204.04243%2019.9911%204.11386Z'%20fill='%23333333'/%3e%3c/g%3e%3cdefs%3e%3cclipPath%20id='clip0_2938_8199'%3e%3crect%20width='16'%20height='16'%20fill='white'%20transform='translate(8%204.00671)'/%3e%3c/clipPath%3e%3c/defs%3e%3c/svg%3e)
'%3e%3cpath%20d='M17.5237%2010.7813L23.4811%204H22.0699L16.8949%209.88693L12.7648%204H8L14.2469%2012.9029L8%2020.0133H9.4112L14.8725%2013.7952L19.2352%2020.0133H24M9.92053%205.04213H12.0885L22.0688%2019.0224H19.9003'%20fill='%23333333'/%3e%3c/g%3e%3cdefs%3e%3cclipPath%20id='clip0_2938_8200'%3e%3crect%20width='16'%20height='16.0134'%20fill='white'%20transform='translate(8%204)'/%3e%3c/clipPath%3e%3c/defs%3e%3c/svg%3e)


