
'%3e%3cpath%20d='M8%200C12.4183%200%2016%203.58172%2016%208C16%2012.4183%2012.4183%2016%208%2016C3.58172%2016%200%2012.4183%200%208C0%203.58172%203.58172%200%208%200ZM11.6162%204.38379C11.2257%203.99337%2010.5927%203.99338%2010.2021%204.38379L8%206.58594L5.79785%204.38379C5.40732%203.99334%204.77429%203.99329%204.38379%204.38379C3.99331%204.77429%203.99335%205.40733%204.38379%205.79785L6.58594%208L4.38379%2010.2021C3.99348%2010.5927%203.99341%2011.2257%204.38379%2011.6162C4.77426%2012.0066%205.40734%2012.0065%205.79785%2011.6162L8%209.41406L10.2021%2011.6162C10.5927%2012.0066%2011.2257%2012.0067%2011.6162%2011.6162C12.0067%2011.2257%2012.0066%2010.5927%2011.6162%2010.2021L9.41406%208L11.6162%205.79785C12.0066%205.40735%2012.0066%204.77429%2011.6162%204.38379Z'%20fill='%23080E17'%20fill-opacity='0.46'/%3e%3c/g%3e%3cdefs%3e%3cclipPath%20id='clip0_3761_713'%3e%3crect%20width='16'%20height='16'%20fill='white'/%3e%3c/clipPath%3e%3c/defs%3e%3c/svg%3e)


'%3e%3cpath%20fill-rule='evenodd'%20clip-rule='evenodd'%20d='M21.4999%2010.9993C21.4999%205.20009%2016.7986%200.498901%2010.9993%200.498901C5.19994%200.498901%200.498657%205.20009%200.498657%2010.9993C0.498657%2016.2404%204.33858%2020.5844%209.35855%2021.3722V14.0346H6.69238V10.9993H9.35855V8.68594C9.35855%206.05427%2010.9262%204.60062%2013.3248%204.60062C14.4736%204.60062%2015.6753%204.80571%2015.6753%204.80571V7.38979H14.3512C13.0468%207.38979%2012.64%208.19921%2012.64%209.0296V10.9993H15.5523L15.0867%2014.0346H12.64V21.3722C17.66%2020.5844%2021.4999%2016.2404%2021.4999%2010.9993Z'%20fill='%231568EA'/%3e%3c/g%3e%3c/svg%3e)


As you may know, Kali Linux is a security-focused operating system that is not designed to run proprietary software like Microsoft Office. So, running Microsoft Office on Kali Linux can be a challenge, but it is possible.
This article will provide you with a step-by-step guide on how to install and use Microsoft Office on Kali with 2 methods.
Method 1: Use Microsoft Office on Kali Linux Online (The Easiest Way)
Microsoft desktop apps do not support LinuxOS and there is no reliable source for installing Microsoft Office for Linux yet, but don’t worry we still have a way for Linux users use it, please follow these steps:
Step 1: Access Microsoft 365 Online
Navigate to the Microsoft 365 web page using your preferred web browser.
Step 2: Sign In or Create an Account
Sign in with your Microsoft account credentials or create a new account if you don't have one. This account is necessary to access Microsoft Office apps online.

Step 3: Explore Microsoft Office Features
Once signed in, you'll have access to a suite of Office apps, including Word, Excel, PowerPoint, and more. Click on the app you want to use.

Step 4: Start Using Office
You can now start using the selected Office app directly in your web browser. Create, edit, and save your documents in the cloud.
By following this method, you can seamlessly harness Microsoft Office 365 on your Linux system. Enjoy the convenience of Office apps without the hassle of installation.
Method 2: Install Microsoft Office with PlayOnLinux
PlayOnLinux is a more advanced method for running MS Office on Kali Linux. It provides a more complete Office experience but can be trickier to set up.
Benefits of PlayOnLinux:
Ease of Use: PlayOnLinux provides a user-friendly interface for installing and managing Windows applications, eliminating the need for complex configurations.
Wine Compatibility: It integrates with Wine to improve compatibility with a wide range of Windows software.
App Profiles: PlayOnLinux creates separate virtual drives (called "wineprefixes") for each application, ensuring that they don't interfere with each other.
Community Support: A thriving community offers support, tips, and scripts for installing popular Windows software.
Please follow these steps to install Microsoft Office with PlayOnLinux:
Step 1: Install PlayOnLinux
If you haven't already, follow the previous guide to install PlayOnLinux on your Ubuntu system.
Reminder: Ensure PlayOnLinux is properly installed and configured before proceeding to the next steps.
Step 2: Open PlayOnLinux and click on the "Install" button in the top menu click on the "Install" button in the top menu

Step 3: Install Microsoft Office
Select "Office" from the categories. Choose "Microsoft Office 2010" and click "Install."

Reminder: PlayOnLinux will guide you through the installation process, simplifying it considerably.
Step 4: Follow the Installation Wizard
Follow the on-screen instructions provided by PlayOnLinux to install Microsoft Office. This process will involve configuring Wine settings and may require you to accept the Microsoft Office license agreement.

Comment: Take your time to configure Office to your preferences.
Step 5: Office Installation Progress
PlayOnLinux will begin installing Microsoft Office. You will see a progress bar indicating the installation status.

Step 6: Office Installed Successfully
Once the installation is complete, you will see a message confirming that Microsoft Office has been installed successfully.

By following these steps and being aware of potential issues, you should be able to successfully install and use Microsoft Office on your Kali Linux system using PlayOnLinux.
How to Use Microsoft Office Features via WPS Office for Free on Kali Linux
What Is WPS Office and Why Choose it?

WPS Office is a free and open-source office suite that includes a word processor, spreadsheet program, and presentation software. It is also a powerful project management tool, with a variety of templates and features that can help users to plan and manage events.
WPS Office is a great alternative to Smartsheet, especially for users who are looking for a free and easy-to-use solution. It offers a variety of advantages, including:
● Free download and free to use Word, Excel, and PPT: WPS Office is completely free to use, with no hidden fees or subscriptions.
● Powerful PDF toolkit: WPS Office includes a powerful PDF toolkit that allows users to create, edit, and convert PDF files.
● Rich template store: WPS Office has a rich template store with over 10,000 templates to choose from, including a variety of scheduling templates.
● Light weight: WPS Office is a lightweight application that takes up very little space on your computer.
● Support online documents: WPS Office allows users to save and access documents online, making it easy to collaborate with others and to access your files from anywhere.
● Safe and stable: WPS Office is a safe and stable application that has been used by millions of people around the world.
Besides that, these are unique features not offered by Microsoft Office for FREE but WPS has:
Co-Editing: Collaborate within Word documents, spreadsheets, and presentations in real-time, enhancing teamwork and productivity.
Group Document Sharing: Share documents within a group, allowing members to edit with your permission, streamlining group projects.
How to Edit Word/Excel/PowerPoint in WPS Office
1. Download and Install Ubuntu
Note: If you already have Ubuntu installed, you can skip this part.
Ubuntu is one of the most popular Linux distributions, known for its user-friendly interface, stability, and vast software library. It's an excellent choice for beginners and experienced users alike.
Here is a step-by-step guide on how to download and install Ubuntu:
Step 1: Download the Ubuntu file.
Go to the Ubuntu website and click on the "Download" button

Step 2: Select the Ubuntu version that suits your needs (e.g., LTS for long-term support) and click "Download."

Step 3: Create a bootable USB drive.
You will need a USB drive with at least 4GB of free space. You can use a tool like Etcher to create a bootable USB drive from the Ubuntu ISO file.
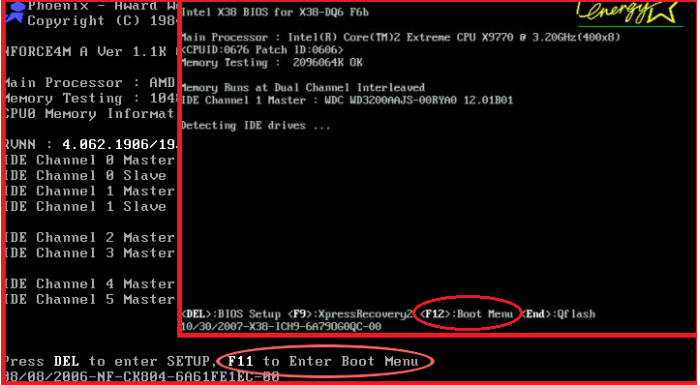
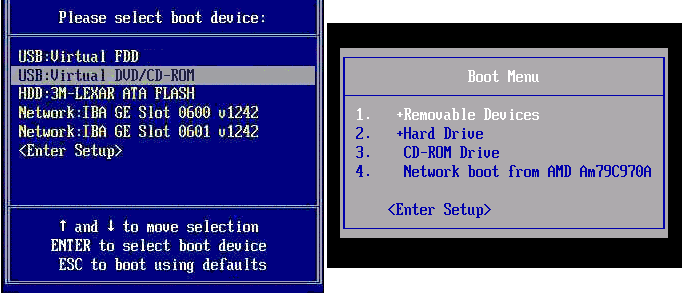
Step 4: Boot from the USB drive.
Insert the bootable USB drive into your computer and restart it. Access the boot menu (usually by pressing F2, F12, or Del during startup) and select the USB drive as the boot device.
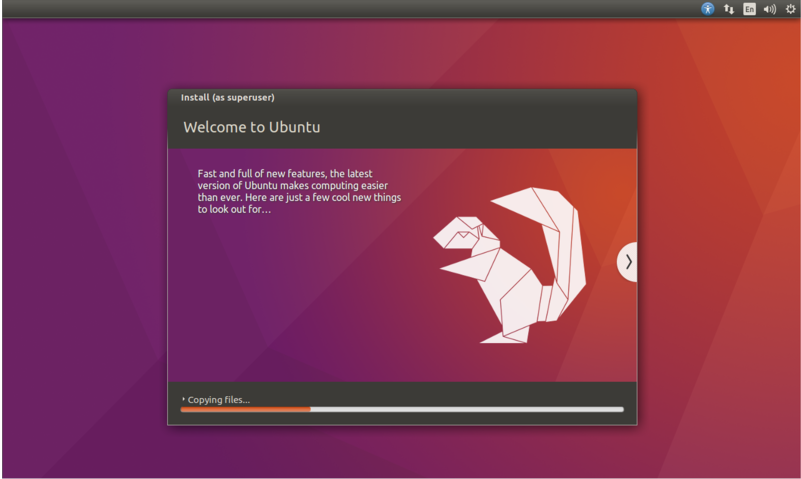
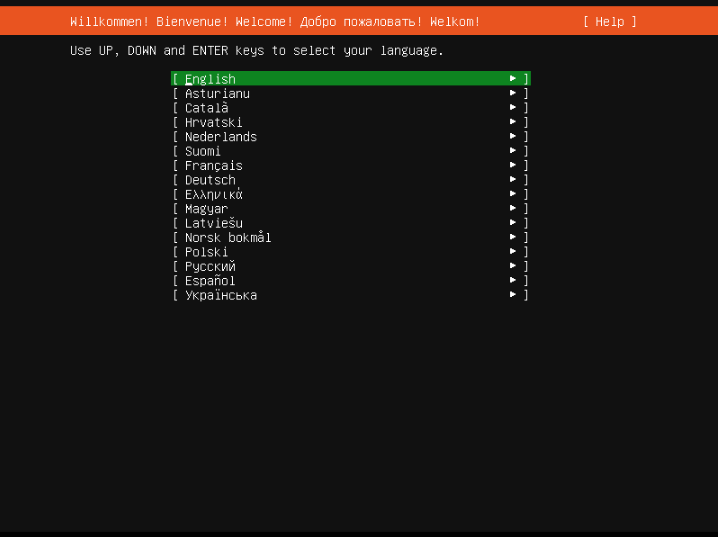
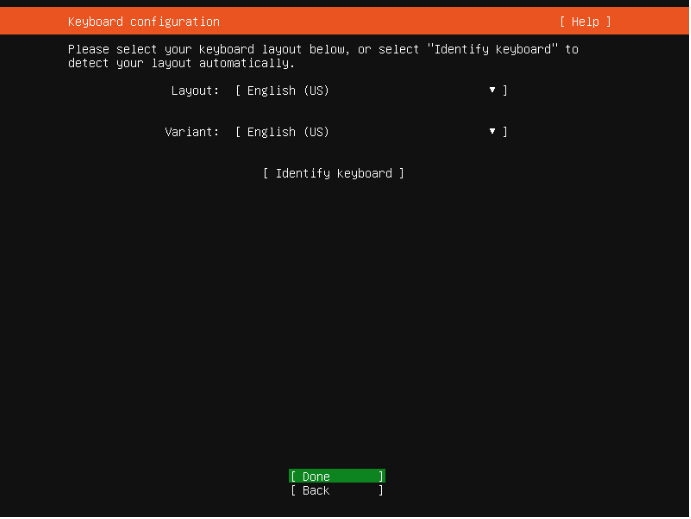
Step 5: Start the Ubuntu installation process.
Once Ubuntu boots from the USB drive, click "Install Ubuntu" from the welcome screen. Follow the on-screen instructions to select your language, keyboard layout, and installation type. You can choose to install Ubuntu alongside your existing OS or replace it.
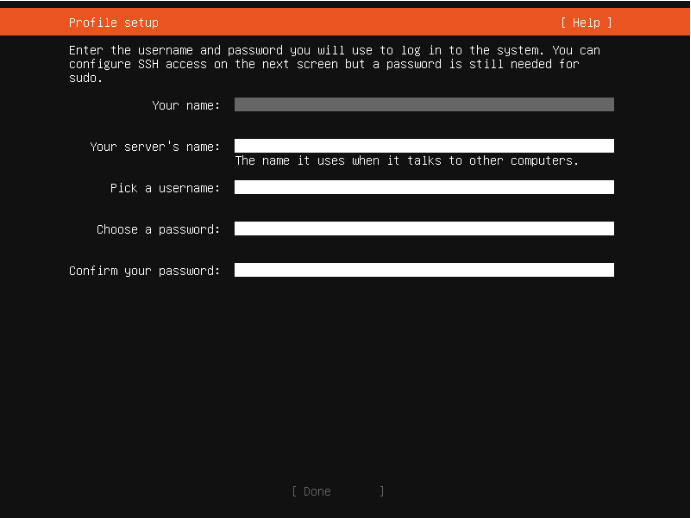
Step 6: Create User Account
Set your username and password for the Ubuntu system. You can also choose to enable automatic login and encrypt your home folder for added security.
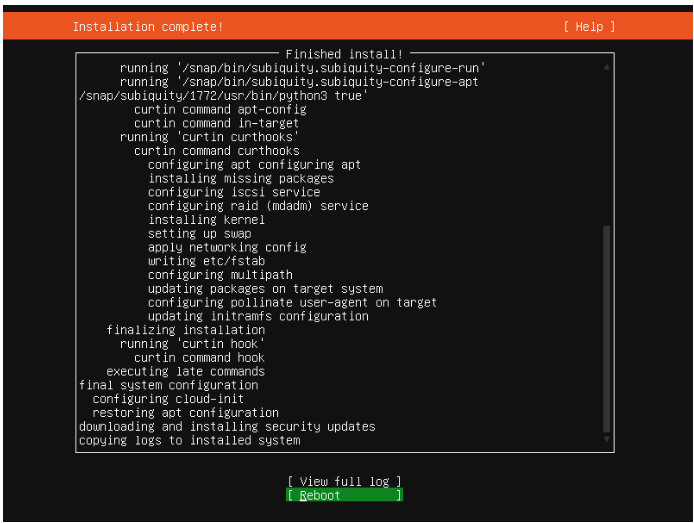
Step 7: Installation Complete
Wait for the installation to finish. Once it's done, click “Reboot” to install the Ubuntu system.
Step 8: Explore Ubuntu
Congratulations! You've successfully installed Ubuntu. Explore its user-friendly interface, access the Software Center to install applications, and enjoy the benefits of this powerful Linux distribution.
2. Install WPS Office on Ubuntu
WPS Office is a popular office suite for Linux, and installing it on Ubuntu is straightforward. Follow these step-by-step instructions to install WPS Office on your Ubuntu system.
Step 1: Visit the official WPS Office website for Linux

Step 2: Click the "Download" button on the page.
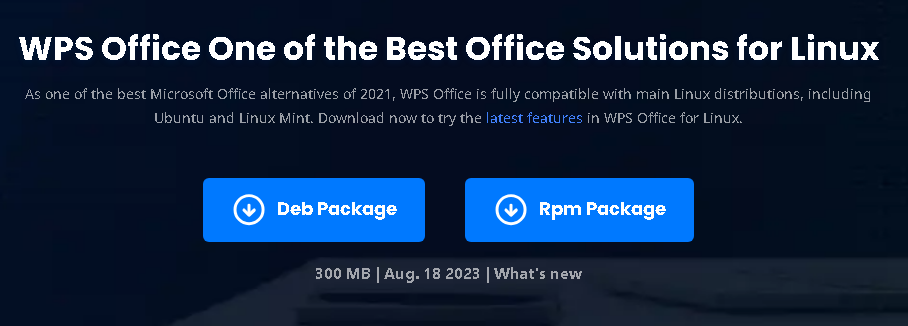
Step 3: Select the correct WPS Office version for your Ubuntu system.
Typically, 32-bit and 64-bit solutions are both offered. Choose the one that best suits the architecture of your system.
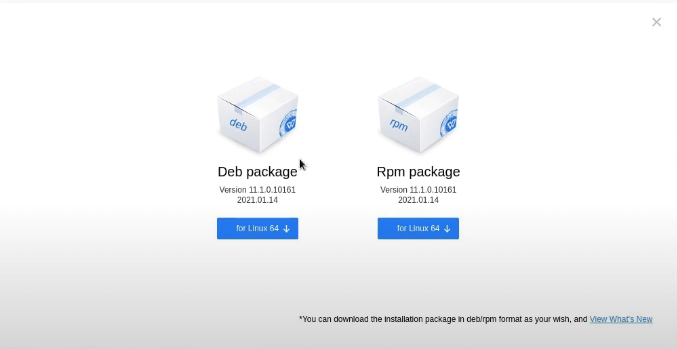
Reminder: Make sure to download the appropriate package for your Ubuntu version (32-bit or 64-bit).
Step 4: Once the download is finished, look for the file in your "Downloads" folder.
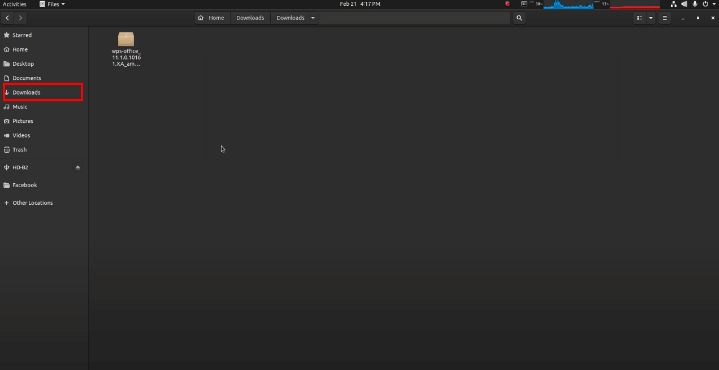
Reminder: Ensure you are in the correct directory where the WPS Office installation package is stored.
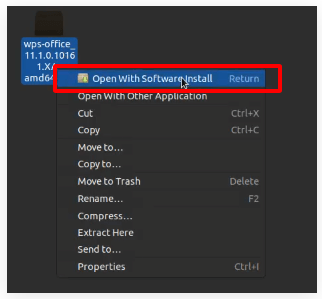
Step 5: Use the "Open With" and "Software Install" options from the context menu when you right-click on the downloaded file. The Ubuntu Software Center will now be accessible.
Step 6: To start the installation procedure, click the "Install" button.
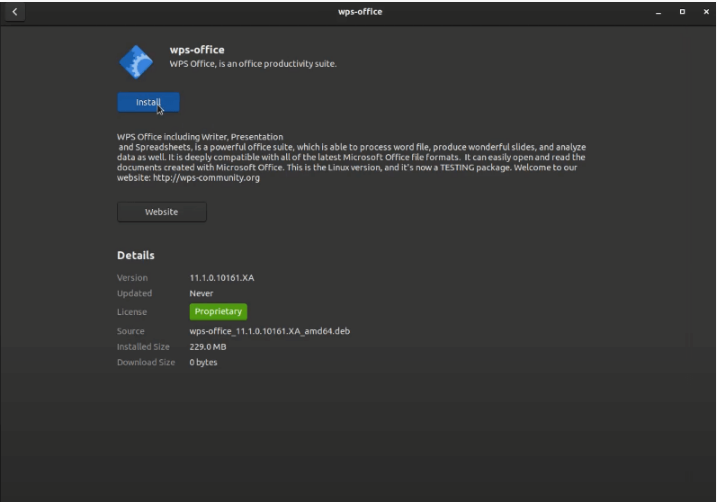
Reminder: Be patient during the installation; it may take a moment to complete.
Step 7: To install software on Ubuntu, you must enter your administrator password when requested.
Step 8: After the installation is complete, you can open WPS Office by selecting it from the programs menu or by using the Ubuntu Dash to search for it.
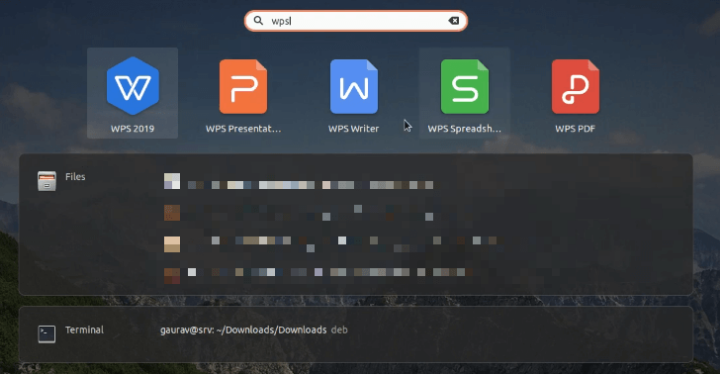
You've successfully installed WPS Office on your Ubuntu Linux system. You can now enjoy using WPS Writer, Presentation, and Spreadsheets.
3. Start Editing Word/Excel/PowerPoint
After we are done downloading WPS Office, now I'll guide you on how to create a new file and start editing .docx, .xlsx, and .pptx files in WPS Writer, Spreadsheet, and Presentation.
To create a new file in WPS Writer/Spreadsheet/Presentation:
Step 1: Open WPS Office.
Step 2: Click the New button in the top left corner of the window.

Step 3: Select the type of file you want to create (Writer, Spreadsheet, or Presentation) then click the “Blank” button.

Step 4: A new file will be created and opened.
To start editing an existing .docx/.xlsx/.pptx file in WPS Writer/Spreadsheet/Presentation:
Step 1: Open WPS Office.
Step 2: Click the “File” button in the top left corner of the window.

Step 3: Browse to the file you want to edit and double-click it.

Step 4: The file will be opened in the corresponding WPS application and start to edit
Tips:
You can also create a new file or open an existing file by pressing Ctrl+N or Ctrl+O, respectively.
If you have multiple WPS applications open, you can switch between them by clicking the tabs at the top of the window.
-
You can also save your files to a cloud storage service such as OneDrive or Google Drive. This will allow you to access your files from any device with an internet connection.

FAQs
Can I use Kali Linux and Windows both?
Yes, you can dual-boot Kali Linux and Windows on the same drive by using virtual machine
Which Linux is best for professional use?
The choice of Linux distribution for professional use depends on your specific needs. Popular options include Ubuntu, CentOS, and Red Hat for general use, while Kali Linux is ideal for cybersecurity professionals.
How can I enhance the security of my Kali Linux system?
To enhance the security of your Kali Linux system, consider regularly updating your software, enabling a firewall, and practicing safe browsing habits. Additionally, learning about and implementing proper security practices and tools is crucial.
Summary
The article provides a comprehensive guide for Kali Linux users seeking to install Microsoft Office alternatives. While exploring various options, it places emphasis on WPS Office as a powerful free alternative.
The guide offers step-by-step instructions, addressing compatibility challenges and providing insights into making Microsoft Office work seamlessly on the Kali Linux platform. Readers will find valuable tips, comparisons, and expert advice, making it the ultimate resource for achieving productivity on Kali Linux without compromising on office suite functionality.

'%3e%3cpath%20d='M19.9911%204.11386V6.471H18.5894C18.0775%206.471%2017.7322%206.57814%2017.5536%206.79243C17.3751%207.00671%2017.2858%207.32814%2017.2858%207.75671V9.44421H19.9019L19.5536%2012.0871H17.2858V18.8639H14.5536V12.0871H12.2769V9.44421H14.5536V7.49779C14.5536%206.39064%2014.8632%205.53201%2015.4822%204.92189C16.1013%204.31177%2016.9257%204.00671%2017.9554%204.00671C18.8304%204.00671%2019.509%204.04243%2019.9911%204.11386Z'%20fill='%23333333'/%3e%3c/g%3e%3cdefs%3e%3cclipPath%20id='clip0_2938_8199'%3e%3crect%20width='16'%20height='16'%20fill='white'%20transform='translate(8%204.00671)'/%3e%3c/clipPath%3e%3c/defs%3e%3c/svg%3e)
'%3e%3cpath%20d='M17.5237%2010.7813L23.4811%204H22.0699L16.8949%209.88693L12.7648%204H8L14.2469%2012.9029L8%2020.0133H9.4112L14.8725%2013.7952L19.2352%2020.0133H24M9.92053%205.04213H12.0885L22.0688%2019.0224H19.9003'%20fill='%23333333'/%3e%3c/g%3e%3cdefs%3e%3cclipPath%20id='clip0_2938_8200'%3e%3crect%20width='16'%20height='16.0134'%20fill='white'%20transform='translate(8%204)'/%3e%3c/clipPath%3e%3c/defs%3e%3c/svg%3e)


