
'%3e%3cpath%20d='M8%200C12.4183%200%2016%203.58172%2016%208C16%2012.4183%2012.4183%2016%208%2016C3.58172%2016%200%2012.4183%200%208C0%203.58172%203.58172%200%208%200ZM11.6162%204.38379C11.2257%203.99337%2010.5927%203.99338%2010.2021%204.38379L8%206.58594L5.79785%204.38379C5.40732%203.99334%204.77429%203.99329%204.38379%204.38379C3.99331%204.77429%203.99335%205.40733%204.38379%205.79785L6.58594%208L4.38379%2010.2021C3.99348%2010.5927%203.99341%2011.2257%204.38379%2011.6162C4.77426%2012.0066%205.40734%2012.0065%205.79785%2011.6162L8%209.41406L10.2021%2011.6162C10.5927%2012.0066%2011.2257%2012.0067%2011.6162%2011.6162C12.0067%2011.2257%2012.0066%2010.5927%2011.6162%2010.2021L9.41406%208L11.6162%205.79785C12.0066%205.40735%2012.0066%204.77429%2011.6162%204.38379Z'%20fill='%23080E17'%20fill-opacity='0.46'/%3e%3c/g%3e%3cdefs%3e%3cclipPath%20id='clip0_3761_713'%3e%3crect%20width='16'%20height='16'%20fill='white'/%3e%3c/clipPath%3e%3c/defs%3e%3c/svg%3e)


'%3e%3cpath%20fill-rule='evenodd'%20clip-rule='evenodd'%20d='M21.4999%2010.9993C21.4999%205.20009%2016.7986%200.498901%2010.9993%200.498901C5.19994%200.498901%200.498657%205.20009%200.498657%2010.9993C0.498657%2016.2404%204.33858%2020.5844%209.35855%2021.3722V14.0346H6.69238V10.9993H9.35855V8.68594C9.35855%206.05427%2010.9262%204.60062%2013.3248%204.60062C14.4736%204.60062%2015.6753%204.80571%2015.6753%204.80571V7.38979H14.3512C13.0468%207.38979%2012.64%208.19921%2012.64%209.0296V10.9993H15.5523L15.0867%2014.0346H12.64V21.3722C17.66%2020.5844%2021.4999%2016.2404%2021.4999%2010.9993Z'%20fill='%231568EA'/%3e%3c/g%3e%3c/svg%3e)


As a user, I've often found myself struggling to merge shapes in PowerPoint. The steps can be confusing, and the results are often unpredictable. In this tutorial, I'll walk you through the process step-by-step, and share some tips and tricks along the way. By the end of this tutorial, you'll be able to merge shapes in PowerPoint with ease!
Part1: What Are Shapes in PowerPoint?
Shapes in PowerPoint are vector graphics that can be used to create a variety of visual elements, such as diagrams, charts, and illustrations. Shapes can be formatted with colors, fills, gradients, and outlines. They can also be grouped and layered to create more complex designs.
Importance and benefits of merging shapes in PowerPoint
Merging shapes in PowerPoint is a powerful tool that can be used to create a variety of unique and visually appealing designs. It can also be used to simplify complex concepts and make them easier to understand.
Create Unique Graphics: Merging shapes enables you to design unique and complex graphics that may not be achievable with individual shapes. For example, you can combine triangles and circles to create a custom logo or icon.

Improve Visual Hierarchy: By merging shapes, you can better control the visual hierarchy of your slide. For instance, you can create a unified background for text and images, ensuring a cohesive and professional look.
Simplify Complex Diagrams: When illustrating complex concepts, merging shapes can simplify your visuals. Imagine representing a Venn diagram by merging circles, making it more visually appealing and easier to understand.

Emphasize Branding: Merge shapes to craft custom design elements that align with your brand identity. This consistency in design helps reinforce your brand message and recognition.
Versatility: Merging shapes allows for limitless possibilities. You can create intricate patterns, custom icons, and decorative elements that enhance the aesthetics of your presentation.
1. Location of Shapes Feature
The location of the "Merging Shapes" feature in PowerPoint can vary slightly between Windows and Mac versions of the software. Here's how to find the feature in both:
In Windows:
Step 1: Open PowerPoint.

Step 2: Create a new slide or open an existing one.
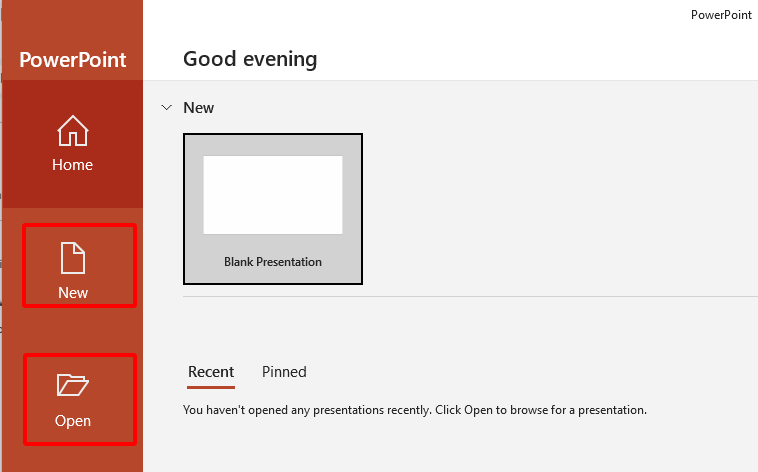
Step 3: Go to the "Insert" tab, look for the "Shapes" dropdown menu in the "Illustrations" group. Click on it to access the various shape options.

Step 4: Select the shapes you want to merge from the available shape options. You can draw or insert the shapes onto your slide.

Step 5: Arrange the shapes as you desire.

Step 6: To merge the shapes, select the shapes you want to merge by holding down the Shift key and clicking on each shape.
Step 7: Once the shapes are selected, go to the "Format" tab. In the "Insert Shapes" group, you should see an option called "Merge Shapes."

In macOS:
Step 1: Open PowerPoint on your Mac.
Step 2: Create a new slide or open an existing presentation.
Step 3: In Insert tab, on Illustrations group, choose Shapes button and click on the shapes you want

Step 4: Select the shapes to merge. Press and hold Shift to select multiple shapes.
Step 5: The Shape Format tab appears, and you will see the Merge Shapes button

2. Types of Shapes in PowerPoint
In PowerPoint, there are various types of shapes that you can use to enhance your presentations. Here are examples of three different types of shapes, along with images:
Basic shapes: These are the most common shapes, such as rectangles, circles, and squares. You can use them to create simple diagrams or to add visual interest to your slides.

Block arrows: These shapes are used to show the direction of movement or flow. They are often used in diagrams or flowcharts.

Flowchart shapes: These shapes are used to create flowcharts, which are diagrams that show the steps in a process.

Part2: How to Merge Shapes in PowerPoint (In Easy Steps)
Merging shapes in PowerPoint allows you to create custom shapes by combining multiple basic shapes. This feature is useful for creating unique graphics, diagrams, and icons. Here's a step-by-step guide with screenshots to help you merge shapes in PowerPoint:
Step 1: Open PowerPoint.
Step 2: Create a new slide or open an existing one.
Step 3: Go to the "Insert" tab, look for the "Shapes" dropdown menu in the "Illustrations" group. Click on it to access the various shape options.
Step 4: Select the shapes you want to merge from the available shape options. You can draw or insert the shapes onto your slide.
Step 5: Arrange the shapes as you desire.
Step 6: Select the shapes you want to merge by holding down the Shift key and clicking on each shape.
Step 7: Merge the Shapes
In the "Insert Shapes" group, click on "Merge Shapes."
A submenu will appear with different merging options, such as "Union," "Combine," "Intersect," and more.
Choose the merging option that suits your needs.
Tips:
Users can reuse their custom shape in another Office program: Just right-click it, then select Save as Picture. Save the file in a folder on your device.
To insert the picture in a different document, open it, then select Insert > Pictures, then locate the picture and select Insert.
Part3: Common Issues While Merging Shapes in PowerPoint
Merge button inactive (grayed out)
Problem: The "Merge Shapes" button is grayed out and cannot be clicked.

Solution:
Select Multiple Shapes: Ensure that you have selected at least two shapes that overlap. The "Merge Shapes" feature requires multiple shapes to be selected before it becomes active.
Check Object Types: Confirm that the shapes you want to merge are not text boxes or pictures. The "Merge Shapes" feature is designed for basic shapes and won't work with other object types.
Ungroup and Regroup: Sometimes, shapes are part of a grouped object. Right-click on the shapes, and if you see the "Group" option, select "Ungroup." Then, select the individual shapes and attempt to merge them. After merging, you can regroup the shapes if needed.
Comment: Ensure that you have the right objects selected and that they are not grouped, as this can prevent the "Merge Shapes" feature from becoming active. Experiment with selecting different shapes if the issue persists.
Shapes vanished
Problem: After merging shapes, one or more of the shapes have disappeared from the slide.


Solution:
Undo the Action: If you notice that a shape has disappeared after merging, immediately use the "Undo" function (Ctrl+Z or Command+Z) to revert to the previous state.
Check Shape Overlapping: Verify that the shapes overlap correctly. If shapes are not positioned to overlap, they might not merge as expected. Adjust the position of the shapes so they overlap.
Comment: Accidentally losing a shape is common. Always double-check your work and make use of the "Undo" function if something goes wrong. Ensure proper alignment and overlap to prevent issues.
Shapes are not properly aligned
Problem: After merging, the resulting shape is not aligned as intended.
Solution:
Use Alignment Tools: Select all the shapes you've merged, go to the "Format" or "Arrange" tab in the Ribbon, and utilize the alignment tools to ensure the merged shape is properly aligned. You can align objects to the center, distribute them evenly, or align them to specific reference points.
Adjust Manually: If the automatic alignment tools don't achieve the desired result, manually adjust the position and size of the merged shape by dragging it with your mouse.
Grids and Guides: Use grids and guides to align objects precisely. Go to the "View" tab and enable "Grids and Guides" to assist in positioning and aligning shapes.
Comment: Proper alignment is crucial for creating professional-looking graphics. Take advantage of alignment tools and grid options to achieve the desired results. Manual adjustments might be necessary for complex shapes.
Part4: How to Merge PowerPoint Shapes for Free with WPS Office
1. What Is WPS Office and Why Choose it?

Microsoft Office has been the market leader in office productivity software for decades, offering robust applications such as Word, Excel, and PowerPoint. However, with the rise of cloud-based solutions and the increasing demand for cost-effective options, free alternatives like WPS Office have gained popularity.
Why should you choose WPS Office as an alternative to Microsoft Office?
Here are the answer:
● Free to use Word, Excel, and PPT. Powerful PDF toolkit
● Rich template store, which contains variousfree and paid templates for Word, PPT, and Excel
● Rich functions
● The light weight of the product is only 200M, and it occupies a small amount of computer memory. It is suitable for Win7, 10, and 11
● The MAC version of WPS Office is very powerful. Microsoft office ignores the experience of mac users, which can be made up by wps office
● Supportonline documents (WPS AirPage), multi-person collaborative editing
● WPS office also supports Linux systems, Android, and ios systems. To use WPS office products on different systems, you only need to log in to the same account, and all files can be synchronized
2. How to Merge Shapes in WPS Presentation
WPS Presentation offers a similar feature to PowerPoint for merging shapes to create custom graphics or diagrams. Here's a step-by-step guide:
Step 1: Open WPS Presentation and create a new presentation or open an existing one.

Step 2: Insert Shapes
On the "Insert" tab, click on the "Shapes" group, select the shapes you want to merge.

Step 3: Arrange Shapes
Position and resize the shapes as needed, ensuring they overlap in the way you want them to merge.

Step 4: Select the Shapes to Merge
Hold down the "Shift" key on your keyboard. Click on each shape to select them.

Step 5: Access the "Merge Shapes" Feature, choose a Merging Option
From the submenu, select the merging option that suits your needs. Common options include "Union," "Combine," "Intersect," and more.

Now you can easily use Merge Shapes in WPS Office and create your own.


FAQs
Are merging shapes and grouping shapes the same thing in PowerPoint?
No, merging shapes and grouping shapes are not the same thing in PowerPoint.
Merging shapes combines two or more individual shapes to create a new shape. The resulting shape is a single object, and you can use various merge options like union, combine, intersect, subtract, etc., to achieve different effects by modifying the shapes' intersections.
Grouping shapes combines multiple shapes or objects into a single group. When you group shapes, they remain individual objects within the group, but you can move, resize, or format them collectively.
What version of Powerpoint has merge shapes?
The Merge Shapes feature was introduced in PowerPoint 2013.
Is there a way to merge text boxes in PowerPoint?
Yes, there is a way to merge text boxes in PowerPoint. To do this, follow these steps:
Select the text boxes you want to merge.
Press Ctrl + C to copy the text boxes.
Click on a blank area of the slide and press Ctrl + V to paste the text boxes.
Click and drag the text boxes to overlap them.
Select the text boxes and right-click.
Select Merge Shapes > Union.
Summary
The article provides a comprehensive guide on merging shapes in PowerPoint, catering specifically to beginners. It covers essential techniques such as union, combine, intersect, and more. While emphasizing WPS Office, the guide explains the process step-by-step, ensuring clarity for users. By highlighting merging options and detailing WPS Office integration, it equips beginners with essential skills for creating custom shapes effectively.

'%3e%3cpath%20d='M19.9911%204.11386V6.471H18.5894C18.0775%206.471%2017.7322%206.57814%2017.5536%206.79243C17.3751%207.00671%2017.2858%207.32814%2017.2858%207.75671V9.44421H19.9019L19.5536%2012.0871H17.2858V18.8639H14.5536V12.0871H12.2769V9.44421H14.5536V7.49779C14.5536%206.39064%2014.8632%205.53201%2015.4822%204.92189C16.1013%204.31177%2016.9257%204.00671%2017.9554%204.00671C18.8304%204.00671%2019.509%204.04243%2019.9911%204.11386Z'%20fill='%23333333'/%3e%3c/g%3e%3cdefs%3e%3cclipPath%20id='clip0_2938_8199'%3e%3crect%20width='16'%20height='16'%20fill='white'%20transform='translate(8%204.00671)'/%3e%3c/clipPath%3e%3c/defs%3e%3c/svg%3e)
'%3e%3cpath%20d='M17.5237%2010.7813L23.4811%204H22.0699L16.8949%209.88693L12.7648%204H8L14.2469%2012.9029L8%2020.0133H9.4112L14.8725%2013.7952L19.2352%2020.0133H24M9.92053%205.04213H12.0885L22.0688%2019.0224H19.9003'%20fill='%23333333'/%3e%3c/g%3e%3cdefs%3e%3cclipPath%20id='clip0_2938_8200'%3e%3crect%20width='16'%20height='16.0134'%20fill='white'%20transform='translate(8%204)'/%3e%3c/clipPath%3e%3c/defs%3e%3c/svg%3e)


