
'%3e%3cpath%20d='M8%200C12.4183%200%2016%203.58172%2016%208C16%2012.4183%2012.4183%2016%208%2016C3.58172%2016%200%2012.4183%200%208C0%203.58172%203.58172%200%208%200ZM11.6162%204.38379C11.2257%203.99337%2010.5927%203.99338%2010.2021%204.38379L8%206.58594L5.79785%204.38379C5.40732%203.99334%204.77429%203.99329%204.38379%204.38379C3.99331%204.77429%203.99335%205.40733%204.38379%205.79785L6.58594%208L4.38379%2010.2021C3.99348%2010.5927%203.99341%2011.2257%204.38379%2011.6162C4.77426%2012.0066%205.40734%2012.0065%205.79785%2011.6162L8%209.41406L10.2021%2011.6162C10.5927%2012.0066%2011.2257%2012.0067%2011.6162%2011.6162C12.0067%2011.2257%2012.0066%2010.5927%2011.6162%2010.2021L9.41406%208L11.6162%205.79785C12.0066%205.40735%2012.0066%204.77429%2011.6162%204.38379Z'%20fill='%23080E17'%20fill-opacity='0.46'/%3e%3c/g%3e%3cdefs%3e%3cclipPath%20id='clip0_3761_713'%3e%3crect%20width='16'%20height='16'%20fill='white'/%3e%3c/clipPath%3e%3c/defs%3e%3c/svg%3e)


'%3e%3cpath%20fill-rule='evenodd'%20clip-rule='evenodd'%20d='M21.4999%2010.9993C21.4999%205.20009%2016.7986%200.498901%2010.9993%200.498901C5.19994%200.498901%200.498657%205.20009%200.498657%2010.9993C0.498657%2016.2404%204.33858%2020.5844%209.35855%2021.3722V14.0346H6.69238V10.9993H9.35855V8.68594C9.35855%206.05427%2010.9262%204.60062%2013.3248%204.60062C14.4736%204.60062%2015.6753%204.80571%2015.6753%204.80571V7.38979H14.3512C13.0468%207.38979%2012.64%208.19921%2012.64%209.0296V10.9993H15.5523L15.0867%2014.0346H12.64V21.3722C17.66%2020.5844%2021.4999%2016.2404%2021.4999%2010.9993Z'%20fill='%231568EA'/%3e%3c/g%3e%3c/svg%3e)


PDF to JPG conversion has become a daily task for students, freelancers, and designers who work with visuals. CloudConvert has become the default choice for many users because of its broad format support and reliable performance. But here’s where the tension begins. CloudConvert’s free tier often runs out of credits just when you need one more urgent conversion. Processing queues can slow you down at peak hours. And uploading sensitive PDFs to a cloud server isn’t always ideal. In this guide, I’ll take you through CloudConvert PDF to JPG, then introduce alternatives for faster, unlimited, and offline-friendly conversions.

Overview of CloudConvert
When people search for ‘free Cloudconvert PDF to JPG’ or ‘Cloudconvert PDF to JPG online’, they're usually attracted by its unique technical strengths. CloudConvert wasn’t built as a simple “upload and download” converter. It was designed as a full-scale processing platform with technical depth such as format engines, adjustable parameters, API endpoints, and automation options that many casual users overlook. It handles obscure formats like HEIC, AI, and EPS with almost no quality loss, something many online converters struggle with. That technical reliability is the reason CloudConvert is so popular in professional and developer circles.

CloudConvert’s broad capabilities become even clearer when you look at the range of formats it handles across documents, images, videos, and archives. It’s one of the few online converters that can reliably process everything from standard PDFs and JPGs to PSD, AI, MKV, and even CAD files. To help you understand where it excels and where it falls short, here’s a quick look at the pros and cons.
CloudConvert is powerful, but it’s also cloud-dependent. And that’s where its limitations start to show.
How to Convert PDF to JPG Using CloudConvert
CloudConvert’s PDF to JPG tool performs best when you know how to adjust the settings instead of relying on the default output. The platform gives you control over resolution, page selection, and quality level, but many users skip these options and end up with heavier files or unnecessary image compression. The conversion speed also varies depending on file size and peak server times, so configuring your settings before starting the job can save a lot of back-and-forth. Here’s the exact workflow I follow when using CloudConvert for PDF to JPG conversions.
Step 1: Start by visiting CloudConvert’s PDF to JPG page and click on the “Select File” button to upload your PDF.

Step 2: After uploading, choose the pages to convert and set the pixel density to adjust image quality and file size.

Step 3: Click the red “Convert” button to start processing your uploaded PDF.

Step 4: Once the conversion is complete, click the green “Download” button to save your JPG file(s) to your device.

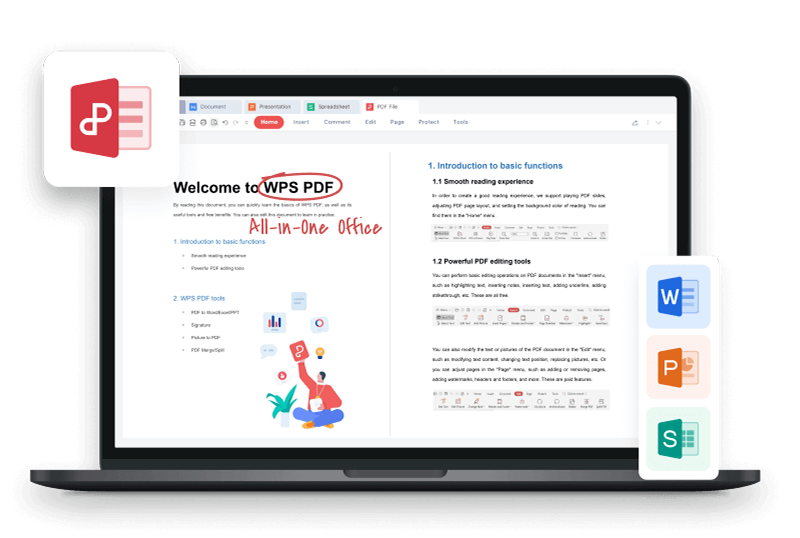
CloudConvert vs WPS PDF — Which Is Better?
I started comparing CloudConvert PDF to image converter with other tools because I kept hitting the same practical bottlenecks. That led me to WPS PDF, which I began testing side‑by‑side on real‑world jobs like converting multi‑page reports and image‑heavy PDFs. It handles batch conversions without throttling, provides clearer options for page selection, and processes files locally in its desktop app so you don’t have to wait in server queues. Rather than choosing based on feature lists alone, I focused on how each tool performed on everyday tasks that matter most: speed, reliability, output quality, and more.
| Feature | CloudConvert | WPS PDF |
|---|---|---|
| Free conversions | Limited daily | Unlimited |
| Conversion speed | Fast (Premium) | Very fast |
| Output quality | Excellent | Excellent |
| Batch conversion | Premium only | Free |
| Offline capability | No | Yes |
| Additional tools | Extensive | Comprehensive |
WPS PDF also integrates editing, merging, page extraction, OCR, and annotation making it a true all-in-one PDF workspace. Here’s where the experience becomes smoother. I’ve used the WPS PDF desktop version on my Mac, and the speed difference is noticeable. Even 100-page PDFs convert in seconds without compression issues. Below is the tutorial for the online version.
Step 1: Head over to the official WPS PDF website and navigate to the “Online Tools” section, which lists all the available PDF features.

Step 2: Once you’re in the section, browse through the options and click on “PDF to JPG”.

Step 3: On the PDF to JPG converter page, click the “Select PDF File” button. This lets you browse your computer and choose the PDF you want to convert.

Step 4: Once the conversion is complete, click on “Download” to view your newly created JPG.

Beyond basic conversion, WPS PDF provides a full suite of tools that streamline your workflow. You can handle batch conversion of multiple PDFs, extract only the pages you need with selective page extraction, fine-tune your output using quality adjustment options, and make edits directly after conversion. Together, these features make WPS PDF not just a converter, but a flexible solution for managing PDFs efficiently.
FAQs
1. Is CloudConvert completely free for PDF to JPG conversion?
CloudConvert offers limited free conversions based on daily credits. Each conversion consumes “minutes,” and multi-page PDFs use them quickly. WPS PDF, on the other hand, allows unlimited free conversions without credits or restrictions.
2. Which platform offers better image quality?
Both CloudConvert and WPS PDF generate high-quality JPGs. However, WPS PDF slightly outperforms in color accuracy and maintaining resolution for complex graphics.
3. Can I convert specific pages instead of the entire PDF?
Yes. Both tools allow selective page conversion. WPS PDF provides a clearer visual preview and easier page selection.
4. Are CloudConvert conversions safe for sensitive files?
CloudConvert deletes files automatically after conversion, but uploads still happen on the cloud. If privacy is essential, WPS PDF’s offline desktop mode is safer.
5. Does WPS PDF support reverse conversion (JPG to PDF)?
Yes. You can convert JPG to PDF using a dedicated tool on pdf.wps.com.

'%3e%3cpath%20d='M19.9911%204.11386V6.471H18.5894C18.0775%206.471%2017.7322%206.57814%2017.5536%206.79243C17.3751%207.00671%2017.2858%207.32814%2017.2858%207.75671V9.44421H19.9019L19.5536%2012.0871H17.2858V18.8639H14.5536V12.0871H12.2769V9.44421H14.5536V7.49779C14.5536%206.39064%2014.8632%205.53201%2015.4822%204.92189C16.1013%204.31177%2016.9257%204.00671%2017.9554%204.00671C18.8304%204.00671%2019.509%204.04243%2019.9911%204.11386Z'%20fill='%23333333'/%3e%3c/g%3e%3cdefs%3e%3cclipPath%20id='clip0_2938_8199'%3e%3crect%20width='16'%20height='16'%20fill='white'%20transform='translate(8%204.00671)'/%3e%3c/clipPath%3e%3c/defs%3e%3c/svg%3e)
'%3e%3cpath%20d='M17.5237%2010.7813L23.4811%204H22.0699L16.8949%209.88693L12.7648%204H8L14.2469%2012.9029L8%2020.0133H9.4112L14.8725%2013.7952L19.2352%2020.0133H24M9.92053%205.04213H12.0885L22.0688%2019.0224H19.9003'%20fill='%23333333'/%3e%3c/g%3e%3cdefs%3e%3cclipPath%20id='clip0_2938_8200'%3e%3crect%20width='16'%20height='16.0134'%20fill='white'%20transform='translate(8%204)'/%3e%3c/clipPath%3e%3c/defs%3e%3c/svg%3e)


