

'%3e%3cpath%20d='M8%200C12.4183%200%2016%203.58172%2016%208C16%2012.4183%2012.4183%2016%208%2016C3.58172%2016%200%2012.4183%200%208C0%203.58172%203.58172%200%208%200ZM11.6162%204.38379C11.2257%203.99337%2010.5927%203.99338%2010.2021%204.38379L8%206.58594L5.79785%204.38379C5.40732%203.99334%204.77429%203.99329%204.38379%204.38379C3.99331%204.77429%203.99335%205.40733%204.38379%205.79785L6.58594%208L4.38379%2010.2021C3.99348%2010.5927%203.99341%2011.2257%204.38379%2011.6162C4.77426%2012.0066%205.40734%2012.0065%205.79785%2011.6162L8%209.41406L10.2021%2011.6162C10.5927%2012.0066%2011.2257%2012.0067%2011.6162%2011.6162C12.0067%2011.2257%2012.0066%2010.5927%2011.6162%2010.2021L9.41406%208L11.6162%205.79785C12.0066%205.40735%2012.0066%204.77429%2011.6162%204.38379Z'%20fill='%23080E17'%20fill-opacity='0.46'/%3e%3c/g%3e%3cdefs%3e%3cclipPath%20id='clip0_3761_713'%3e%3crect%20width='16'%20height='16'%20fill='white'/%3e%3c/clipPath%3e%3c/defs%3e%3c/svg%3e)




'%3e%3cpath%20fill-rule='evenodd'%20clip-rule='evenodd'%20d='M21.4999%2010.9993C21.4999%205.20009%2016.7986%200.498901%2010.9993%200.498901C5.19994%200.498901%200.498657%205.20009%200.498657%2010.9993C0.498657%2016.2404%204.33858%2020.5844%209.35855%2021.3722V14.0346H6.69238V10.9993H9.35855V8.68594C9.35855%206.05427%2010.9262%204.60062%2013.3248%204.60062C14.4736%204.60062%2015.6753%204.80571%2015.6753%204.80571V7.38979H14.3512C13.0468%207.38979%2012.64%208.19921%2012.64%209.0296V10.9993H15.5523L15.0867%2014.0346H12.64V21.3722C17.66%2020.5844%2021.4999%2016.2404%2021.4999%2010.9993Z'%20fill='%231568EA'/%3e%3c/g%3e%3c/svg%3e)


'%3e%3cpath%20d='M2.42045%2022.1876H6.31818V12.7217L0.75%208.54553V20.5171C0.75%2021.4414%201.49892%2022.1876%202.42045%2022.1876Z'%20fill='%234285F4'/%3e%3cpath%20d='M19.682%2022.1876H23.5797C24.5041%2022.1876%2025.2502%2021.4387%2025.2502%2020.5171V8.54553L19.682%2012.7217'%20fill='%2334A853'/%3e%3cpath%20d='M19.682%205.48293V12.7216L25.2502%208.54543V6.31816C25.2502%204.25236%2022.8921%203.07469%2021.2411%204.31361'%20fill='%23FBBC04'/%3e%3cpath%20d='M6.31824%2012.7217V5.48303L13.0001%2010.4944L19.6819%205.48303V12.7217L13.0001%2017.733'%20fill='%23EA4335'/%3e%3cpath%20d='M0.75%206.31816V8.54543L6.31818%2012.7216V5.48293L4.75909%204.31361C3.10534%203.07469%200.75%204.25236%200.75%206.31816Z'%20fill='%23C5221F'/%3e%3c/g%3e%3cdefs%3e%3cclipPath%20id='clip0_2954_7305'%3e%3crect%20width='24.5'%20height='18.375'%20fill='white'%20transform='translate(0.75%203.8125)'/%3e%3c/clipPath%3e%3c/defs%3e%3c/svg%3e)


Need to save what is on your screen right now — an error message, a receipt, a chart, or a funny moment in a video? Every Windows PC can capture the screen in seconds, whether you want the whole desktop, a single window, or a small region you trace by hand. You only need to pick the method that matches what you want to keep.
This guide walks through the built-in keyboard shortcuts and tools step by step, then shows how WPS Office can capture, annotate, and reuse screenshots for documents and reports without installing any extra app.
How to Take a Screenshot on PC
Method 1: How to Take a Screenshot on PC with the PrtScn Key
The fastest way to take a screenshot on PC is the PrtScn (Print Screen) key on your keyboard. Depending on the key combination, the capture is either saved automatically or copied to your clipboard for pasting.
Full screen to clipboard. Press PrtScn once. The entire screen is copied to the clipboard; open any editor and press Ctrl + V to paste it.
Full screen saved automatically. Press Windows key + PrtScn. The screen dims briefly and the PNG file is saved to Pictures > Screenshots — no pasting needed.
Active window only. Press Alt + PrtScn to capture just the window you are working in, copied to the clipboard.
If your laptop keyboard has an Fn key, you may need to add it to the combination, for example Fn + Windows key + PrtScn.
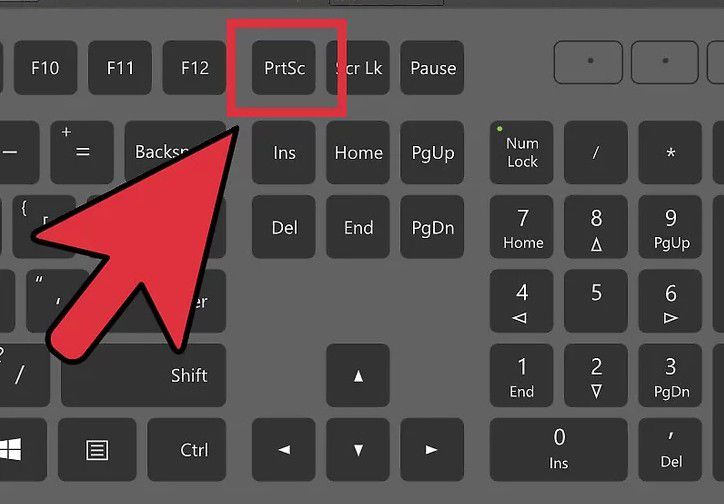
PrntSc key on Windows keyboard
Method 2: How to Take a Screenshot on PC with the Snipping Tool
The Snipping Tool has been part of Windows for years and is still a reliable choice when you want to choose the capture area yourself, add a short delay, or annotate immediately after capturing.
Open the tool. Press the Start button, type Snipping Tool in the search box, and open it from the results.
Choose a mode. Pick Rectangle, Window, Full screen, or Free-form snip depending on what you want to capture.
Set a delay if needed. Use the timer option to wait a few seconds — useful for capturing menus that close when you click away.
Capture and save. Click New, select the area, then annotate with the pen or highlighter if you like and save the image as PNG, JPG, or GIF.
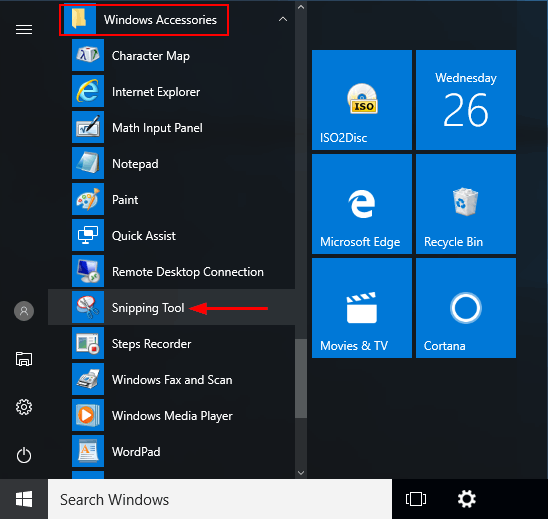
Open Snipping Tool from Start menu
Method 3: How to Take a Screenshot on PC with Snip & Sketch
For the quickest region capture on Windows 10 and 11, the Windows key + Shift + S shortcut is the most convenient way to take a screenshot on PC. It opens a small toolbar at the top of the screen without opening any app first.
Press the shortcut. Hold Windows + Shift + S. The screen dims and a capture toolbar appears.
Pick the shape. Choose rectangular or free-form snip, then drag over the area you want. The snip is copied to the clipboard.
Open the notification. Click the pop-up in the corner to open Snip & Sketch, where you can crop further, draw, and annotate.
Save or share. Press Ctrl + S to save the file, or paste it directly into an email, chat, or document.
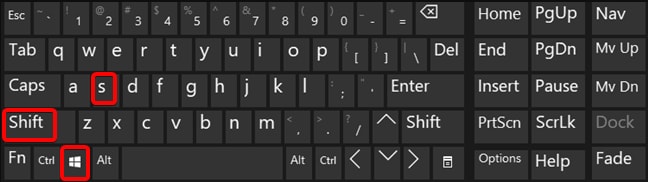
Windows Shift S screenshot shortcut


The Best Free Alternative: WPS Office
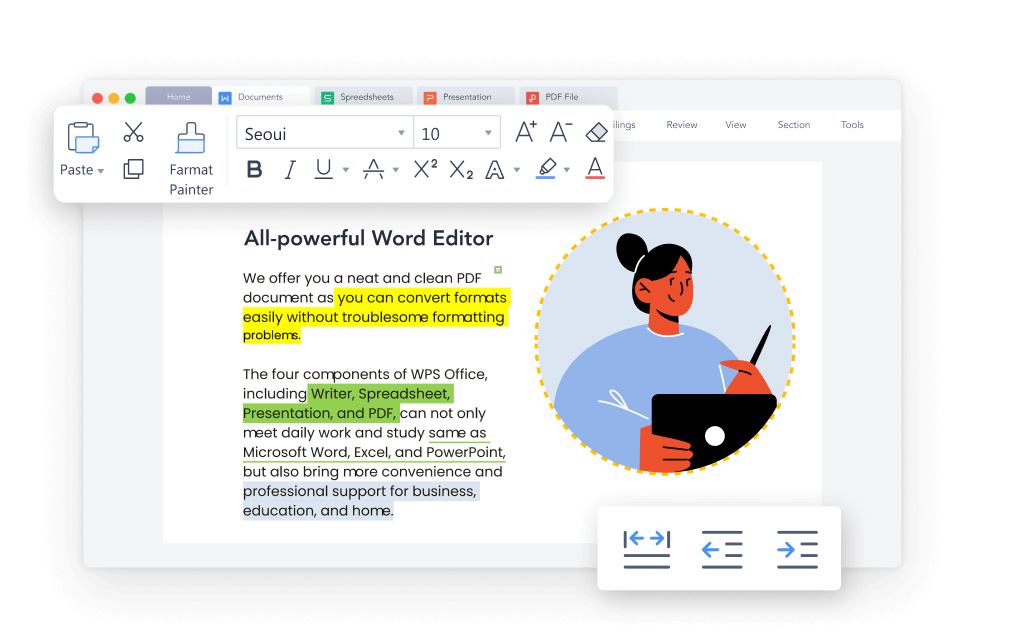
Built-in shortcuts capture the screen, but they stop there: you still need another app to annotate, and another one to put the image into a report. WPS Office solves this by combining a screen capture tool with a full, free office suite. After you take a screenshot on PC, you can highlight, box, or write on it right away, and drop it straight into a Writer document, a spreadsheet, or a presentation — all without leaving the app or paying for a license.
WPS Office is free to download, works with Word, Excel, and PowerPoint file formats, and keeps a familiar Microsoft-like interface, so there is almost no learning curve. It is a practical pick for students, office workers, and anyone who captures and shares screenshots regularly.
How to use a screenshot inside WPS Office:
Open the capture tool. Launch WPS Office, open any document, and go to Insert > Screenshot (or Screen Capture in some versions).
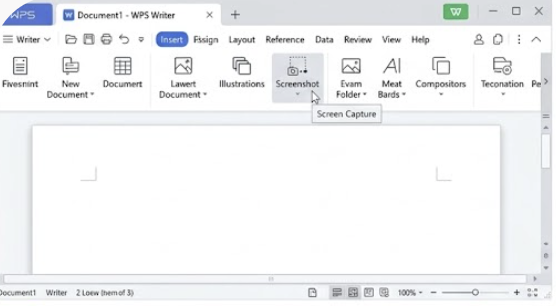
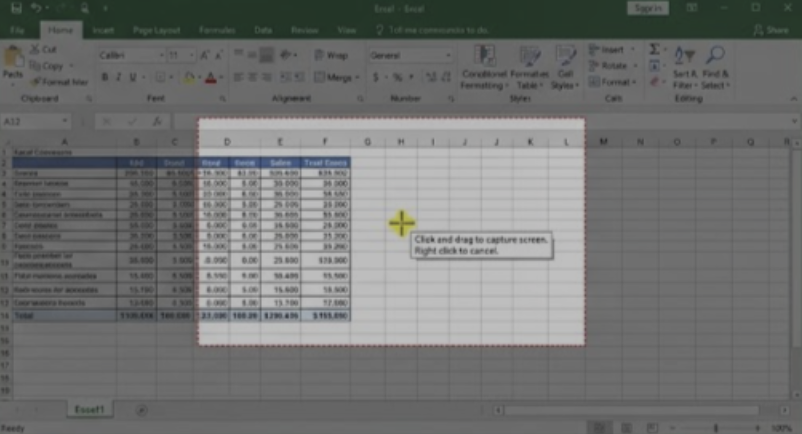
click Screenshot Select the area. WPS hides itself automatically and lets you drag a frame over the part of the screen you need, including open windows or a custom region.
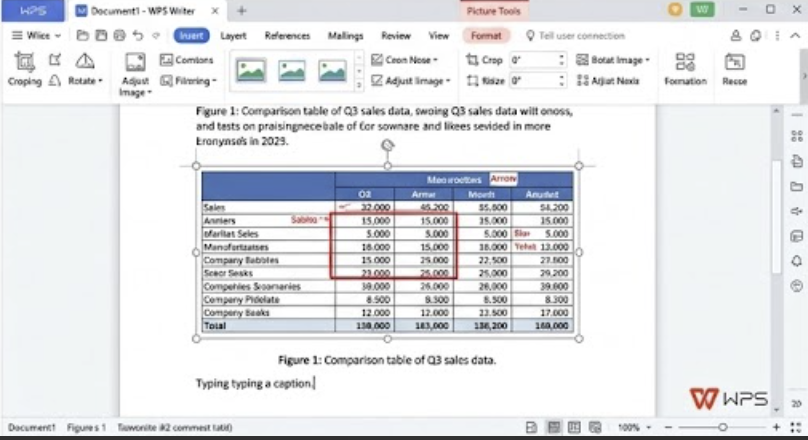
Select the area Annotate instantly. Use the floating toolbar to add rectangles, arrows, text, or blur sensitive details before you confirm.
Finish and reuse. The capture is inserted into the current document automatically, so you can resize it, add a caption, and export the file to share.
If you already edit screenshots in other apps, you can learn how to edit a screenshot online for free as well, and combine both workflows. And if your screenshots are destined for a report, our guide on how to insert a screenshot or screen clipping into Word and Excel covers the next step in detail.
FAQs
Where are screenshots saved on a Windows PC?
When you press Windows key + PrtScn, screenshots are saved automatically to Pictures > Screenshots inside your user folder. Captures made with PrtScn alone or Alt + PrtScn go to the clipboard instead, so you must paste them into an app before they become files.
Why does my PrtScn key not work?
On many laptops the PrtScn key shares its position with a system function, so you need to press Fn + PrtScn. If OneDrive or Dropbox is installed, its screenshot setting may also intercept the key; check the app preferences or use Windows key + Shift + S instead.
How do I take a screenshot of only one window?
Click the window to make sure it is active, then press Alt + PrtScn. Only that window is copied to the clipboard, which keeps the image clean compared with capturing the entire desktop.
Is there a free way to annotate screenshots?
Yes. The Snipping Tool and Snip & Sketch include pen, highlighter, and crop tools for basic annotation. For deeper editing inside documents, WPS Office offers free capture and annotation tools in Writer, Sheets, and Slides.
Can I take screenshots on a PC without a keyboard?
You can use the on-screen keyboard in Windows accessibility settings to press PrtScn, or open Snipping Tool and click New with the mouse. On tablets, pressing the power and volume-up buttons together captures the screen.


'%3e%3cpath%20d='M19.9911%204.11386V6.471H18.5894C18.0775%206.471%2017.7322%206.57814%2017.5536%206.79243C17.3751%207.00671%2017.2858%207.32814%2017.2858%207.75671V9.44421H19.9019L19.5536%2012.0871H17.2858V18.8639H14.5536V12.0871H12.2769V9.44421H14.5536V7.49779C14.5536%206.39064%2014.8632%205.53201%2015.4822%204.92189C16.1013%204.31177%2016.9257%204.00671%2017.9554%204.00671C18.8304%204.00671%2019.509%204.04243%2019.9911%204.11386Z'%20fill='%23333333'/%3e%3c/g%3e%3cdefs%3e%3cclipPath%20id='clip0_2938_8199'%3e%3crect%20width='16'%20height='16'%20fill='white'%20transform='translate(8%204.00671)'/%3e%3c/clipPath%3e%3c/defs%3e%3c/svg%3e)
'%3e%3cpath%20d='M17.5237%2010.7813L23.4811%204H22.0699L16.8949%209.88693L12.7648%204H8L14.2469%2012.9029L8%2020.0133H9.4112L14.8725%2013.7952L19.2352%2020.0133H24M9.92053%205.04213H12.0885L22.0688%2019.0224H19.9003'%20fill='%23333333'/%3e%3c/g%3e%3cdefs%3e%3cclipPath%20id='clip0_2938_8200'%3e%3crect%20width='16'%20height='16.0134'%20fill='white'%20transform='translate(8%204)'/%3e%3c/clipPath%3e%3c/defs%3e%3c/svg%3e)


