Whether you’re printing business cards, designing t-shirts, or
creating laser-cut crafts, you’ll soon hear: "We need a vector file."
So, how do you transform your pixel-based image into a crisp, infinitely
scalable vector? In this article, we’ll explore how to vectorize an
image using the best tools available in 2025, from professional design
software to simple, free online solutions.
Use Word, Excel, and PPT for FREE
How to Vectorize an Image
Part 1: Introduction
to Image Vectorization
What Is a Vector Image?
A vector image is a type of graphic that uses mathematical paths
instead of pixels to form shapes, lines, and colors. Unlike raster
images such as JPG or PNG, which are made up of small squares that lose
quality when enlarged, vector graphics can be scaled to any size without
distortion, this makes them ideal for professional printing, large
banners, and digital designs where clarity is essential.
What Is a Vector Image
Vector files can be edited easily because every shape and color is a
separate object. Designers often use vector formats when they need to
change colors, resize graphics, or create consistent branding
materials.
Benefits of Vector Images
The main advantage of vector images is scalability. You can resize a
vector file infinitely, and it will always remain sharp and clean. This
is why company logos, icons, and illustrations are often designed as
vectors.
Other benefits include:
Smaller file size: Vector images usually take up
less storage space than high-resolution raster files.
Edit flexibility: You can modify shapes and
colors independently.
Print quality: They are perfect for large-scale
printing, cutting, and engraving.
Professional consistency: Vectors maintain a
polished look across all platforms, from digital screens to physical
products.
If you often need to create marketing materials or merchandise,
learning how to vectorize an image ensures that your designs always look
professional and ready for any format.
The Main Types of Vector
File Formats
Several file formats are commonly used to store vector graphics:
SVG (Scalable Vector Graphics): Widely supported
by web browsers and ideal for online use.
AI (Adobe Illustrator): The standard format used
in Adobe Illustrator for professional graphic design.
EPS (Encapsulated PostScript): Often required by
printers and used in commercial publishing.
PDF (Portable Document Format): Supports both
vector and raster elements and is easy to share.
When you vectorize an image, the result is typically exported into
one of these formats. Choosing the right format depends on your
project’s purpose, whether it is for web design, print media, or machine
cutting.
Part 2: Top 5 Best Image
Vectorization
1. Adobe Illustrator
Adobe Illustrator is one of the most powerful professional tools used
to vectorize an image with precision. It is trusted by designers,
marketers, and print studios for converting raster graphics into smooth,
editable vector shapes. The tool’s "Image Trace" feature allows users to
automatically trace a photo or logo and transform it into scalable
paths.
How to vectorize an image for free using Adobe Illustrator
Features
Image Trace: Converts bitmap images into clean
vector outlines.
Multiple Presets: Offers options for sketches,
logos, line art, and detailed illustrations.
Advanced Editing: Provides full control over
anchor points, colors, and shapes.
Integration: Works seamlessly with Photoshop and
other Adobe Creative Cloud apps.
Subscription-based pricing may not suit casual users.
Requires time and practice to master.
Personal Experience
When using Adobe Illustrator to vectorize an image, the results are
precise and professional, especially for logos or printed materials.
However, beginners may find it slightly complex at first. Once you
understand the Image Trace settings, it becomes a reliable choice for
consistent, high-quality output.
2. Vectorizer.io
Vectorizer.io is a quick and accurate online tool that allows users
to vectorize an image for free without installing any software. It
automatically converts raster images such as JPG or PNG into SVG, PDF,
or EPS formats. This platform is ideal for non-designers and small
business owners who need a fast solution for scalable graphics.
How to vectorize an image using an AI vectorizer
Features
Automatic Conversion: Upload a raster file and
get a clean vector in seconds.
Multiple Output Formats: Exports to SVG, EPS,
and PDF.
AI-Based Processing: Uses advanced algorithms to
maintain details and color accuracy.
Browser-Based Tool: No need for downloads or
account creation.
Step 2: Upload your image by dragging it into
the upload area.
Step 3: Wait for the system to process the image
automatically.
How to vectorize an image using AI
Step 4: Review the preview and make any small
adjustments if needed.
Review the preview
Step 5: Download the vector file in your
preferred format (SVG, EPS, or PDF).
download the vectorized image
Pros
Simple and fast interface suitable for beginners.
Provides multiple export options.
Works directly from a browser, saving time and setup
effort.
Cons
Limited manual editing options.
The free version has fewer customization features compared to
paid plans.
Personal Experience
When I tested how to vectorize an image using Vectorizer.io, the
process took less than a minute. The conversion quality was surprisingly
good for basic logos and line drawings. However, complex images with
gradients or shadows required some manual cleaning afterward. It is a
practical tool if you need a quick and free conversion.
3. Canva
Canva is a versatile online design platform that lets users vectorize
an image and create professional graphics without advanced design
skills. It combines powerful creative features with a simple
drag-and-drop interface, making it an excellent choice for small
businesses, marketers, and hobbyists.
How to vectorize an image using Canva
Features
AI-Powered Vector Conversion: Canva now includes
tools to transform raster images into scalable vector-style
designs.
Template Library: Thousands of ready-made
templates for posters, logos, and social media.
Collaborative Editing: Teams can co-edit designs
in real time.
Export Flexibility: Supports formats like SVG,
PDF, and PNG.
Step 2: Open a new design and upload your image
(JPG or PNG).
Step 3: Select the image and use the “Edit
Image” option.
Go to Edit Image
Step 4: Choose the Vectorizer feature and click “Start tracer” to recreate your design in vector
form.
Choose vectorizer
Step 5: Once complete, export your design as an SVG file for scalable use.
vectorized image using Canva AI
Pros
Very easy to use, even for beginners.
Includes thousands of templates and fonts.
Accessible on both desktop and mobile.
Cons
Fewer precise vector editing controls than professional
software.
Requires Canva Pro for SVG export and some AI tools.
Personal Experience
Using Canva to vectorize an image is ideal when you want results
quickly without advanced design tools. The AI features can recreate
simple graphics with good clarity, although intricate logos may lose
minor details. For marketers and small teams who prioritize speed and
collaboration, Canva is an efficient and affordable solution.
4. Stickerit
Stickerit is an online tool designed primarily for printing and
creating custom merchandise. It also provides a built-in vectorizer that
helps users vectorize an image for free before printing it on stickers,
t-shirts, or product labels. This feature makes it popular among small
businesses and artists who want high-quality prints without needing
graphic design experience.
How to vectorize an image using Stickerit
Features
Instant Vector Conversion: Upload a raster file,
and the system automatically converts it into a print-ready
vector.
Print-Ready Output: Ensures your designs remain
sharp when printed on any surface.
Simple Artwork Upload: Accepts JPG, PNG, and PDF
formats.
Online Preview: Lets you view and adjust your
vector design before finalizing your print order.
Price
Free to use for vector conversion. You only pay for
printed products.
Step 2: Click on the Vectoriser tool and upload your image.
Upload the image to Stickerit
Step 3: Wait for the system to automatically
convert it into a vector format.
Preview the image in Stickerit
Step 4: Review the preview and adjust the output
if needed.
Step 5: Download the vector file or continue to
order your printed items.
Pros
Free vectorization service.
Great for preparing artwork for printing.
Fast processing and easy-to-use interface.
Cons
Limited to simple artwork.
Less suitable for detailed or multi-colored
illustrations.
Personal Experience
I used Stickerit to vectorize an image for a promotional sticker
design, and the process was effortless. The conversion quality was
excellent for logos with bold outlines and flat colors. However, it is
not ideal for complex images with gradients or intricate details. Still,
for small business owners who need quick, print-ready graphics,
Stickerit is a convenient and free option.
5. Kittl
Kittl is an all-in-one online design tool that combines advanced
vector editing with ease of use. It allows users to vectorize an image
directly in the browser while also offering creative design templates,
text effects, and export options. Kittl is especially suitable for
creators who want to design and edit vector artwork for merchandise,
digital marketing, or personal projects.
Step 2: Upload your raster image, such as JPG or
PNG.
Step 3: The vectorizer will process the file
automatically, showing a live preview.
vectorized image using Kittl
Step 4: Edit your converted design using Kittl’s
fonts, shapes, or effects.
Edit the vectorized image using Kittl
Step 5: Export the result as an SVG or PDF for
printing or digital use.
Download the vectorized image for free using Kittl
Pros
Easy to use with an intuitive drag-and-drop editor.
Includes professional templates and design tools.
Offers both vectorization and full creative editing in one
platform.
Cons
Requires an internet connection for editing.
Some advanced features are available only in paid plans.
Personal Experience
When I tested how to vectorize an image using Kittl, the results were
clean and accurate. The platform handled color transitions better than
most free converters. I also liked that I could make small edits
directly after conversion. It is one of the best tools for users who
want to create ready-to-print designs quickly without switching between
multiple apps.
Part 3: Comparison of the
Five Tools
Tool
Features
Pros
Cons
Price
Adobe Illustrator
Advanced Image Trace, full vector editing,
color, and anchor control
Professional accuracy, detailed
customization, supports all vector formats
Each tool suits a different type of user. Adobe Illustrator delivers
unmatched precision for professionals who handle complex artwork.
Vectorizer.io is ideal for users who want to vectorize an image for free
within seconds. Canva combines creativity with ease of use, though some
export options require a subscription. Stickerit focuses on quick
conversions for printing needs, making it excellent for small business
owners. Kittl offers a balanced approach with both vectorization and
creative editing in one workspace.
Part 4:
Effortlessly Enhance Your Images with WPS Photo
While professional tools such as Adobe Illustrator and Kittl are
excellent for creating vector graphics, the results sometimes need extra
polishing before being used in print or digital media. Free converters
like Vectorizer.io and Stickerit can also produce decent results, but
the images may still appear dull, slightly blurred, or lacking contrast
after vectorization.
If you want to refine and enhance the clarity, sharpness, or color
tone of your vectorized image, WPS Photo offers an ideal post-processing solution. Instead of vectorizing, it
helps improve the visual quality of your finished graphics, making them
ready for professional use in marketing, printing, and online
publishing.
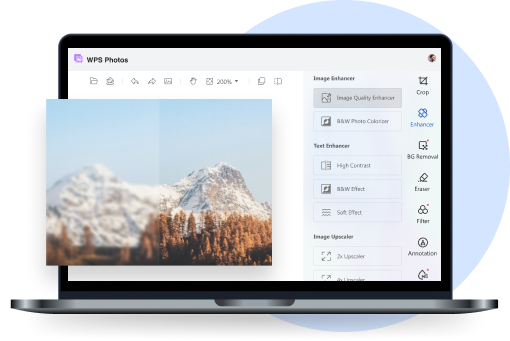
WPS AI Photo Editor
Why Use WPS
Photo to Enhance a Vectorized Image?
AI-Powered Enhancement:
WPS Photo uses advanced AI to automatically adjust brightness, color
contrast, and sharpness. It can make a vectorized logo or illustration
appear more vivid and balanced.
Detail Restoration:
The enhancement tools can reduce pixelation and smooth out edges in
raster sections, helping your design look cleaner and more polished.
Beginner-Friendly Interface:
Every function is straightforward and labeled clearly. You can import
your image, enhance it, and export the result within seconds.
Speed and Efficiency:
The AI-driven engine processes images rapidly, offering instant
improvements without requiring complex adjustments or prior editing
experience.
Step-by-Step: How to Enhance a Vectorized Image with WPS
Photo
Step 1: Open WPS Photos from
the main WPS Office suite or as a standalone application.
Step 2: Import your vectorized or
high-resolution image.
Open the vectorized image in WPS Photos
Step 3: Go to the AI Tools or Enhance Tools section and choose AI Photo
Enhance or Color Adjustment.
Enhance the vectorized image in WPS Photos
Step 4: Adjust brightness, sharpness, and
saturation as needed. You can preview the enhancement in real
time.
Step 5: Save or export the improved image in
your preferred format, such as PNG, JPG, or PDF.
Download the enhanced image in WPS Photos
Personal Experience
After testing how to vectorize an image using WPS Photo, the results
were impressive. The tool handled fine edges and color transitions
smoothly, which is often challenging for most free converters. The AI
system produced clear outlines and accurate shapes with no manual
adjustments required. WPS Photo makes vectorization effortless and
highly accessible for beginners and professionals alike.
100% secure
FAQs
1. Why do I need a vector logo if my website only uses a
small PNG?
A vector logo ensures your brand remains sharp and consistent across
every format. Even if your website uses a small PNG now, you will
eventually need a scalable version for printing, packaging, or
merchandise. With a vector file, your design can be resized infinitely
without losing quality, making it ideal for all future uses.
2. I vectorized my image, but it still has a white
background. How do I remove it?
Most vectorization tools include an option to remove backgrounds. In
Adobe Illustrator, check the “Ignore White” box under
the Image Trace settings. If the white background remains, expand the
traced object, select the white area, and delete it manually before
exporting the file.
3. Can I vectorize an image using AI tools for
free?
Yes. Several online platforms now allow you to vectorize an
image for free using AI-based systems. Tools such asVectorizer.io, Stickerit, andWPS Photo offer quick conversion without needing design
experience. However, paid software usually provides more precise results
and better color control.
4. What is the best format to save my vectorized
file?
The most commonly used formats are SVG,AI, and EPS. For web graphics, SVG is
ideal because it maintains small file sizes and scales smoothly. For
professional printing or detailed editing, AI and EPS formats are
preferred.
5. How can I improve the quality of my vectorized
image?
To improve accuracy, start with a clear and high-resolution image.
Avoid blurred or low-contrast photos. When using tools like WPS
Photo or Adobe Illustrator, fine-tune settings
such as detail and smoothness. Cleaning up paths or shapes manually
after conversion can also help achieve a polished finish.
Summary
Learning how to vectorize an image is essential for anyone who wants crisp, scalable, and professional-looking designs. Whether you are a small business owner creating a logo, a marketer preparing print materials, or a hobbyist designing stickers, using the right vectorization tool ensures your images remain sharp at any size. Tools like Adobe Illustrator and Kittl provide full creative control, while online options such as Vectorizer.io, Canva, and Stickerit deliver fast and accessible results for beginners.
Among these tools, WPS Photo stands out as the most balanced solution. It combines AI accuracy, user-friendly design, and remarkable speed to produce high-quality vector results in seconds. If you want to vectorize an image efficiently without complex steps or costly subscriptions, WPS Photo offers the perfect mix of simplicity and precision for both personal and professional use.
Office software expert with 15+ years of experience since 2009. I specialize in tech tutorials, productivity tools, and digital solutions for everyday users. Passionate about making technology simple and accessible for everyone.

'%3e%3cpath%20d='M8%200C12.4183%200%2016%203.58172%2016%208C16%2012.4183%2012.4183%2016%208%2016C3.58172%2016%200%2012.4183%200%208C0%203.58172%203.58172%200%208%200ZM11.6162%204.38379C11.2257%203.99337%2010.5927%203.99338%2010.2021%204.38379L8%206.58594L5.79785%204.38379C5.40732%203.99334%204.77429%203.99329%204.38379%204.38379C3.99331%204.77429%203.99335%205.40733%204.38379%205.79785L6.58594%208L4.38379%2010.2021C3.99348%2010.5927%203.99341%2011.2257%204.38379%2011.6162C4.77426%2012.0066%205.40734%2012.0065%205.79785%2011.6162L8%209.41406L10.2021%2011.6162C10.5927%2012.0066%2011.2257%2012.0067%2011.6162%2011.6162C12.0067%2011.2257%2012.0066%2010.5927%2011.6162%2010.2021L9.41406%208L11.6162%205.79785C12.0066%205.40735%2012.0066%204.77429%2011.6162%204.38379Z'%20fill='%23080E17'%20fill-opacity='0.46'/%3e%3c/g%3e%3cdefs%3e%3cclipPath%20id='clip0_3761_713'%3e%3crect%20width='16'%20height='16'%20fill='white'/%3e%3c/clipPath%3e%3c/defs%3e%3c/svg%3e)


'%3e%3cpath%20fill-rule='evenodd'%20clip-rule='evenodd'%20d='M21.4999%2010.9993C21.4999%205.20009%2016.7986%200.498901%2010.9993%200.498901C5.19994%200.498901%200.498657%205.20009%200.498657%2010.9993C0.498657%2016.2404%204.33858%2020.5844%209.35855%2021.3722V14.0346H6.69238V10.9993H9.35855V8.68594C9.35855%206.05427%2010.9262%204.60062%2013.3248%204.60062C14.4736%204.60062%2015.6753%204.80571%2015.6753%204.80571V7.38979H14.3512C13.0468%207.38979%2012.64%208.19921%2012.64%209.0296V10.9993H15.5523L15.0867%2014.0346H12.64V21.3722C17.66%2020.5844%2021.4999%2016.2404%2021.4999%2010.9993Z'%20fill='%231568EA'/%3e%3c/g%3e%3c/svg%3e)


'%3e%3cpath%20d='M19.9911%204.11386V6.471H18.5894C18.0775%206.471%2017.7322%206.57814%2017.5536%206.79243C17.3751%207.00671%2017.2858%207.32814%2017.2858%207.75671V9.44421H19.9019L19.5536%2012.0871H17.2858V18.8639H14.5536V12.0871H12.2769V9.44421H14.5536V7.49779C14.5536%206.39064%2014.8632%205.53201%2015.4822%204.92189C16.1013%204.31177%2016.9257%204.00671%2017.9554%204.00671C18.8304%204.00671%2019.509%204.04243%2019.9911%204.11386Z'%20fill='%23333333'/%3e%3c/g%3e%3cdefs%3e%3cclipPath%20id='clip0_2938_8199'%3e%3crect%20width='16'%20height='16'%20fill='white'%20transform='translate(8%204.00671)'/%3e%3c/clipPath%3e%3c/defs%3e%3c/svg%3e)
'%3e%3cpath%20d='M17.5237%2010.7813L23.4811%204H22.0699L16.8949%209.88693L12.7648%204H8L14.2469%2012.9029L8%2020.0133H9.4112L14.8725%2013.7952L19.2352%2020.0133H24M9.92053%205.04213H12.0885L22.0688%2019.0224H19.9003'%20fill='%23333333'/%3e%3c/g%3e%3cdefs%3e%3cclipPath%20id='clip0_2938_8200'%3e%3crect%20width='16'%20height='16.0134'%20fill='white'%20transform='translate(8%204)'/%3e%3c/clipPath%3e%3c/defs%3e%3c/svg%3e)


