
'%3e%3cpath%20d='M8%200C12.4183%200%2016%203.58172%2016%208C16%2012.4183%2012.4183%2016%208%2016C3.58172%2016%200%2012.4183%200%208C0%203.58172%203.58172%200%208%200ZM11.6162%204.38379C11.2257%203.99337%2010.5927%203.99338%2010.2021%204.38379L8%206.58594L5.79785%204.38379C5.40732%203.99334%204.77429%203.99329%204.38379%204.38379C3.99331%204.77429%203.99335%205.40733%204.38379%205.79785L6.58594%208L4.38379%2010.2021C3.99348%2010.5927%203.99341%2011.2257%204.38379%2011.6162C4.77426%2012.0066%205.40734%2012.0065%205.79785%2011.6162L8%209.41406L10.2021%2011.6162C10.5927%2012.0066%2011.2257%2012.0067%2011.6162%2011.6162C12.0067%2011.2257%2012.0066%2010.5927%2011.6162%2010.2021L9.41406%208L11.6162%205.79785C12.0066%205.40735%2012.0066%204.77429%2011.6162%204.38379Z'%20fill='%23080E17'%20fill-opacity='0.46'/%3e%3c/g%3e%3cdefs%3e%3cclipPath%20id='clip0_3761_713'%3e%3crect%20width='16'%20height='16'%20fill='white'/%3e%3c/clipPath%3e%3c/defs%3e%3c/svg%3e)


'%3e%3cpath%20fill-rule='evenodd'%20clip-rule='evenodd'%20d='M21.4999%2010.9993C21.4999%205.20009%2016.7986%200.498901%2010.9993%200.498901C5.19994%200.498901%200.498657%205.20009%200.498657%2010.9993C0.498657%2016.2404%204.33858%2020.5844%209.35855%2021.3722V14.0346H6.69238V10.9993H9.35855V8.68594C9.35855%206.05427%2010.9262%204.60062%2013.3248%204.60062C14.4736%204.60062%2015.6753%204.80571%2015.6753%204.80571V7.38979H14.3512C13.0468%207.38979%2012.64%208.19921%2012.64%209.0296V10.9993H15.5523L15.0867%2014.0346H12.64V21.3722C17.66%2020.5844%2021.4999%2016.2404%2021.4999%2010.9993Z'%20fill='%231568EA'/%3e%3c/g%3e%3c/svg%3e)


Merging images is one of those Photoshop skills that looks complicated from the outside but becomes incredibly satisfying once you know the steps. Adobe Photoshop gives you total control over your photo composition but the problem is that Photoshop’s tools aren’t always intuitive. In this guide, I’ll show you how to merge two photos together on Photoshop in a way that feels natural and if you prefer something easier and AI-powered, I’ll also share how WPS Photos allows you to merge photos with one click for fast, professional results.

Overview of Photoshop
It helps to understand why Photoshop is the go-to tool for merging images. Knowing the workflow and key tools makes combining two photos far less intimidating. Layers let you stack multiple images and edit them independently, while masks give you precise control over which parts of each image are visible. Blending modes handle how layers interact, helping you create anything from realistic composites to artistic effects.
With these capabilities in mind, you can see how Photoshop provides the control and flexibility needed for professional-quality photo merging which is essential for anyone exploring detailed photo composition Photoshop techniques.

Grasping these aspects gives you a solid foundation before learning how to merge two photos together on photoshop.
2 Methods to Merge Two Photos Together on Photoshop (Step-by-Step)
I’ve done a lot of research about looking into ways to merge 2 photos, and different techniques work better depending on your goal. If you want a realistic composition, like placing a subject into a new background, layer masks give you precise control and allow for non-destructive editing. On the other hand, if you’re aiming for artistic effects such as double exposures or creative overlays, blending modes can achieve complex results quickly without heavy manual adjustments.
Merge Two Photos Using Layer Masks (Best for Realistic Blending)
When your goal is to combine two pictures Photoshop gives you a simple option known as layer masks. Here’s how to apply them.
Step 1: Begin by importing both of your photos into Photoshop. Click “File” in the top menu, then choose “Open As” to select your images.

Step 2: Head to the top menu bar and click “Photo”. This is where Photoshop groups most of its import and editing options related to image files.

Step 3: Hover over “Edit in”, then choose “Open as Layers in Photoshop”. This action imports your second image directly into the same project and places it above your base photo as a separate layer.

Step 4: Once the images appear in the Layers panel, select the top layer and at the bottom of the panel, click the “Layer Merge” icon. Photoshop instantly merges the two images together into a single, unified layer.

Merge Photos with Blending Modes (Great for Creative Effects)
If your goal is more artistic such as a double exposure, Photoshop photo blending modes offer faster, more dramatic results. Here’s how to use it.
Step 1: Start by uploading both images in Photoshop like before by clicking on “File” then “Open As”. They’ll open as tabs at the top of your workspace.
Step 2: To see them side by side, click both the images and drab their tabs down from the top to detach them into separate windows.

Note: Arrange them so both images are visible next to each other.
Step 3: Select the “Move Tool” from the toolbar on the left. This lets you click and drag the image from one window into the other.

Step 4: Click on the image you want to move, hold down the mouse, and drag it onto the other image’s window which will allow the images to be overlayed.

A Simpler Alternative – WPS Photos (AI Photo Merging)
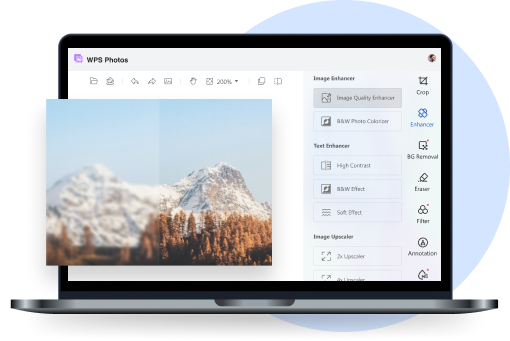
When I want to make some enhancements to two merged photos quickly without dealing with the complications in Photoshop, I often turn to WPS Photos, an AI‑powered photo editor built into the WPS suite. Instead of going through a full layer mask merge tutorial, you can rely on smart tools that automatically boost image quality, remove or replace backgrounds, and erase unwanted objects. Its AI Photo Enhancer upscales low-res or blurry shots by up to 4×, while the Auto Background Remover handles even tricky edges like hair with great precision.

WPS Photos makes enhancing images simple, even without design experience. Here’s how to use it.
Step 1: Right-click on the photo you want to edit, then click on “Edit Photo” to open it in WPS Photo Editor.

Step 2: Make whatever changes you like to the photo, such as using the “Background Removal” for a refined look.

Step 3: Click on “Convert”, then select “Print to PDF” to save your changes and print your edited photo.

Comparison Between Photoshop and WPS Photos
It's important to compare both of the tools side by side so you can choose the right tool for your needs. I’ve used Photoshop when I needed full manual control, for example, when fine-tuning layer masks, matching lighting precisely, or making complex double‑exposure compositions. But I also rely on WPS Photos for quick turnarounds: its AI handles merging, sharpening, and color balancing without me having to micromanage every detail. By weighing ease of use, output quality, speed, and flexibility, this comparison will help you decide whether you want the power of Photoshop or the convenience of WPS Photos for your next photo‑merging project.
| Feature | Photoshop | WPS Photos |
|---|---|---|
| Ease of Use | Moderate to difficult (requires learning layers & masks) | Very easy (AI automation) |
| Speed | Manual, time-consuming | Instant merging |
| Type of Merging | Professional, detailed, precise | Quick, simple, automated |
| Batch Support | Limited | Strong batch automation |
| Output Quality | Industry-standard | High-quality AI-enhanced |
| Ideal For | Designers, photographers, creative editors | Beginners, students, casual users |
While Photoshop excels at detailed, professional edits, WPS Photos lets you achieve high-quality merges quickly and efficiently. Its AI tools simplify color correction, sharpening, and blending, so you can produce images without the technical effort or time investment required by Photoshop.
FAQs
1. Can I merge two photos in Photoshop without losing quality?
Yes. Use layer masks and non-destructive editing techniques to maintain full image quality.
2. Is Photoshop free to use?
No. Photoshop requires a paid subscription, though a 7-day free trial is available.
3. What’s the easiest way to merge photos without Photoshop?
WPS Photos is the simplest alternative. Its AI system automatically blends, enhances, and merges images with one click.
4. How do I blend photos perfectly in Photoshop?
Use gradient masks, adjust opacity, and match the lighting and color tones between the two images.

'%3e%3cpath%20d='M19.9911%204.11386V6.471H18.5894C18.0775%206.471%2017.7322%206.57814%2017.5536%206.79243C17.3751%207.00671%2017.2858%207.32814%2017.2858%207.75671V9.44421H19.9019L19.5536%2012.0871H17.2858V18.8639H14.5536V12.0871H12.2769V9.44421H14.5536V7.49779C14.5536%206.39064%2014.8632%205.53201%2015.4822%204.92189C16.1013%204.31177%2016.9257%204.00671%2017.9554%204.00671C18.8304%204.00671%2019.509%204.04243%2019.9911%204.11386Z'%20fill='%23333333'/%3e%3c/g%3e%3cdefs%3e%3cclipPath%20id='clip0_2938_8199'%3e%3crect%20width='16'%20height='16'%20fill='white'%20transform='translate(8%204.00671)'/%3e%3c/clipPath%3e%3c/defs%3e%3c/svg%3e)
'%3e%3cpath%20d='M17.5237%2010.7813L23.4811%204H22.0699L16.8949%209.88693L12.7648%204H8L14.2469%2012.9029L8%2020.0133H9.4112L14.8725%2013.7952L19.2352%2020.0133H24M9.92053%205.04213H12.0885L22.0688%2019.0224H19.9003'%20fill='%23333333'/%3e%3c/g%3e%3cdefs%3e%3cclipPath%20id='clip0_2938_8200'%3e%3crect%20width='16'%20height='16.0134'%20fill='white'%20transform='translate(8%204)'/%3e%3c/clipPath%3e%3c/defs%3e%3c/svg%3e)


