
'%3e%3cpath%20d='M8%200C12.4183%200%2016%203.58172%2016%208C16%2012.4183%2012.4183%2016%208%2016C3.58172%2016%200%2012.4183%200%208C0%203.58172%203.58172%200%208%200ZM11.6162%204.38379C11.2257%203.99337%2010.5927%203.99338%2010.2021%204.38379L8%206.58594L5.79785%204.38379C5.40732%203.99334%204.77429%203.99329%204.38379%204.38379C3.99331%204.77429%203.99335%205.40733%204.38379%205.79785L6.58594%208L4.38379%2010.2021C3.99348%2010.5927%203.99341%2011.2257%204.38379%2011.6162C4.77426%2012.0066%205.40734%2012.0065%205.79785%2011.6162L8%209.41406L10.2021%2011.6162C10.5927%2012.0066%2011.2257%2012.0067%2011.6162%2011.6162C12.0067%2011.2257%2012.0066%2010.5927%2011.6162%2010.2021L9.41406%208L11.6162%205.79785C12.0066%205.40735%2012.0066%204.77429%2011.6162%204.38379Z'%20fill='%23080E17'%20fill-opacity='0.46'/%3e%3c/g%3e%3cdefs%3e%3cclipPath%20id='clip0_3761_713'%3e%3crect%20width='16'%20height='16'%20fill='white'/%3e%3c/clipPath%3e%3c/defs%3e%3c/svg%3e)


'%3e%3cpath%20fill-rule='evenodd'%20clip-rule='evenodd'%20d='M21.4999%2010.9993C21.4999%205.20009%2016.7986%200.498901%2010.9993%200.498901C5.19994%200.498901%200.498657%205.20009%200.498657%2010.9993C0.498657%2016.2404%204.33858%2020.5844%209.35855%2021.3722V14.0346H6.69238V10.9993H9.35855V8.68594C9.35855%206.05427%2010.9262%204.60062%2013.3248%204.60062C14.4736%204.60062%2015.6753%204.80571%2015.6753%204.80571V7.38979H14.3512C13.0468%207.38979%2012.64%208.19921%2012.64%209.0296V10.9993H15.5523L15.0867%2014.0346H12.64V21.3722C17.66%2020.5844%2021.4999%2016.2404%2021.4999%2010.9993Z'%20fill='%231568EA'/%3e%3c/g%3e%3c/svg%3e)


In a visually-driven world, photos have become powerful storytellers, whether you’re showcasing a product, promoting a property, or capturing personal memories. But glare can instantly ruin an otherwise perfect image. Fixing it manually often leads to unnatural patches, color distortion, or blurred textures. And unless you’re a seasoned photo editor with premium software, the task can feel irritating and nearly impossible. In this guide, I’ll introduce the best tools and show you how to remove glare from photo quickly and easily.

Top Tools for Removing Glare from Photos
Each glare-removal tool handles glare differently depending on how it detects highlights, textures, and the underlying surface. Evoto AI, for example, uses portrait-focused reconstruction that works really well on skin but behaves differently on reflective objects, while X-Design’s online engine prioritizes speed and cleans up glass reflections with minimal detail loss. Understanding these differences helped me figure out which tool to use for specific scenarios like photos taken through windows, shiny product shots, or areas with mixed lighting.
Evoto AI
Evoto AI is primarily known as a portrait retouching engine, but its glare-removal model is almost perfect because it analyzes skin texture, highlights, and luminance patterns instead of simply blurring bright areas. The software reconstructs the underlying details by referencing nearby pixels, which helps maintain realism even in high-contrast shots. It’s built for desktop use, so the processing is fast and stable, especially for large image batches. Evoto also gives you manual controls alongside AI correction, which is useful when glare appears on both reflective surfaces and skin.

Features
Evoto AI offers a dedicated glasses glare removal slider that works specifically on portrait photos.
The software includes local AI masking for selective adjustments in glare‑affected areas, such as exposure and saturation.
It provides healing tools, like the Spot-Healing Brush and Patch Tool, to manually correct glare spots.
Evoto AI supports batch editing, allowing you to apply the same glare-correction settings across multiple images efficiently.
Pros:
Removes glasses glare with a dedicated slider in the “Eyes” section.
Reduces shine on skin and face using a “Face Shine” control.
Includes healing tools like Clone Stamp and Patch for manual touch-ups.
Cons:
Glasses glare tool doesn’t work on colored or tinted lenses.
Mostly built for portraits which is less effective for complex environmental glare.
Once you understand how the sliders and brushes interact, you can quickly remove glare from photo online free while preserving texture and detail across multiple images. Here’s exactly how to import your photos and fine-tune the results for professional-grade clarity:
Step 1: Go to Evoto AI’s Photo Glare Remover and click “Upload Image” to import your file.

Step 2: Once your file is uploaded, the glare is removed automatically, and you can view the before-and-after by sliding the comparison bar.

Step 3: Click the yellow “Download” button to save your glare-free image with no watermarks.

Note: If you want to edit multiple photos at once, click the black “Bulk Editing” button. This will redirect you to download the full Evoto software for batch processing.
X-Design
X-Design is an online editor built for users who want to fix glare quickly without installing any software. Its glare-removal tool uses a simplified AI pipeline that detects hotspots and diffused light patches, then softens or reconstructs them depending on the severity. Because it processes everything in-browser, it’s well-suited for fixing glare on glass, phone screens, or product photos that don’t need deep texture restoration. The interface is user-friendly, with adjustments appearing immediately on-screen, making it easy to fine-tune results even if you have no editing background.

Features
X-Design provides a browser-based glare remover that fixes reflections without requiring any software installation.
The platform has a one-click processing feature that automatically detects and corrects glare with minimal user input.
It includes a live preview slider so you can adjust the intensity of glare removal before downloading your image.
X-Design supports common image formats such as JPEG and PNG and works seamlessly on both mobile and desktop browsers.
Pros:
Lets you remove glare directly in your browser.
Supports batch upload up to 30 images.
Brush or box tools let you precisely select the glare area before AI fixes it.
Automatically enhances sharpness and details.
Cons:
Fewer advanced controls compared to desktop editors.
Requires a stable internet connection for processing.
X‑Design’s simplicity is its strength, but to get the best results, you need to guide the tool to the areas that need correction. Here’s how to go about it.
Step 1: Go to X-Design’s AI Photo Glare Remover and click “Upload Image” to add your file.

Step 2: Once your file is uploaded, click on the “Glare” button on the left menu to remove glare from the uploaded picture.

Step 3: Finally, click the green “Download” button to save your glare-free image.

PerfectCorp YouCam Enhance
PerfectCorp’s YouCam Enhance is designed for mobile creators, so its glare-removal model is optimized for photos taken in uneven lighting or reflective indoor environments. The app analyzes shadows, skin tone, and brightness distribution to reduce harsh reflections without flattening the entire image. YouCam Enhance is part of PerfectCorp’s larger ecosystem of beauty and enhancement tools, which means you get additional lighting and color correction features that naturally complement glare reduction. Its real-time preview makes it easy to see how adjustments affect the final result, specifically with selfies or lifestyle shots.

Features
YouCam Enhance uses AI-based object removal to erase glare, light streaks, and reflections from photos.
It offers glare removal tools specifically optimized for glasses, flash, and background light.
The software automatically corrects colors, including hue, saturation, and temperature, to rebalance the image after glare removal.
YouCam Enhance also provides photo enhancement features such as de-noising, sharpening, and upscaling to restore image clarity.
Pros:
AI-powered object removal removes glare from glasses and light streaks.
Automatically balances color after glare removal.
Can erase glare from background lights like streetlamps.
Easy to use on mobile, with intuitive brush-based editing.
Cons:
The free version may have limited functionality depending on the plan.
May struggle with very complex or large glare areas
By combining glare removal with its color and lighting corrections, you can restore natural tones and clarity. Here’s how you can go about editing your images to get the most out of each feature.
Step 1: Go to YouCam’s Online Editor and click “Try it Now ” to upload your photo.

Step 2: Select the “Photo Enhancer” from the left menu to improve the image, including reducing glare.

Step 3: Review the before-and-after comparison displayed on the same image and if the results look good to you, click the black “Apply” button to confirm your edits.

Step 4: Click the blue “Download”button to save your enhanced, glare-free image.

AIEase
AIEase focuses on pinpoint object and glare removal rather than full-scene reconstruction, making it ideal for photos where glare appears in small, concentrated spots. The tool identifies reflective highlights and treats them similarly to unwanted objects, patching the area with surrounding texture data. Because everything runs online, the process is simple: upload, select the glare region, and let the engine process the correction. AIEase performs best when glare sits on a defined surface like a pair of glasses, polished wood, or a small reflective object.

Features
AIEase includes a dedicated glare remover that automatically detects and erases reflections on glasses, windows, and other surfaces.
It provides a brush tool for precise glare removal, allowing users to manually refine the corrected areas.
The platform also includes AI tools for object removal, background removal, and blemish correction.
AIEase offers three AI-quality enhancement models to improve image sharpness and resolution after glare removal.
Pros:
Detects and removes glare from glasses, flash, and reflective surfaces.
Lets you manually paint over glare zones for more precise corrections.
Includes broader AI editing tools like object removal and background removal.
Offers image enhancement models for improving quality post‑glare removal.
Cons:
Less advanced than full photo editors.
Limited manual control for reconstructing complex textures.
Careful selection of affected areas ensures precise corrections without impacting surrounding details. Here’s how you can approach glare removal efficiently and refine your images for a refined look.
Step 1: Go to AI Ease’s Online Photo Glare Remover and click “Remove Glare from Photo” to go to the editor.

Step 2: Once the editor opens, click on the blue “Upload Image” button to upload your image.

Step 3: Click the “Auto” button to switch into automatic glare removal mode.

Step 4: Under the search bar, type the element you want to remove glare from and then click “Remove”.

Step 5: After the glare has been removed, click the blue “Download” button to save your image.

Comparison Table of Glare Removal Tools
What works beautifully in one scenario can completely fall short in another. Over time, I zeroed in on four platforms: Evoto AI, X‑Design, YouCam Enhance, and AIEase that cover very different use cases. Laying out their strengths side by side helps me and anyone reading decide the right tool depending on whether I’m editing a product catalog, portraits, or casual phone shots. In the comparison table below, I break down each tool’s type, standout features, and trade‑offs so you can pick what suits you and your budget.
| Tool | Type | Features | Pros | Cons | Price |
|---|---|---|---|---|---|
| Evoto AI | Desktop Software | AI-powered, batch processing | High accuracy, professional results | Subscription-based | Paid |
| X-Design | Online Tool | One-click removal, no install | Fast, accessible | Limited control | Freemium |
| PerfectCorp | Mobile/Online | AI enhancement, multiple tools | User-friendly, good results | Watermarks on free | Freemium |
| AIEase | Online | Object removal, glare tools | Simple interface | Basic features | Freemium |
While these tools handle glare well in their specific contexts, many photos also need broader adjustments like lighting, color correction, or texture enhancement.
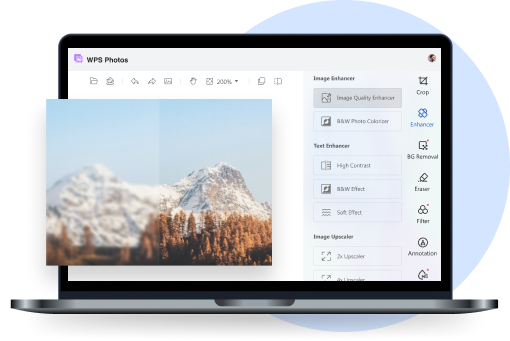
Remove Glare From Photo with WPS Photo
Many images benefit from a more comprehensive approach. Glare is often just one issue as colors might need balancing, textures restored, or small details sharpened to make the photo look professional. WPS Photo provides all of this in one platform, letting you reduce glare while enhancing lighting, correcting colors, and improving overall clarity. You may be working with JPG or PNG images from product shots, portraits, or real estate listings, and WPS Photo provides precise control with easy-to-use AI tools to refine every detail without the need to juggle multiple programs.

Features
Automatically enhances image quality by sharpening details, reducing noise, and boosting resolution with the AI Photo Enhancer.
Removes unwanted objects, people, or text with an AI-powered eraser tool, seamlessly blending backgrounds.
Uses AI to automatically detect and remove backgrounds with precise edge handling even for complex shapes like hair via the background removal feature.
Upscales images by 2× or 4× without losing clarity, using super-resolution AI that preserves texture and sharpness.
Pros
Sharpens images, reduces noise, and upscales resolution by up to 4×.
Magic Eraser removes unwanted objects, people, and text.
Background Remover handles complex edges like hair or fur for clean cutouts.
All editing happens locally, so your photos stay private.
Cons
Advanced editing features may be limited in free versions.
Local AI processing can be slower on lower-powered devices.
With these capabilities, WPS Photo gives you the tools to enhance the overall quality of your images in one place. Here’s how to go about using WPS Photo to reduce glare and refine your images step by step.
Step 1: Right-click on the photo affected by glare, then click on “Edit Photo” to open it in WPS Photo Editor.

Step 2: Click on “AI Enhancer” and make any adjustments you prefer to help soften and reduce unwanted glare before moving to the auto removal tool.

Step 3: You can also explore the tools in the right-side menu to further refine your image whether you want to remove the background, smooth out details, or make additional enhancements.

Step 4: Click on “Export”, then select “Print” to save your changes and print your edited photo.

FAQs
1. Can I remove glare from photos for free?
Yes. Tools like X-Design and AIEase allow free glare removal. WPS AI Photo also provides free access with optional premium enhancements.
2. How do I prevent glare when taking photos?
Avoid shooting directly toward reflective surfaces, use diffused light, place your light source at an angle, or try polarizing filters for cameras.
3. What’s the difference between AI and manual glare removal?
AI glare removal is automatic and fast, requiring minimal effort. Manual editing offers more control but takes time and skill.
4. Can I remove glare from faces or glasses?
Yes. Evoto AI and WPS AI Photo handle reflections on glasses exceptionally well, keeping the skin texture intact.
5. Will glare removal affect image quality?
With good AI tools, no. High-quality software preserves natural textures, colors, and fine details.

'%3e%3cpath%20d='M19.9911%204.11386V6.471H18.5894C18.0775%206.471%2017.7322%206.57814%2017.5536%206.79243C17.3751%207.00671%2017.2858%207.32814%2017.2858%207.75671V9.44421H19.9019L19.5536%2012.0871H17.2858V18.8639H14.5536V12.0871H12.2769V9.44421H14.5536V7.49779C14.5536%206.39064%2014.8632%205.53201%2015.4822%204.92189C16.1013%204.31177%2016.9257%204.00671%2017.9554%204.00671C18.8304%204.00671%2019.509%204.04243%2019.9911%204.11386Z'%20fill='%23333333'/%3e%3c/g%3e%3cdefs%3e%3cclipPath%20id='clip0_2938_8199'%3e%3crect%20width='16'%20height='16'%20fill='white'%20transform='translate(8%204.00671)'/%3e%3c/clipPath%3e%3c/defs%3e%3c/svg%3e)
'%3e%3cpath%20d='M17.5237%2010.7813L23.4811%204H22.0699L16.8949%209.88693L12.7648%204H8L14.2469%2012.9029L8%2020.0133H9.4112L14.8725%2013.7952L19.2352%2020.0133H24M9.92053%205.04213H12.0885L22.0688%2019.0224H19.9003'%20fill='%23333333'/%3e%3c/g%3e%3cdefs%3e%3cclipPath%20id='clip0_2938_8200'%3e%3crect%20width='16'%20height='16.0134'%20fill='white'%20transform='translate(8%204)'/%3e%3c/clipPath%3e%3c/defs%3e%3c/svg%3e)


