
'%3e%3cpath%20d='M8%200C12.4183%200%2016%203.58172%2016%208C16%2012.4183%2012.4183%2016%208%2016C3.58172%2016%200%2012.4183%200%208C0%203.58172%203.58172%200%208%200ZM11.6162%204.38379C11.2257%203.99337%2010.5927%203.99338%2010.2021%204.38379L8%206.58594L5.79785%204.38379C5.40732%203.99334%204.77429%203.99329%204.38379%204.38379C3.99331%204.77429%203.99335%205.40733%204.38379%205.79785L6.58594%208L4.38379%2010.2021C3.99348%2010.5927%203.99341%2011.2257%204.38379%2011.6162C4.77426%2012.0066%205.40734%2012.0065%205.79785%2011.6162L8%209.41406L10.2021%2011.6162C10.5927%2012.0066%2011.2257%2012.0067%2011.6162%2011.6162C12.0067%2011.2257%2012.0066%2010.5927%2011.6162%2010.2021L9.41406%208L11.6162%205.79785C12.0066%205.40735%2012.0066%204.77429%2011.6162%204.38379Z'%20fill='%23080E17'%20fill-opacity='0.46'/%3e%3c/g%3e%3cdefs%3e%3cclipPath%20id='clip0_3761_713'%3e%3crect%20width='16'%20height='16'%20fill='white'/%3e%3c/clipPath%3e%3c/defs%3e%3c/svg%3e)


'%3e%3cpath%20fill-rule='evenodd'%20clip-rule='evenodd'%20d='M21.4999%2010.9993C21.4999%205.20009%2016.7986%200.498901%2010.9993%200.498901C5.19994%200.498901%200.498657%205.20009%200.498657%2010.9993C0.498657%2016.2404%204.33858%2020.5844%209.35855%2021.3722V14.0346H6.69238V10.9993H9.35855V8.68594C9.35855%206.05427%2010.9262%204.60062%2013.3248%204.60062C14.4736%204.60062%2015.6753%204.80571%2015.6753%204.80571V7.38979H14.3512C13.0468%207.38979%2012.64%208.19921%2012.64%209.0296V10.9993H15.5523L15.0867%2014.0346H12.64V21.3722C17.66%2020.5844%2021.4999%2016.2404%2021.4999%2010.9993Z'%20fill='%231568EA'/%3e%3c/g%3e%3c/svg%3e)


Photoshop leads in image editing with tools to isolate photo sections for tweaks. The magic wand tool Photoshop quickly selects matching color zones. New users often puzzle over choosing it against other tools or adjusting tolerance, contiguous, and anti-aliasing to skip poor results. What defines the magic wand tool in Photoshop? How does it function, when to apply it, and what steps follow? For less manual work, AI choices exist too. This piece details the tool, its roles, Photoshop steps, and WPS Photos as a simple, fast option for edits.
Part 1: What the Magic Wand Tool Is

The Magic Wand Tool in Photoshop selects pixels based on color similarity, ideal for removing solid backgrounds quickly. Click a spot to sample its tone and grab nearby matching shades within a tolerance range, saving time on basic edits. It analyzes RGB values mathematically, stopping at edges like clouds in a sky. Great for product photos needing clean isolations, it has been a core feature since Photoshop's early days, integrating with layers for flexible, non-destructive work.
Key Features:
In Photoshop's Magic Wand tutorial, Tolerance (0-255) controls color sensitivity: low for exact matches, high for broader shades. Contiguous limits to touching pixels; Anti-aliased smooths edges. Sample All Layers grabs from stacked files. Tweak in top bar, refine with Select and Mask, pair with 2025 AI like Object Selection. Practice on stock pics from flats to textures.

Pros:
Speeds up selections on solid colors, like skies or walls, in under a minute.
Supports non-destructive edits on copied layers for easy fixes or undos.
Works well within Photoshop for masking or filling without extra software.
Allows batch actions to apply to multiple files, boosting efficiency.
Isolates elements fast for social media graphics, saving time for creativity.
Lowers the barrier for entry-level editing in e-commerce or basic designs.
These perks make it a go-to for quick, uniform area tasks.
Cons:
Falters on detailed or multi-tone areas, needing extra manual work like on fur or foliage.
Demands practice with settings, leading to over or under selections for novices.
Lacks built-in batch support, making repetitive tasks slow without scripts.
Lags on high-res images, with longer processing times.
Misses nuances in complex art, like hair strands or shadows.
Often requires switching to other tools for intricate edges.
These limits highlight when to pair it with alternatives.
Part 2: How to Use the Magic Wand Tool in Photoshop
The how to use magic wand tool in Photoshop follows a simple flow. It matches user goals for fast background or object isolation. This magic wand tool Photoshop tutorial focuses on selecting a background. It includes tips for uneven tones. Start on a duplicate layer to keep edits reversible. Zoom to 100% for accuracy.
Prepare your workspace. Close unused panels. Right-click the background layer and duplicate it. Name it "Selection Edit." Activate the tool by pressing W. Select Magic Wand from the flyout if needed. The cursor changes to a wand.
Step 1: Open Your Image and Select the Tool

Launch Photoshop and go to File > Open. Load your image. The Magic Wand is in the toolbar, fourth icon down. Press W to cycle if hidden. In the options bar, set Tolerance to 32. Enable Contiguous for local selections. Turn on Anti-aliased for smooth borders. Leave Sample All Layers off for basics. This prevents over-selection errors.
Test on a simple file. Click the background to see the outline. Raise tolerance by 10 if tight. Save presets for recurring jobs like e-commerce.
Step 2: Click to Make the Initial Selection

Zoom in with Ctrl/Cmd + +. Click the center of the target area, like a solid background. For photoshop magic wand select background, watch the dotted outline form. Hold Shift to add areas, Alt/Option to subtract. Uniform colors need one click. Gradients require multiples. This handles basics well, with practice filling gaps.
Avoid clicking edges to prevent subject grabs. For non-contiguous, disable the option and Shift-click spots. Practice on landscapes to learn control.
Step 3: Refine the Selection

Go to Select > Modify > Feather at 1-2 pixels to soften edges. Use Lasso Tool for stubborn spots. Disable Contiguous for distant areas. Select > Inverse flips to the subject. Work on the duplicated layer. These ensure cleaner edges for pro looks.
Use Select and Mask for advanced refine. Brush tricky areas. Feather avoids halos in composites. Test by filling to check holds.
Step 4: Apply Edits and Deselect

Press Delete to remove, or Edit > Fill > Content-Aware for swaps. Add a layer mask via Layer > Layer Mask > Reveal Selection. Deselect with Ctrl/Cmd + D. Save as PSD, export PNG for transparency. Magic wand excels on flats, Quick Selection on shapes. Review at full size, undo if needed.
Record Actions for batches via Window > Actions. This scales for pros.
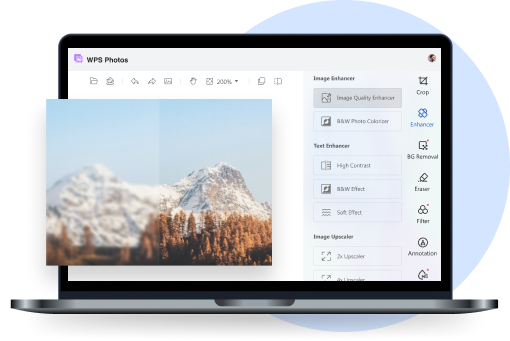
Part 3: Alternative Tool Recommendation – WPS Photos

For automated selections without Photoshop adjustments, WPS Photos offers AI-driven ease for simple enhancements. It suits quick photo merging or background removal.
WPS Photos is an AI app for auto merges, boosts, and touch-ups. Ideal for non-designers seeking pro results sans manual work. Download from wps.com for trial. Clean interface, upload via drag.
In 2025, its machine learning detects edges better than rule-based tools. Handles bulk e-commerce fast.
Features:
AI enhancement for sharpness and color fixes.
One-click merging and background swaps, no tweaks.
Auto color correction and detail sharpening.
Beginner interface with cloud sync and mobile app.
Multi-format exports.
WPS auto-handles complexity. Batch processes hundreds. Free tier works, premium adds AI depth.
How to Use:
Step 1: Download and Open WPS Photos

Get free trial from wps.com. Launch, upload via + icon. Supports common formats. Quick load, thumbnail view.
Step 2: Select AI Tool for Background or Enhancement
![AI Background Remover Integrated into Office Suite [Guide with Examples] | WPS Office Blog](https://res-academy.cache.wpscdn.com/upload/seo-engine-admin/2025-12-08/df5561ac7800c4eb47bb9edd8ae13f60.png "Remove image background")
Pick "Background Removal" or "Enhance" from sidebar. AI selects auto. Grabs edges cleanly as a wand alternative. Preview, adjust slider.
Step 3: Merge or Edit and Export

Choose new background or boosts. Export with batch support. Sliders for customs. Saves time, pro quality sans hassle.
Use templates for social. AI suggests crops. Deep undos, stable on big files.
Part 4: Comparison Between Photoshop and WPS Photos

Here is a table weighing Photoshop's magic wand against WPS Photos.
| Feature | Photoshop (Magic Wand) | WPS Photos (AI Tools) |
|---|---|---|
| Ease of Use | Manual clicks, steep for beginners. | One-click AI, intuitive. |
| Batch Support | Limited, needs scripts. | Yes, effortless multiples. |
| Output Quality | Precise on solids, tweaks needed. | Pro AI, consistent on varied. |
| Learning Curve | Moderate, practice required. | Minimal, AI lifts load. |
| Cost | $20/month sub. | Free trial, $3/month premium. |
| Speed | Fast simples, slow complexes. | Instant on most. |
| Precision | User-controlled for experts. | AI adaptive edges. |
WPS wins quick edits, Photoshop deep designs. AI eases for most.
FAQs
Q1: Can I use the Magic Wand Tool if my background is not a single colour?
Yes, increase Tolerance and add/subtract manually. Complex needs other tools. Upping to 64 aids gradients over tracing.
Q2: Is the Magic Wand Tool still relevant in the latest Photoshop versions?
Yes, useful for scenarios, complements AI like Select Subject. 2025 basics solid, AI shines more.
Q3: What happens if I do not duplicate the background layer before using the Magic Wand Tool?
Direct edits risk data loss. Duplicate enables safe undos. Avoid file mishaps.
Q4: When should I switch to WPS Photos instead of using Photoshop’s Magic Wand Tool?
For fast auto removal or merging sans mastery, WPS fits. Great for batch media, frees creative time.
Q5: How does tolerance affect selections in the Magic Wand Tool?
Sets color range. Low for tight, high for broad. Start 32, test on copies.
Q6: Can the Magic Wand Tool select non-adjacent areas?
Yes, disable Contiguous, Shift-click multiples. Good for scattered colors.

'%3e%3cpath%20d='M19.9911%204.11386V6.471H18.5894C18.0775%206.471%2017.7322%206.57814%2017.5536%206.79243C17.3751%207.00671%2017.2858%207.32814%2017.2858%207.75671V9.44421H19.9019L19.5536%2012.0871H17.2858V18.8639H14.5536V12.0871H12.2769V9.44421H14.5536V7.49779C14.5536%206.39064%2014.8632%205.53201%2015.4822%204.92189C16.1013%204.31177%2016.9257%204.00671%2017.9554%204.00671C18.8304%204.00671%2019.509%204.04243%2019.9911%204.11386Z'%20fill='%23333333'/%3e%3c/g%3e%3cdefs%3e%3cclipPath%20id='clip0_2938_8199'%3e%3crect%20width='16'%20height='16'%20fill='white'%20transform='translate(8%204.00671)'/%3e%3c/clipPath%3e%3c/defs%3e%3c/svg%3e)
'%3e%3cpath%20d='M17.5237%2010.7813L23.4811%204H22.0699L16.8949%209.88693L12.7648%204H8L14.2469%2012.9029L8%2020.0133H9.4112L14.8725%2013.7952L19.2352%2020.0133H24M9.92053%205.04213H12.0885L22.0688%2019.0224H19.9003'%20fill='%23333333'/%3e%3c/g%3e%3cdefs%3e%3cclipPath%20id='clip0_2938_8200'%3e%3crect%20width='16'%20height='16.0134'%20fill='white'%20transform='translate(8%204)'/%3e%3c/clipPath%3e%3c/defs%3e%3c/svg%3e)


