

'%3e%3cpath%20d='M8%200C12.4183%200%2016%203.58172%2016%208C16%2012.4183%2012.4183%2016%208%2016C3.58172%2016%200%2012.4183%200%208C0%203.58172%203.58172%200%208%200ZM11.6162%204.38379C11.2257%203.99337%2010.5927%203.99338%2010.2021%204.38379L8%206.58594L5.79785%204.38379C5.40732%203.99334%204.77429%203.99329%204.38379%204.38379C3.99331%204.77429%203.99335%205.40733%204.38379%205.79785L6.58594%208L4.38379%2010.2021C3.99348%2010.5927%203.99341%2011.2257%204.38379%2011.6162C4.77426%2012.0066%205.40734%2012.0065%205.79785%2011.6162L8%209.41406L10.2021%2011.6162C10.5927%2012.0066%2011.2257%2012.0067%2011.6162%2011.6162C12.0067%2011.2257%2012.0066%2010.5927%2011.6162%2010.2021L9.41406%208L11.6162%205.79785C12.0066%205.40735%2012.0066%204.77429%2011.6162%204.38379Z'%20fill='%23080E17'%20fill-opacity='0.46'/%3e%3c/g%3e%3cdefs%3e%3cclipPath%20id='clip0_3761_713'%3e%3crect%20width='16'%20height='16'%20fill='white'/%3e%3c/clipPath%3e%3c/defs%3e%3c/svg%3e)



'%3e%3cpath%20fill-rule='evenodd'%20clip-rule='evenodd'%20d='M21.4999%2010.9993C21.4999%205.20009%2016.7986%200.498901%2010.9993%200.498901C5.19994%200.498901%200.498657%205.20009%200.498657%2010.9993C0.498657%2016.2404%204.33858%2020.5844%209.35855%2021.3722V14.0346H6.69238V10.9993H9.35855V8.68594C9.35855%206.05427%2010.9262%204.60062%2013.3248%204.60062C14.4736%204.60062%2015.6753%204.80571%2015.6753%204.80571V7.38979H14.3512C13.0468%207.38979%2012.64%208.19921%2012.64%209.0296V10.9993H15.5523L15.0867%2014.0346H12.64V21.3722C17.66%2020.5844%2021.4999%2016.2404%2021.4999%2010.9993Z'%20fill='%231568EA'/%3e%3c/g%3e%3c/svg%3e)


'%3e%3cpath%20d='M2.42045%2022.1876H6.31818V12.7217L0.75%208.54553V20.5171C0.75%2021.4414%201.49892%2022.1876%202.42045%2022.1876Z'%20fill='%234285F4'/%3e%3cpath%20d='M19.682%2022.1876H23.5797C24.5041%2022.1876%2025.2502%2021.4387%2025.2502%2020.5171V8.54553L19.682%2012.7217'%20fill='%2334A853'/%3e%3cpath%20d='M19.682%205.48293V12.7216L25.2502%208.54543V6.31816C25.2502%204.25236%2022.8921%203.07469%2021.2411%204.31361'%20fill='%23FBBC04'/%3e%3cpath%20d='M6.31824%2012.7217V5.48303L13.0001%2010.4944L19.6819%205.48303V12.7217L13.0001%2017.733'%20fill='%23EA4335'/%3e%3cpath%20d='M0.75%206.31816V8.54543L6.31818%2012.7216V5.48293L4.75909%204.31361C3.10534%203.07469%200.75%204.25236%200.75%206.31816Z'%20fill='%23C5221F'/%3e%3c/g%3e%3cdefs%3e%3cclipPath%20id='clip0_2954_7305'%3e%3crect%20width='24.5'%20height='18.375'%20fill='white'%20transform='translate(0.75%203.8125)'/%3e%3c/clipPath%3e%3c/defs%3e%3c/svg%3e)


If you are searching how do you do a voice over PowerPoint, you usually want more than a silent deck. You want slides that explain themselves for training, class submissions, client updates, or async meetings.
There is no single “correct” path. Some people record a full narrated slide show with automatic timings. Others export separate MP3 files and upload them slide by slide. Others work in a free office suite such as WPS Presentation and insert audio there. This guide covers narration tips first, then three workable methods, a side-by-side comparison, and when WPS Office is a strong PowerPoint alternative.

Tips for Recording Effective Narration in PowerPoint
Clean voiceovers fail less often because of missing buttons and more often because of rushed scripts and noisy rooms. Before you open Record or a voice recorder, lock down the basics.
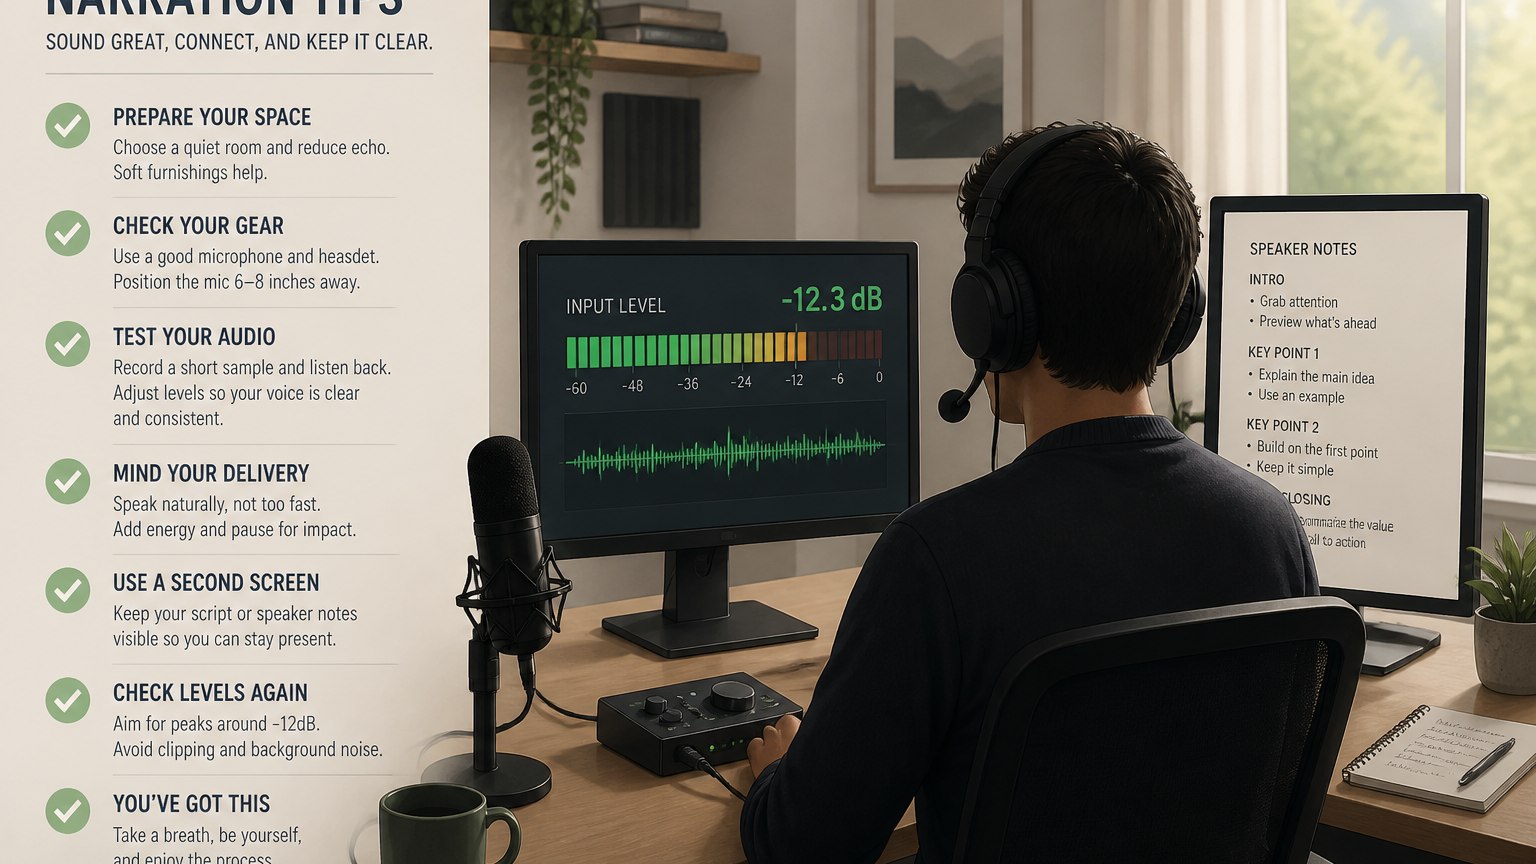
Write for speaking. Short sentences beat dense bullet reading. Put names, numbers, and acronyms in speaker notes so you do not stumble mid-slide.
Test the mic for ten seconds. Built-in laptop mics work for drafts; a USB headset usually sounds clearer for shared work. On Windows and Mac, confirm that PowerPoint (or your browser) has microphone permission.
Pause on transitions. In Microsoft PowerPoint’s recording flow, audio and video are not captured during slide transitions, and each slide also has a short silent buffer. Stop talking for a beat when you advance.
Record in chunks. Finish a section, take a break, then continue. Per-slide audio is easier to fix than one long take that fails on the last slide.
Do a full playback before you send the file. Listen for peaking volume, keyboard clicks, background fan noise, and slides that feel rushed.


How Do You Do a Voiceover on PowerPoint?
Below are three practical answers to how do you do a voiceover on PowerPoint, from emergency web uploads to Microsoft desktop recording to WPS Presentation.
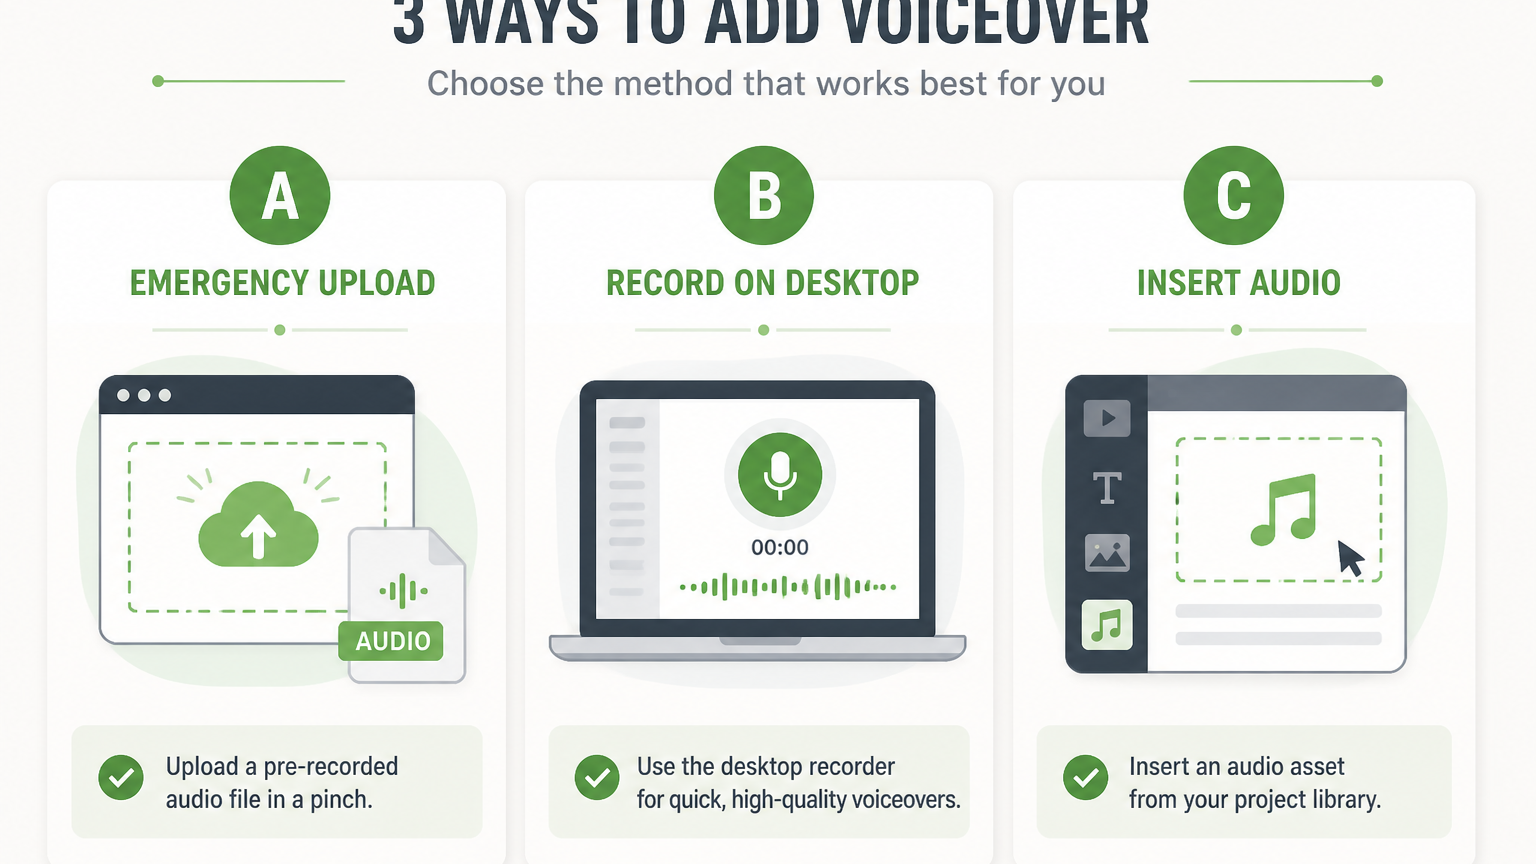
Method A: External recording + web PowerPoint import (emergency only)
Use this when you are stuck in a browser tab, on a shared computer, or need a same-day patch for a few slides.
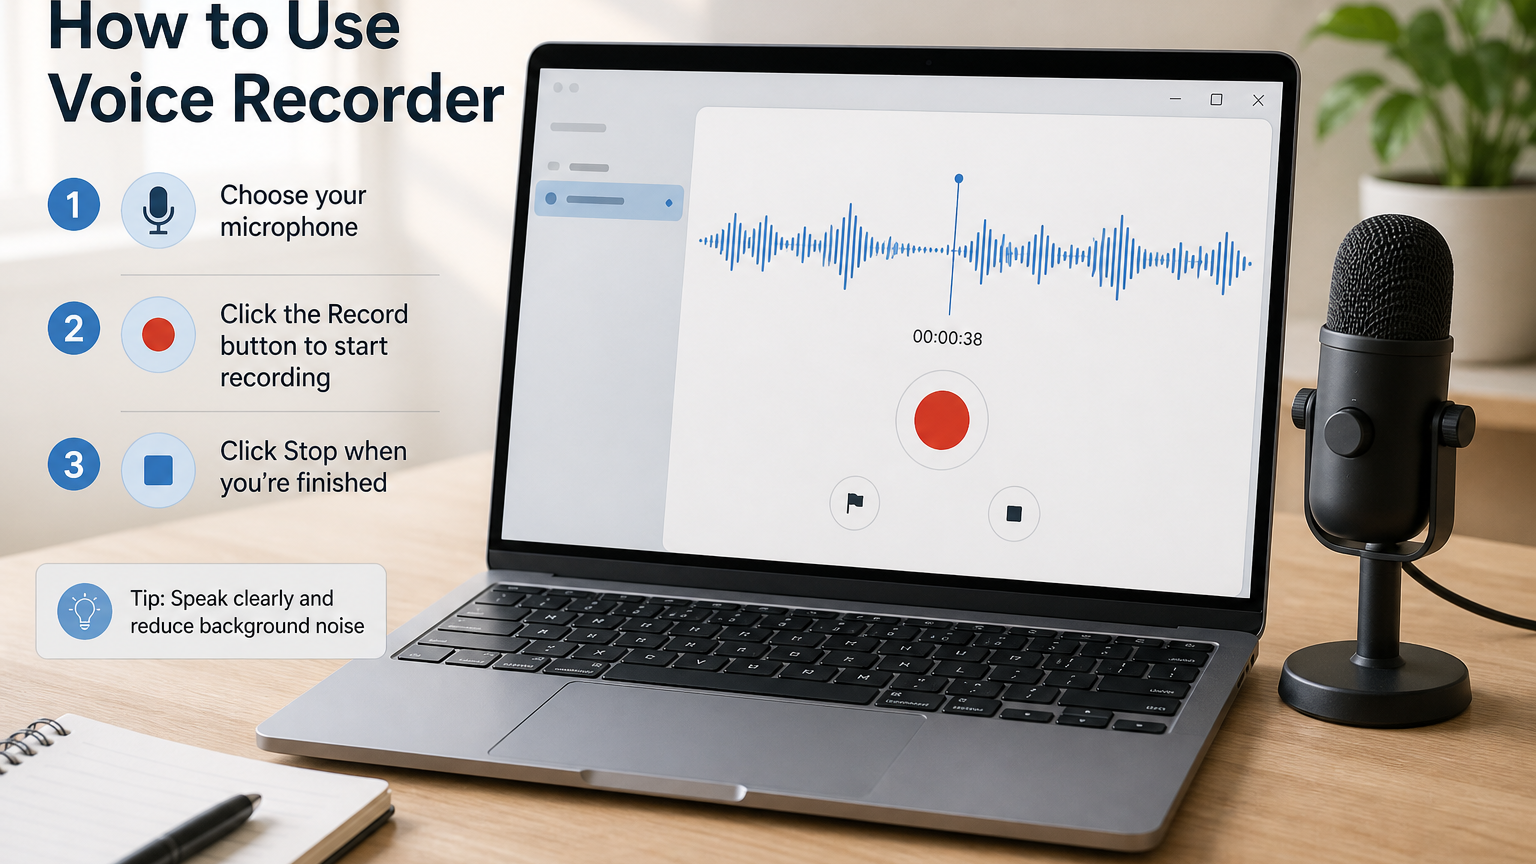
Step 1 — Record MP3 clips outside PowerPoint
Open your computer’s built-in recorder: Voice Recorder / Sound Recorder on Windows, or QuickTime Player on Mac (File → New Audio Recording).
Speak one slide at a time.
Export or save each clip as an audio file (MP3 or another format your web editor accepts).
Name files clearly, such as
01-intro.mp3,02-agenda.mp3.
Step 2 — Upload into web PowerPoint
Open the deck in PowerPoint for the web.
Select a slide.
Go to Insert → Audio and upload the matching local file.
Set playback to start automatically or on click, then hide or reposition the audio icon if needed.
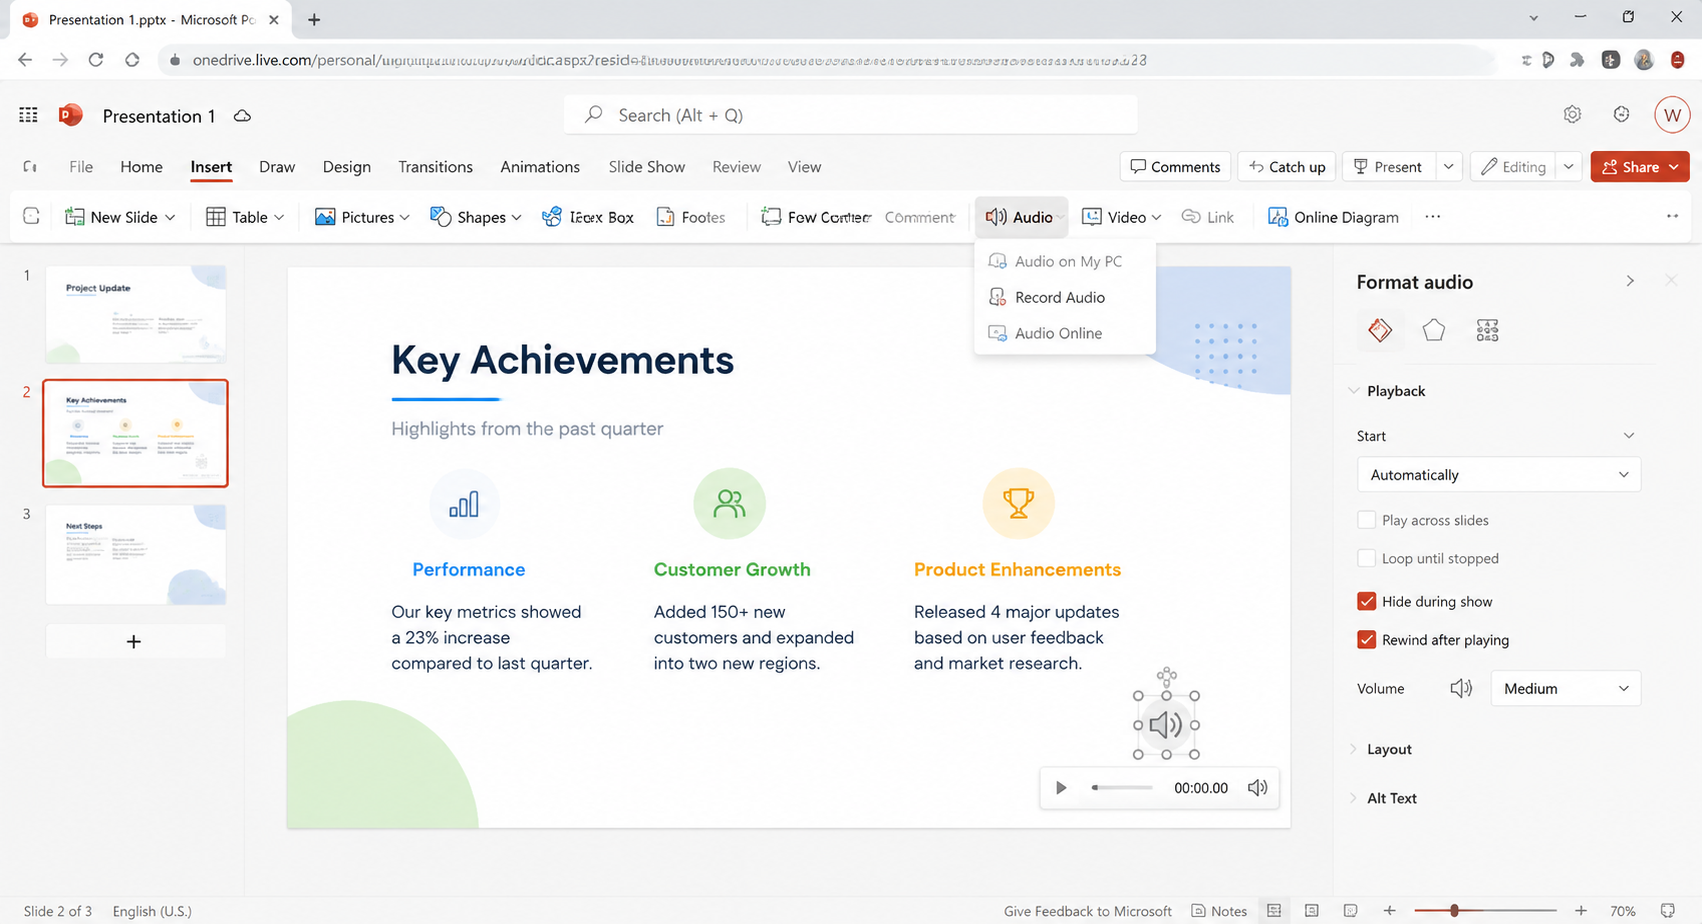
Limits (important): web uploads do not give you the same automatic slide-timing experience as a full desktop Record Slide Show. You often control pacing manually during playback, and multi-slide timing sync is weaker. Treat this path as an emergency fix, not a production workflow.
Method B: Microsoft PowerPoint (desktop Record workflow)
This is the strongest native answer when you already use Microsoft 365 or desktop PowerPoint and need narration plus timings in one pass.
Open the presentation and go to the starting slide.
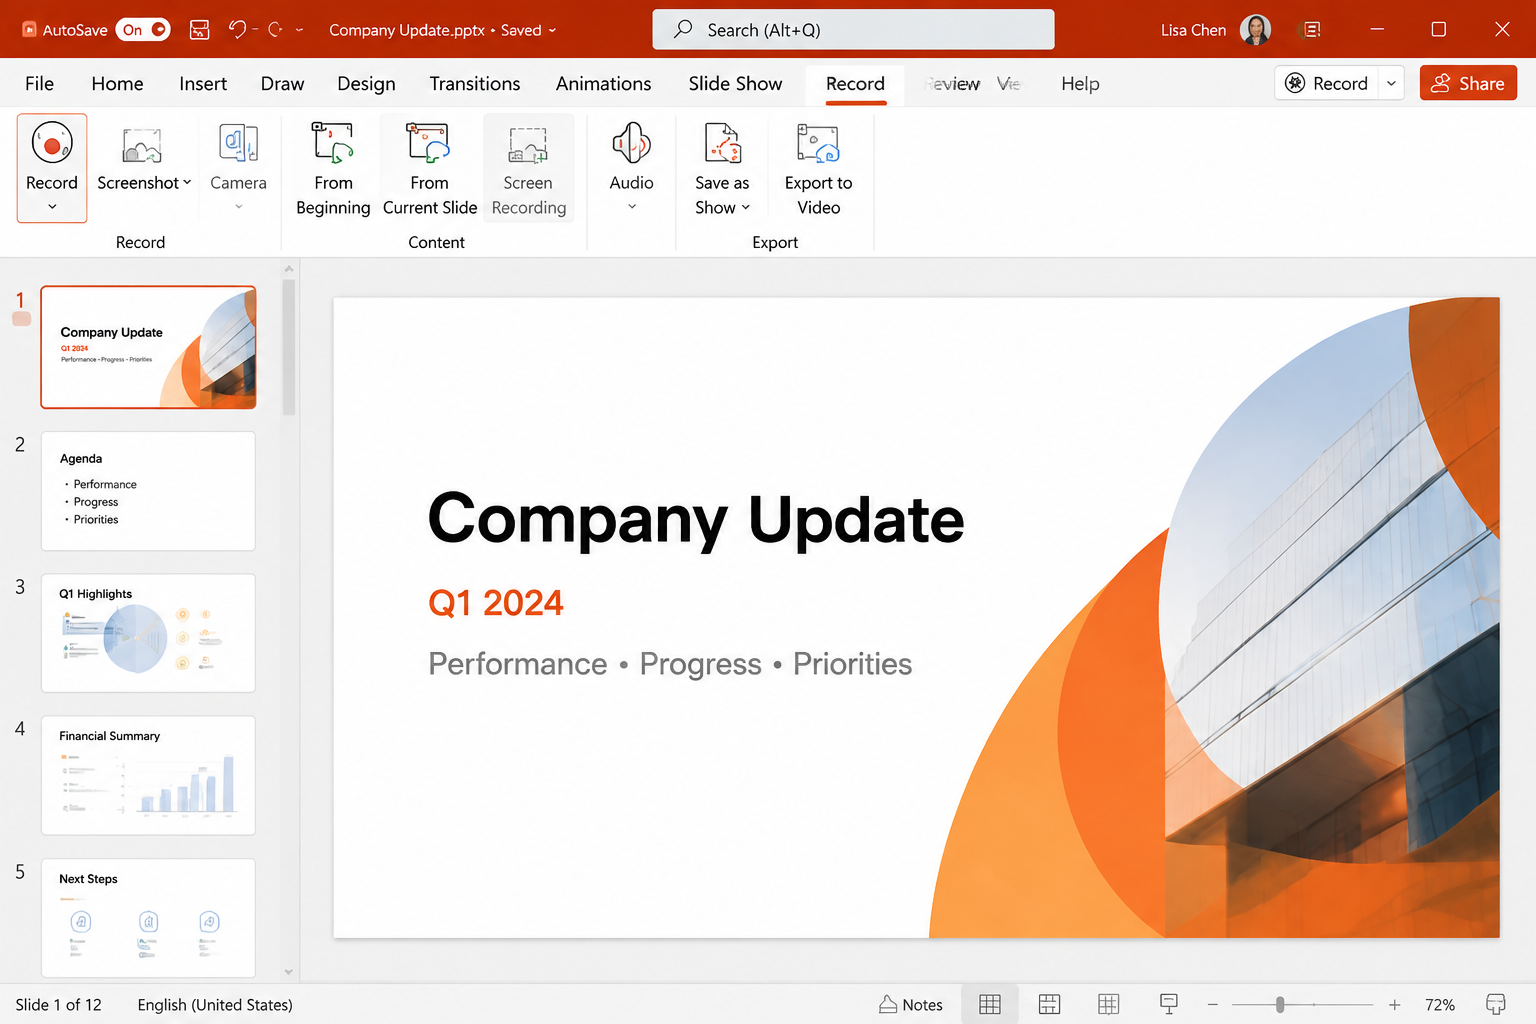
Select Record near the top of the window (Microsoft 365 / recent Windows builds), or use Slide Show → Record Slide Show on older builds.
Confirm the microphone. Turn the camera on only if you want talking-head video.
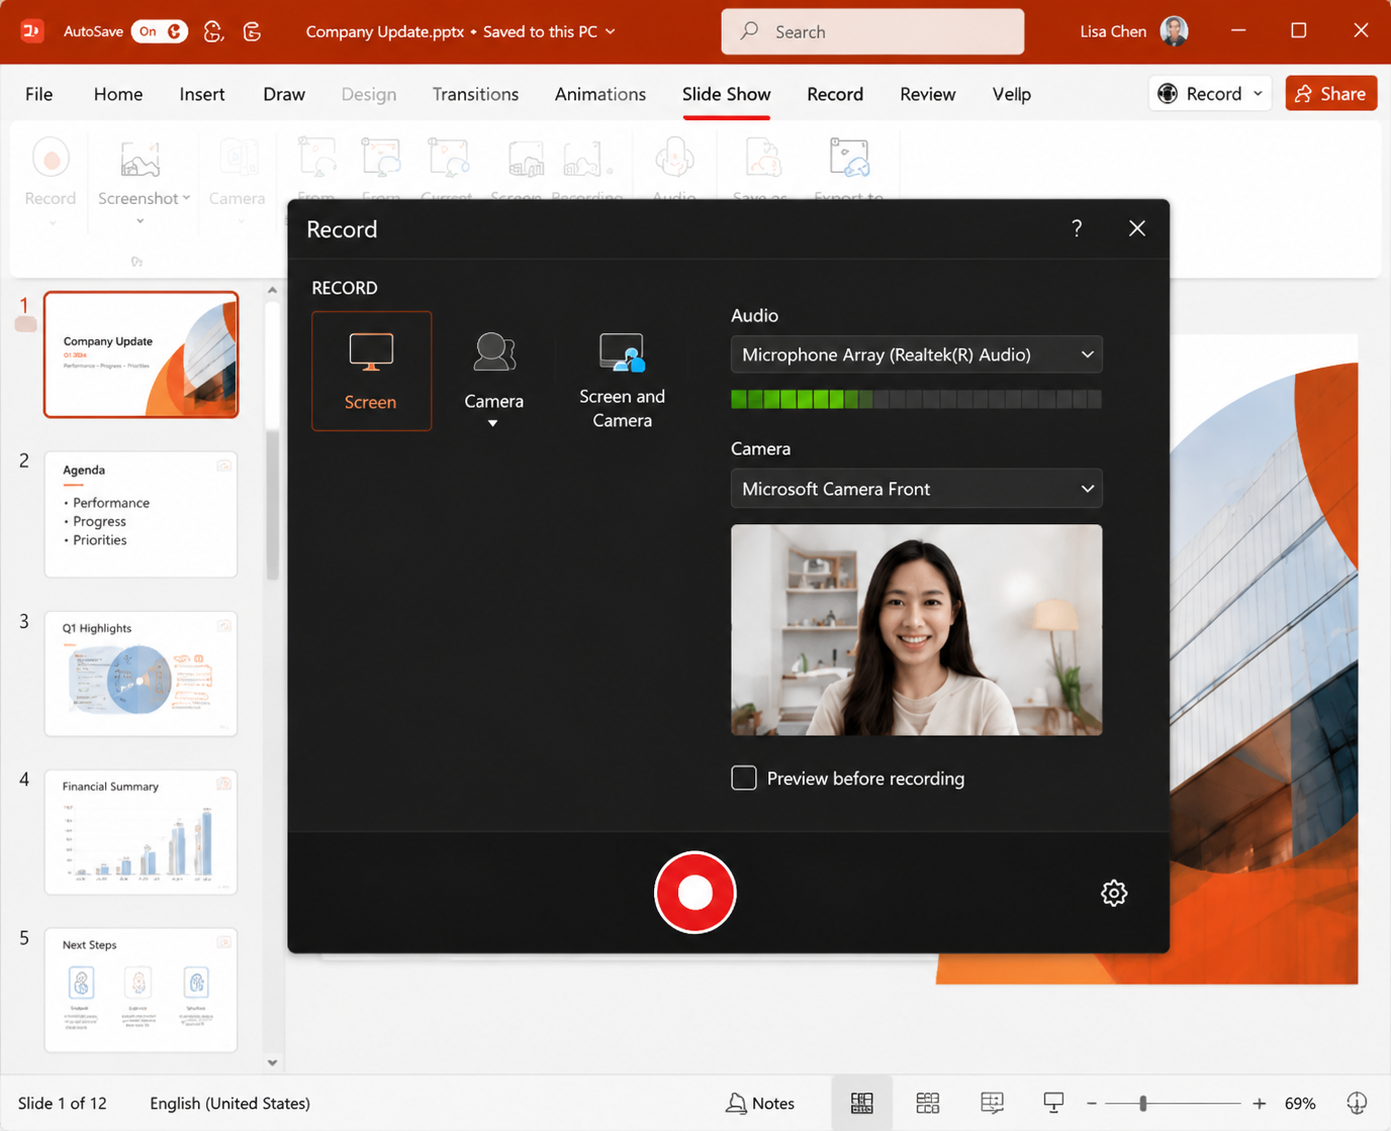
Press the red Record button, wait for the countdown, then narrate.
Advance slides deliberately. Pause during transitions.
Stop, preview, and clear/re-record only the weak slides.
Save the
.pptx, or export with File → Export → Create a Video when viewers need an MP4.
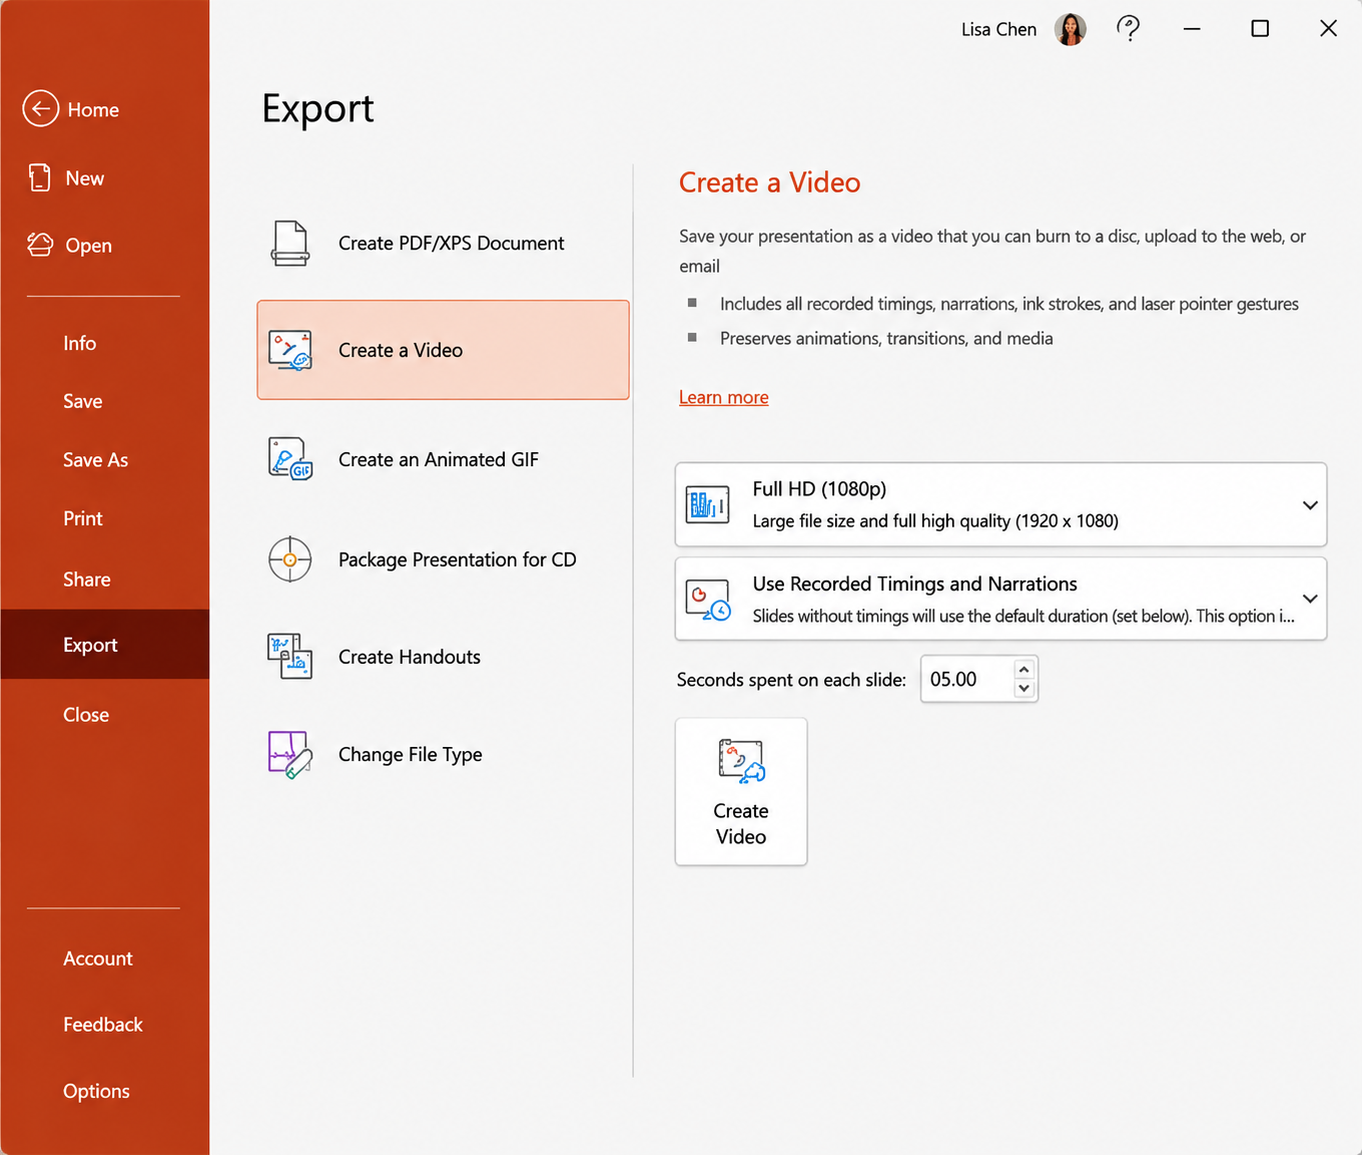
Microsoft’s recording experience stores narration per slide and can keep timings for playback and video export. That is why it is usually better than stitching web-uploaded MP3s for a full course or client walkthrough.
You can also use Insert → Audio → Record Audio for a single-slide clip, but that is closer to Method A’s per-slide audio model than a full timed show.
Method C: WPS Presentation (free-friendly audio workflow)
WPS Presentation is useful when you want PowerPoint-compatible .pptx editing without paying for a full Microsoft subscription first. Official WPS guidance centers on inserting audio files, with desktop builds also offering a Screen Recorder that can capture audio for later insert.
Option 1 — Insert an existing audio file (most reliable)
Open your deck in WPS Presentation.
Select the slide.
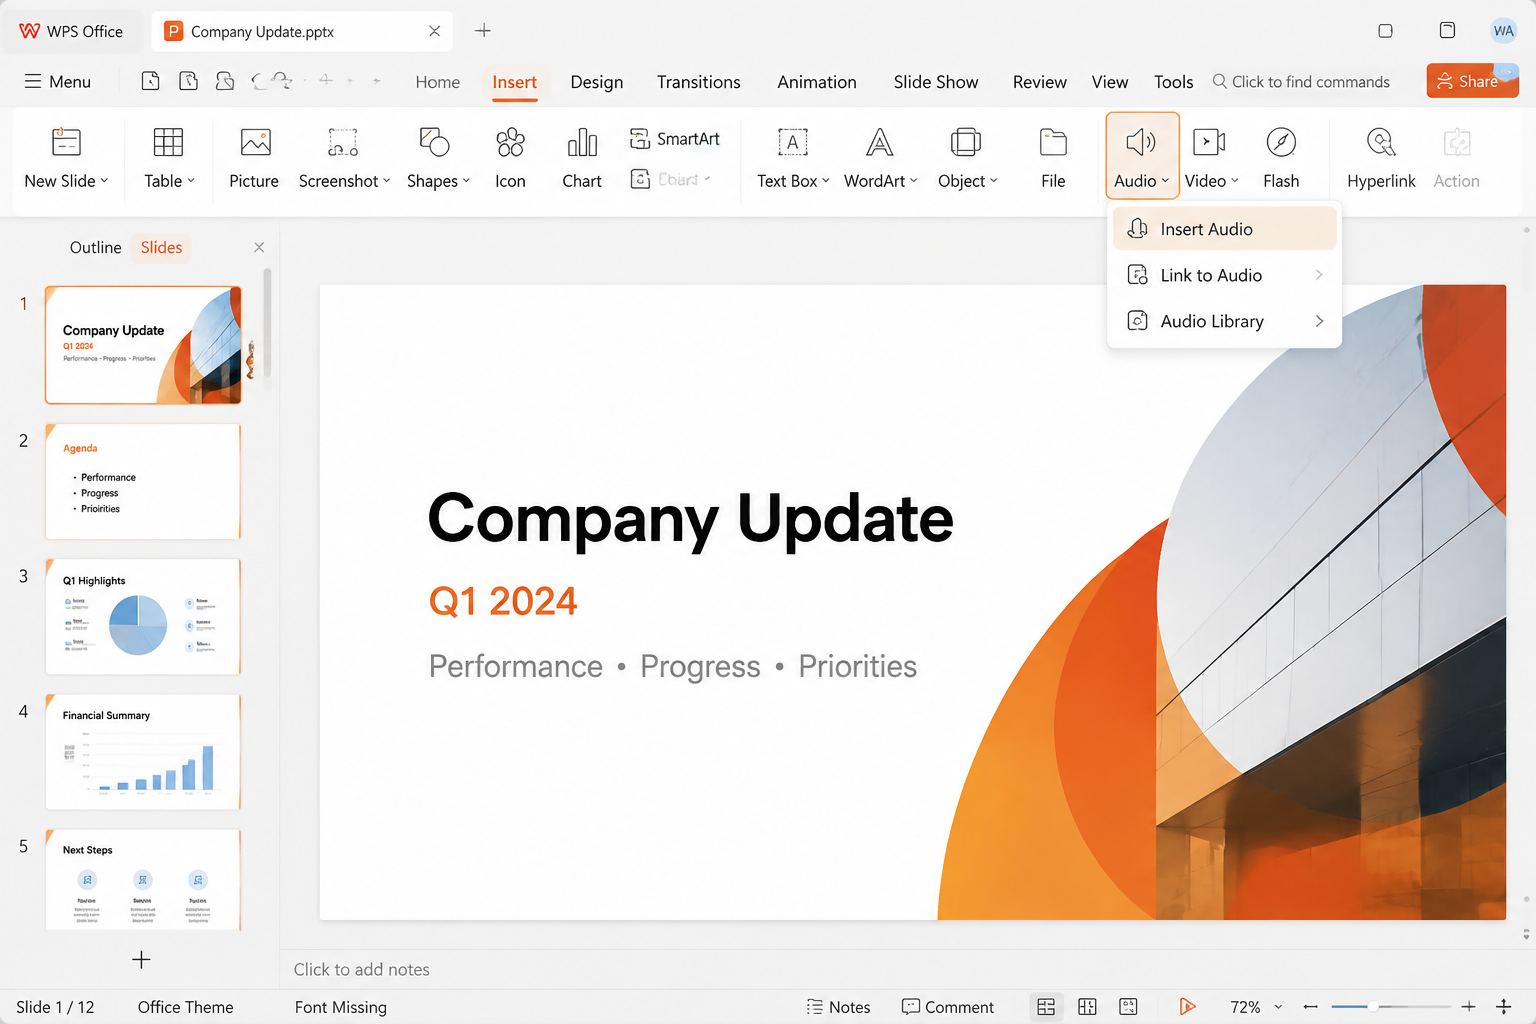
Go to Insert → Audio → Insert Audio (wording can vary slightly by version).
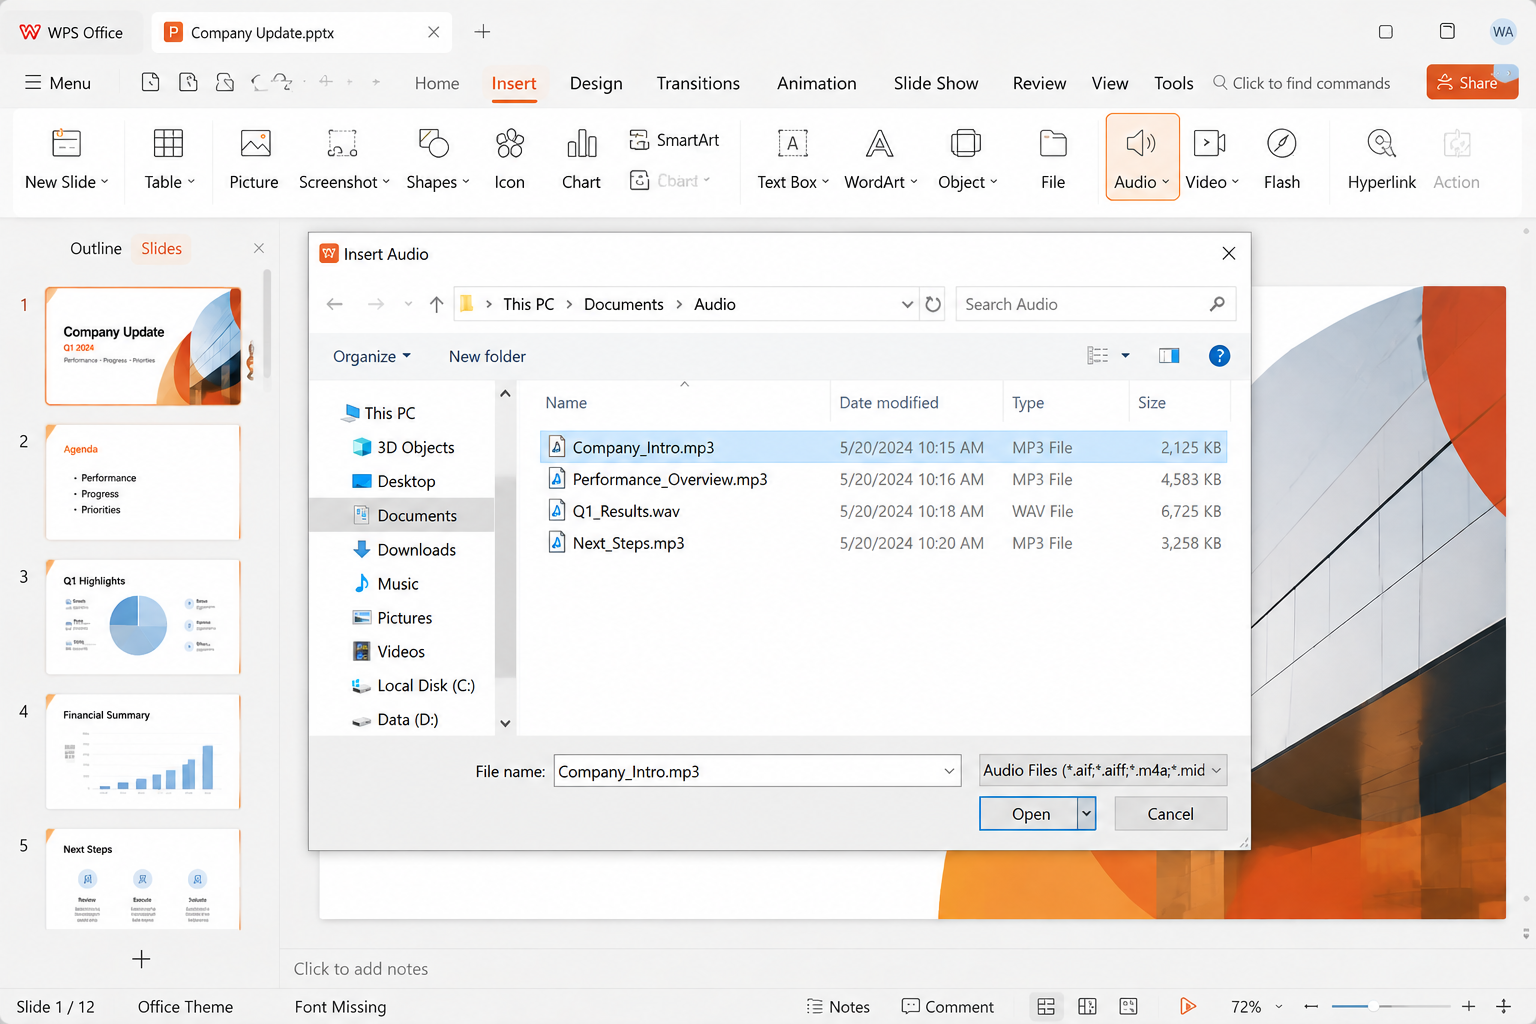
Choose your MP3/WAV (or other supported) file.
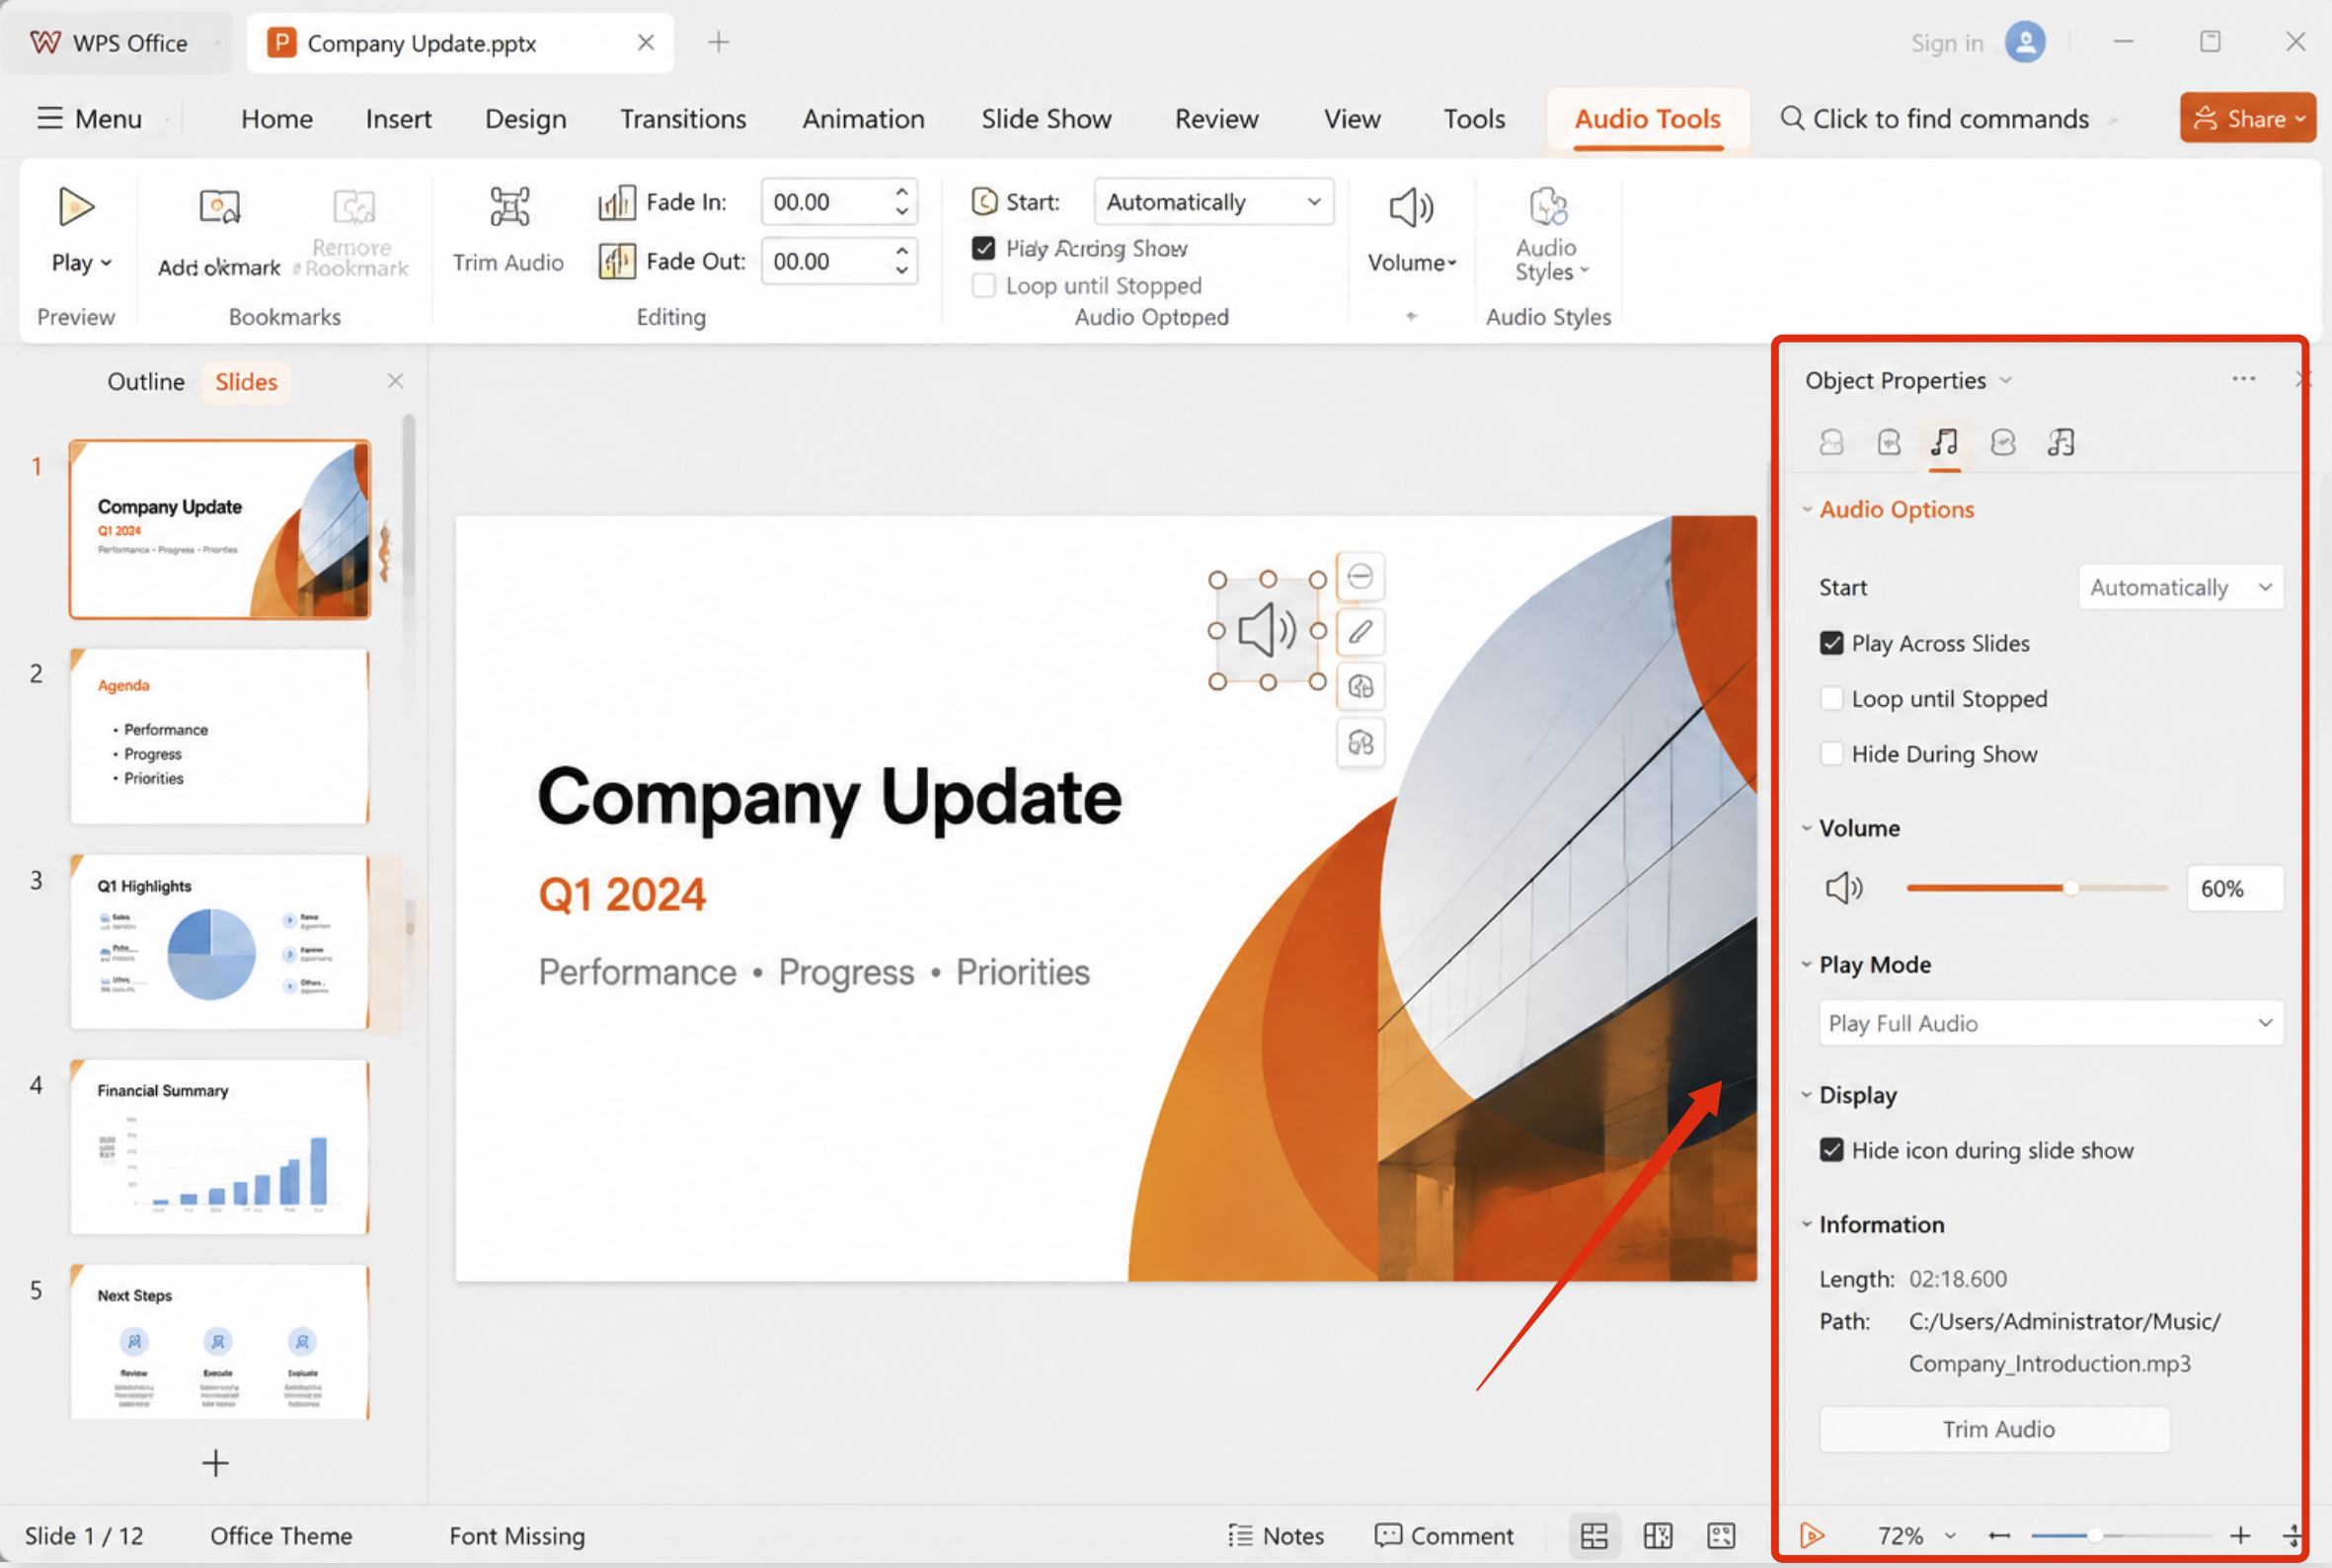
Open Audio Tools to set volume, trim, fade, automatic or on-click play, play across slides, and hide during show.
WPS Academy notes that “Link to Sound” style inserts may break when the file moves to another device, so prefer embedded Insert Audio when you will share the deck.
Option 2 — Record audio with WPS Screen Recorder, then insert
On many desktop builds:
Open Tools → Screen Recorder.
Choose an audio recording option when available, record your narration, and stop.
Save the clip, then use Insert → Audio → Insert Audio to place it on the slide.
Adjust playback settings in Audio Tools.
Mobile WPS flows can also let you record or pick device audio while editing a slide, but menus differ by phone OS. Always preview the finished show on the device your audience will use.
Comparing the Three Methods
| Need | External + web upload | Microsoft PowerPoint Record | WPS Presentation audio |
|---|---|---|---|
| Best for | Emergency fixes, few slides | Full narrated show + timings/video export | Free-friendly PPTX work and per-slide audio |
| Automatic slide timings | Weak / mostly manual | Strong | Depends on how you place audio; not identical to Microsoft Record |
| Learning curve | Low | Low–medium | Low if you already use Insert Audio |
| Cost posture | Needs Microsoft web access | Needs Microsoft license for full desktop features | Core Presentation editing available on WPS free plan; advanced suite extras may be paid |
| Share risk | Browser limits; manual pacing | Mature export to PPTX/MP4 | Prefer embedded audio over linked files |
Quick pick:
Need a same-day patch in a browser → Method A.
Already deep in Microsoft 365 and need timed Record + MP4 export → Method B still works.
Want a free-to-start, all-in-one way to edit PPTX, insert narration, and keep Word/Excel/PDF in the same suite → choose Method C with WPS Presentation. Most readers on this page will get the best balance of cost and convenience here.
Best PowerPoint Alternative: WPS Office
Many people asking how do you do a voice over PowerPoint are also hitting product friction: subscription cost, heavy installs, or needing Word/Excel/PDF tools in the same place as slides. That is where WPS Office often enters the conversation.
Common pain points with a PowerPoint-only setup
You only needed slides plus a short narration, but the wider Microsoft plan may feel expensive for light use.
You bounce between separate apps for documents, spreadsheets, PDFs, and decks.
Template hunting slows you down when the deck itself is simple.
You want the same file to open on Windows, Mac, and mobile without rebuilding the workflow.
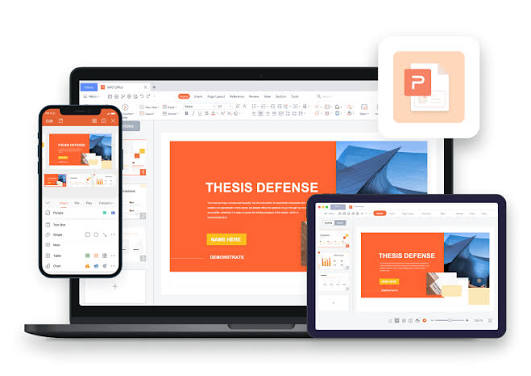
Why WPS Office is a practical alternative
Basic presentation work can stay free. WPS publishes a free plan that covers core Writer, Spreadsheets, Presentation, and basic PDF reading/editing. You can build and edit everyday decks—including inserting audio—without buying a full Microsoft-style subscription first. Advanced capabilities (such as deeper PDF tools, higher limits, premium templates, or AI extras, depending on region and plan) sit behind paid upgrades.
Paid plans are usually about unlocking more of the suite, not restarting from zero. If you upgrade, you typically keep using the same all-in-one workspace for Writer (Word-compatible docs), Spreadsheets, Presentation, and stronger PDF/conversion features. For many students and small teams, that bundled value is the point: one subscription lane instead of stacking separate tools.
Templates and integrated tools reduce busywork. WPS Presentation sits beside document and spreadsheet apps, with template access that helps you start faster than designing every slide from a blank canvas.
Cross-platform coverage with a lighter footprint. WPS targets Windows, macOS, Linux, iOS, and Android. Official positioning emphasizes a Microsoft-like interface, Office-format compatibility, and a comparatively lightweight install—useful when you narrate on a laptop and tidy slides on a phone later.
Ready to try it on your next narrated deck? Open the file in WPS Presentation, insert your MP3 (or record with Screen Recorder), set Auto Play / Hide During Show, and preview once. If you later need richer PDF tools, premium templates, or other advanced extras, upgrade inside the same workspace—you do not have to rebuild your slides elsewhere.
For most people asking how do you do a voice over PowerPoint—especially students, freelancers, and small teams—WPS Office is the alternative we recommend starting with: free core Presentation tools, audio insert that fits everyday narration, and Writer/Spreadsheet/PDF in one download. Get started at WPS Office Free Download.
FAQ
How do you do a voice over PowerPoint without a webcam?
Turn the camera off and record microphone audio only. In Microsoft Record, voice and timings still work. In WPS or web upload flows, insert audio files the same way.
Can web PowerPoint match desktop narration timing?
Not reliably for full shows. External MP3 uploads into PowerPoint for the web are fine for emergencies, but automatic multi-slide timing is weaker than desktop Record Slide Show / Record.
Does WPS Presentation support inserting MP3 narration?
Yes. Use Insert → Audio → Insert Audio, then set play options in Audio Tools. Prefer embedded inserts over linked sound files when sharing across devices.
Should I share a PPTX or an MP4?
Share PPTX when viewers may edit slides. Export or screen-record to video when they only need to watch, or may not have the same office app installed.
Is WPS Office really free?
Core apps are available on WPS’s free plan. Some advanced features require a paid upgrade. Check the current official pricing page for your region before you buy.


'%3e%3cpath%20d='M19.9911%204.11386V6.471H18.5894C18.0775%206.471%2017.7322%206.57814%2017.5536%206.79243C17.3751%207.00671%2017.2858%207.32814%2017.2858%207.75671V9.44421H19.9019L19.5536%2012.0871H17.2858V18.8639H14.5536V12.0871H12.2769V9.44421H14.5536V7.49779C14.5536%206.39064%2014.8632%205.53201%2015.4822%204.92189C16.1013%204.31177%2016.9257%204.00671%2017.9554%204.00671C18.8304%204.00671%2019.509%204.04243%2019.9911%204.11386Z'%20fill='%23333333'/%3e%3c/g%3e%3cdefs%3e%3cclipPath%20id='clip0_2938_8199'%3e%3crect%20width='16'%20height='16'%20fill='white'%20transform='translate(8%204.00671)'/%3e%3c/clipPath%3e%3c/defs%3e%3c/svg%3e)
'%3e%3cpath%20d='M17.5237%2010.7813L23.4811%204H22.0699L16.8949%209.88693L12.7648%204H8L14.2469%2012.9029L8%2020.0133H9.4112L14.8725%2013.7952L19.2352%2020.0133H24M9.92053%205.04213H12.0885L22.0688%2019.0224H19.9003'%20fill='%23333333'/%3e%3c/g%3e%3cdefs%3e%3cclipPath%20id='clip0_2938_8200'%3e%3crect%20width='16'%20height='16.0134'%20fill='white'%20transform='translate(8%204)'/%3e%3c/clipPath%3e%3c/defs%3e%3c/svg%3e)


