

'%3e%3cpath%20d='M8%200C12.4183%200%2016%203.58172%2016%208C16%2012.4183%2012.4183%2016%208%2016C3.58172%2016%200%2012.4183%200%208C0%203.58172%203.58172%200%208%200ZM11.6162%204.38379C11.2257%203.99337%2010.5927%203.99338%2010.2021%204.38379L8%206.58594L5.79785%204.38379C5.40732%203.99334%204.77429%203.99329%204.38379%204.38379C3.99331%204.77429%203.99335%205.40733%204.38379%205.79785L6.58594%208L4.38379%2010.2021C3.99348%2010.5927%203.99341%2011.2257%204.38379%2011.6162C4.77426%2012.0066%205.40734%2012.0065%205.79785%2011.6162L8%209.41406L10.2021%2011.6162C10.5927%2012.0066%2011.2257%2012.0067%2011.6162%2011.6162C12.0067%2011.2257%2012.0066%2010.5927%2011.6162%2010.2021L9.41406%208L11.6162%205.79785C12.0066%205.40735%2012.0066%204.77429%2011.6162%204.38379Z'%20fill='%23080E17'%20fill-opacity='0.46'/%3e%3c/g%3e%3cdefs%3e%3cclipPath%20id='clip0_3761_713'%3e%3crect%20width='16'%20height='16'%20fill='white'/%3e%3c/clipPath%3e%3c/defs%3e%3c/svg%3e)



'%3e%3cpath%20fill-rule='evenodd'%20clip-rule='evenodd'%20d='M21.4999%2010.9993C21.4999%205.20009%2016.7986%200.498901%2010.9993%200.498901C5.19994%200.498901%200.498657%205.20009%200.498657%2010.9993C0.498657%2016.2404%204.33858%2020.5844%209.35855%2021.3722V14.0346H6.69238V10.9993H9.35855V8.68594C9.35855%206.05427%2010.9262%204.60062%2013.3248%204.60062C14.4736%204.60062%2015.6753%204.80571%2015.6753%204.80571V7.38979H14.3512C13.0468%207.38979%2012.64%208.19921%2012.64%209.0296V10.9993H15.5523L15.0867%2014.0346H12.64V21.3722C17.66%2020.5844%2021.4999%2016.2404%2021.4999%2010.9993Z'%20fill='%231568EA'/%3e%3c/g%3e%3c/svg%3e)


'%3e%3cpath%20d='M2.42045%2022.1876H6.31818V12.7217L0.75%208.54553V20.5171C0.75%2021.4414%201.49892%2022.1876%202.42045%2022.1876Z'%20fill='%234285F4'/%3e%3cpath%20d='M19.682%2022.1876H23.5797C24.5041%2022.1876%2025.2502%2021.4387%2025.2502%2020.5171V8.54553L19.682%2012.7217'%20fill='%2334A853'/%3e%3cpath%20d='M19.682%205.48293V12.7216L25.2502%208.54543V6.31816C25.2502%204.25236%2022.8921%203.07469%2021.2411%204.31361'%20fill='%23FBBC04'/%3e%3cpath%20d='M6.31824%2012.7217V5.48303L13.0001%2010.4944L19.6819%205.48303V12.7217L13.0001%2017.733'%20fill='%23EA4335'/%3e%3cpath%20d='M0.75%206.31816V8.54543L6.31818%2012.7216V5.48293L4.75909%204.31361C3.10534%203.07469%200.75%204.25236%200.75%206.31816Z'%20fill='%23C5221F'/%3e%3c/g%3e%3cdefs%3e%3cclipPath%20id='clip0_2954_7305'%3e%3crect%20width='24.5'%20height='18.375'%20fill='white'%20transform='translate(0.75%203.8125)'/%3e%3c/clipPath%3e%3c/defs%3e%3c/svg%3e)


Quick answer: When people search how to reduce size of word document for printing, they almost always mean the file size in megabytes—not fewer sheets of paper. In Microsoft Word, click a picture → Picture Format → Compress Pictures → choose Print (220 ppi), check Delete cropped areas of pictures, clear “Apply only to this picture” if you want every image compressed, then save a copy. That cuts bloat while keeping photos sharp enough for office printing.

That reading matches what actually ranks for this query: Microsoft’s own guide is about reducing Word file size, and the “for printing” part is the quality floor—use the Print resolution preset, not Email 96 ppi. Users hit this when a photo-heavy .docx won’t email, upload to a print shop, or open smoothly, but they still need a clean hard copy.
Compress pictures in Word for print (Print 220 ppi)
High-resolution phone photos and screenshots are the #1 reason Word files explode. Compress for print, not email.
- Open the document in Word for Windows (Microsoft 365, Word 2021, or Word 2019).
- Click any picture so the Picture Format tab appears.
- Select Compress Pictures.
- Clear Apply only to this picture to compress all images in the file.
- Check Delete cropped areas of pictures (cropped originals often stay buried in the file).
- Under Resolution, choose Print (220 ppi)—Word’s print-oriented preset.
- Select OK, then File → Save As a new copy and compare size under File → Info.
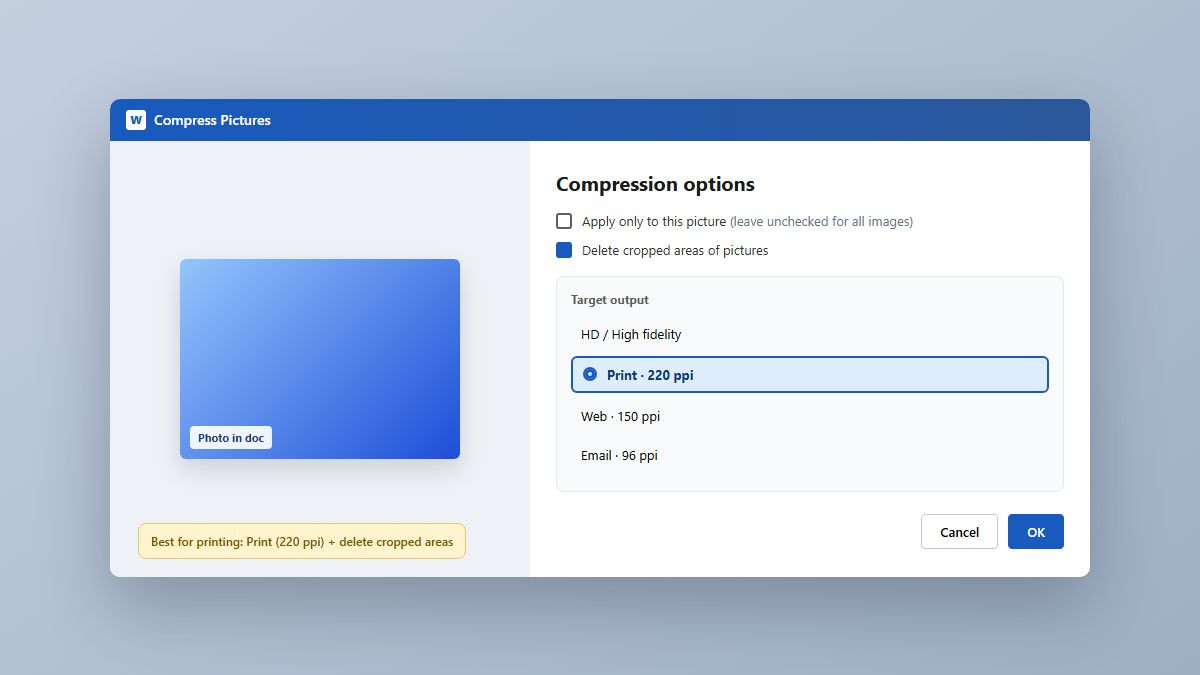
Do not pick Email (96 ppi) if you still plan to print. That setting is for sending tiny files on screen; it often looks soft or blocky on paper. Web/150 ppi is a middle ground for drafts you’ll mostly view digitally.
Discard image editing data (hidden originals)
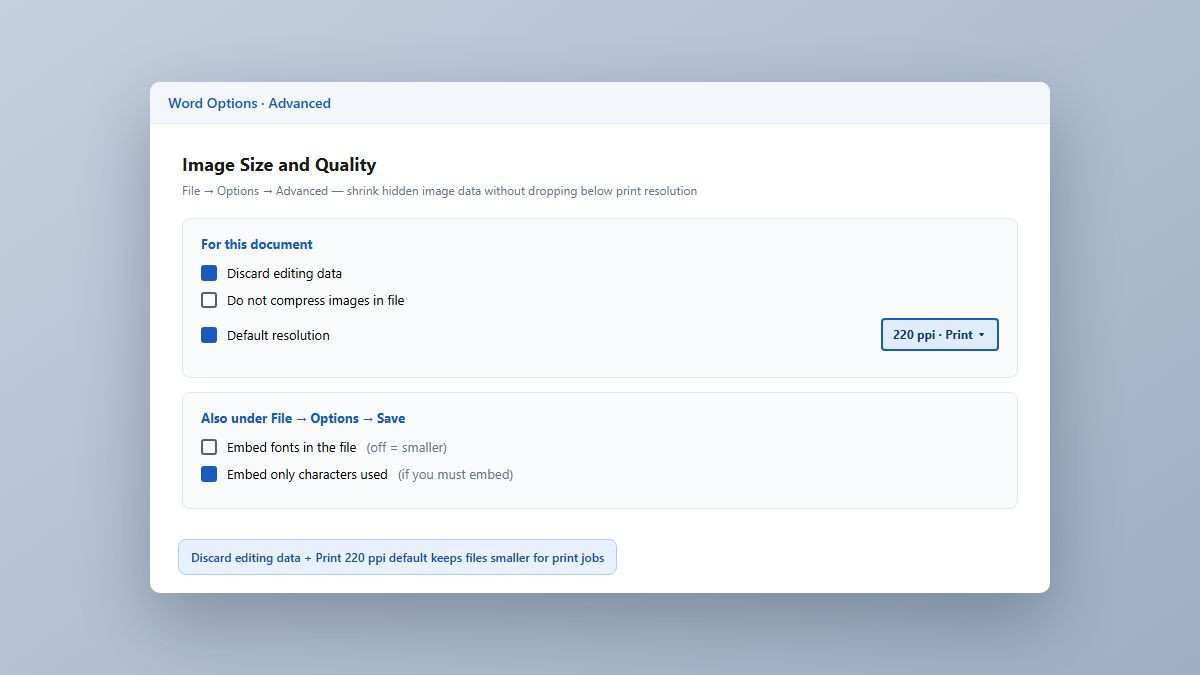
Cropping, brightness, and rotate edits keep a full “undo” copy of the original image inside the .docx. Clearing that cache shrinks the file without dropping below your print resolution target.
- Go to File → Options → Advanced.
- Under Image Size and Quality, check Discard editing data.
- Make sure Do not compress images in file is unchecked.
- Set Default resolution to 220 ppi / Print for future saves on this document.
- Optional: File → Options → Save → turn off full Embed fonts, or embed only characters used if recipients need your fonts.
Also remove heavy embedded objects (full Excel workbooks pasted as objects, attached PDFs, unused 3D models). Linking instead of embedding keeps the Word file lighter when the source still lives on your drive or network.
Why “for printing” does not mean Email compression
- Print (220 ppi): Best default when the file must print on an office laser/inkjet and still shrink.
- Web (150 ppi): Smaller file; OK for on-screen review; may look softer on paper.
- Email (96 ppi): Smallest common preset—fine for inbox, poor for printed handouts.
After compressing, print one test page with photos before you send the file to a print shop or run the whole job.
Still huge? Extra file-size checks
- Check File → Info for size before/after each change so you know what worked.
- Insert pictures with Insert → Pictures instead of paste/drag when you can—paste often brings extra baggage.
- Resize huge images in a photo app to the on-page width before inserting (for example ~6–7 inches wide at 220–300 ppi).
- If the print shop wants a PDF, compress pictures in Word first, then export PDF with a standard/print-oriented setting—not “minimum size / online”—when quality matters.
If you actually meant fewer sheets of paper
That’s a different search (Shrink One Page, margins, 2 pages per sheet). Quick pointers only:
- Short last page → add Shrink One Page to the Quick Access Toolbar (save a copy first).
- Draft proofing → File → Print → Pages per sheet → 2.
- Final Letter copies → keep 1 page per sheet and 100% / Actual size.
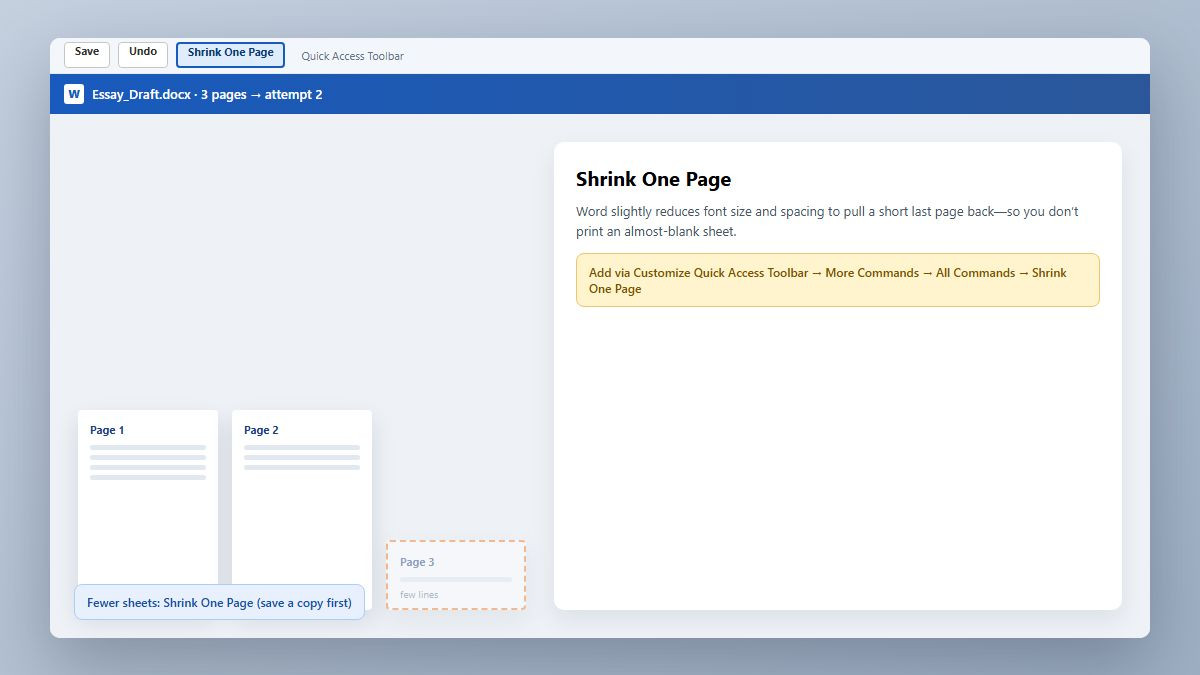
Those tools change layout or print imposition. They do not replace Compress Pictures when the problem is a 40+ MB .docx.
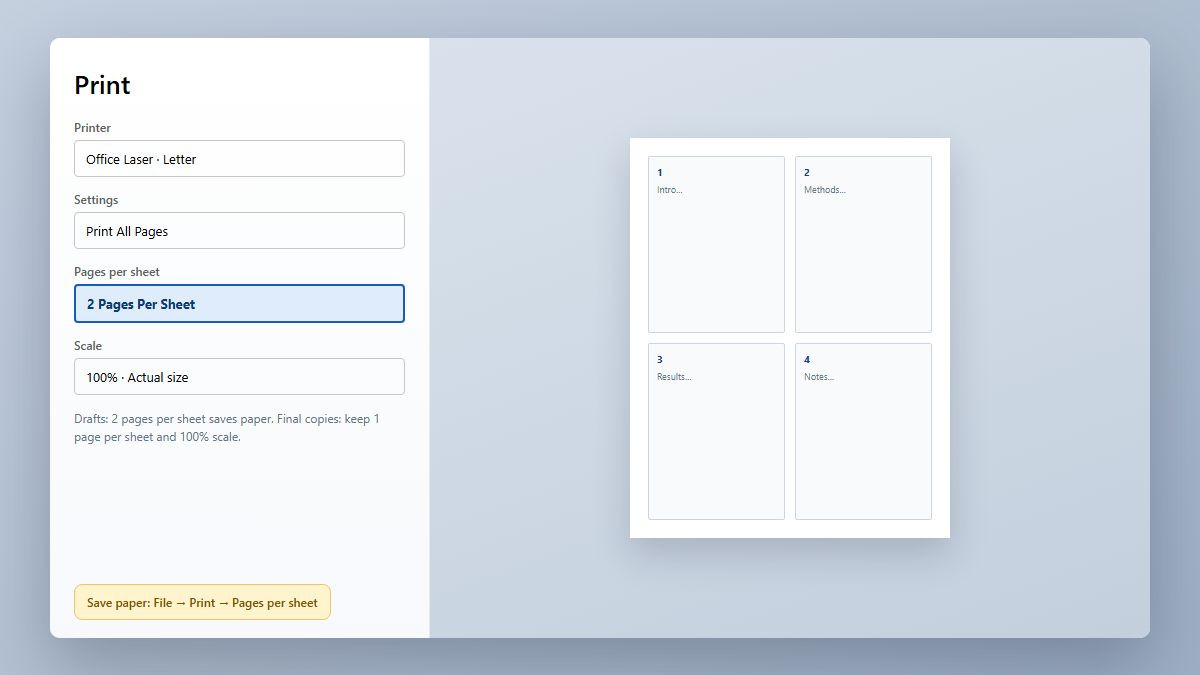
Another option: compress and preview in WPS Writer
Already finished in Microsoft Word? You’re done. If you use WPS Office, open the same .docx in WPS Writer, compress oversized pictures if available, check Print Preview, then print finals at 100% scale.

FAQ
What does “reduce size of Word document for printing” usually mean?
In real Google results and Microsoft’s own help, it means smaller file size (MB) while keeping images good enough to print—typically Compress Pictures at Print 220 ppi.
How do I compress Word pictures without blurry prints?
Use Picture Format → Compress Pictures → Print (220 ppi), delete cropped areas, and apply to all pictures. Avoid Email 96 ppi for print jobs.
Why is my Word document still huge after I crop photos?
Word keeps the original image data. Check Delete cropped areas of pictures and Discard editing data under File → Options → Advanced.
Will compressing pictures change my page layout?
Usually no. Compression changes image data inside the file, not margins or page count. Always Save As a copy and spot-check Print Preview.
Should I save as PDF to make a Word file smaller for the print shop?
Often yes—after compressing images in Word. Prefer a print-oriented PDF export over “minimum size / online” when the PDF will be printed.
Is Shrink One Page the same as reducing file size?
No. Shrink One Page squeezes text to remove a short last page. File size reduction is about megabytes (mostly pictures and embedded objects).
Summary
Authentic intent for this keyword is cut the .docx megabytes for a file you still need to print: Compress Pictures at Print 220 ppi, delete cropped areas, discard editing data, and skip Email-quality compression. Confirm size under File → Info and test-print one photo page. Use Shrink One Page or Pages per sheet only if your real goal was fewer sheets—not a smaller file. Open the same document in WPS Writer only if you already work in WPS.

'%3e%3cpath%20d='M19.9911%204.11386V6.471H18.5894C18.0775%206.471%2017.7322%206.57814%2017.5536%206.79243C17.3751%207.00671%2017.2858%207.32814%2017.2858%207.75671V9.44421H19.9019L19.5536%2012.0871H17.2858V18.8639H14.5536V12.0871H12.2769V9.44421H14.5536V7.49779C14.5536%206.39064%2014.8632%205.53201%2015.4822%204.92189C16.1013%204.31177%2016.9257%204.00671%2017.9554%204.00671C18.8304%204.00671%2019.509%204.04243%2019.9911%204.11386Z'%20fill='%23333333'/%3e%3c/g%3e%3cdefs%3e%3cclipPath%20id='clip0_2938_8199'%3e%3crect%20width='16'%20height='16'%20fill='white'%20transform='translate(8%204.00671)'/%3e%3c/clipPath%3e%3c/defs%3e%3c/svg%3e)
'%3e%3cpath%20d='M17.5237%2010.7813L23.4811%204H22.0699L16.8949%209.88693L12.7648%204H8L14.2469%2012.9029L8%2020.0133H9.4112L14.8725%2013.7952L19.2352%2020.0133H24M9.92053%205.04213H12.0885L22.0688%2019.0224H19.9003'%20fill='%23333333'/%3e%3c/g%3e%3cdefs%3e%3cclipPath%20id='clip0_2938_8200'%3e%3crect%20width='16'%20height='16.0134'%20fill='white'%20transform='translate(8%204)'/%3e%3c/clipPath%3e%3c/defs%3e%3c/svg%3e)


